background image

Ä

40

USING SETUP MENU

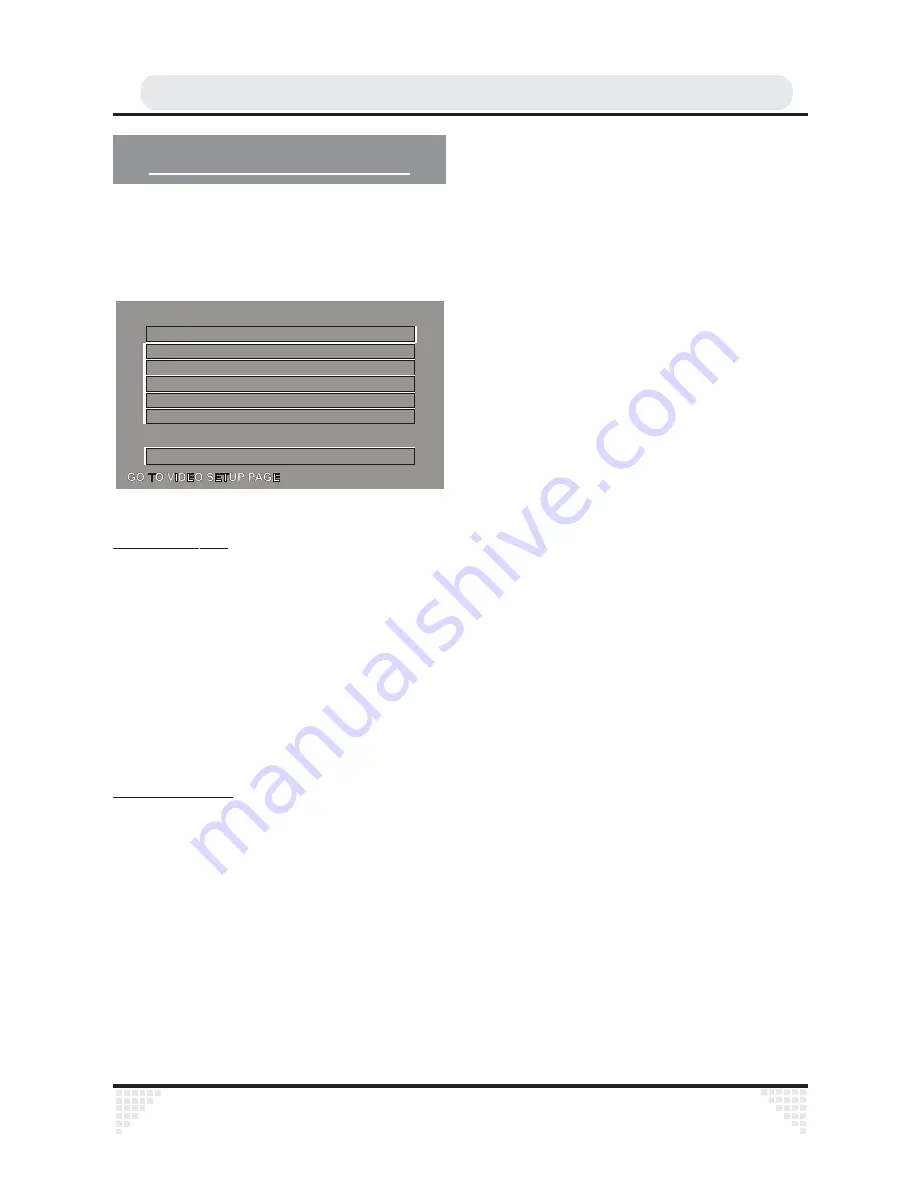
Press SETUP button on the remote control.

The setup menu-main page appears. This is the menu,

where you can change the device’s settings.

6(7830(180$,13$*(

(;,76(783

9,'(26(783

$8',26(783
63($.(56(783
/$1*8$*(6(783
3$5(17$/6(783
35()(5(1&(6(783

USING MAIN PAGE

Select items using 

6 5

v up/down arrow

buttons.

When selected, the item will be highlighted.

P r e s s   S E L E C T   t o   e n t e r   t h e   s u b m e n u   f o r

highlighted item.

The submenu for the selected item appears on the

screen.
Note: To close the setup menu, select EXIT SETUP and

press SELECT, or press SETUP.

USING SUB MENUS
Once you enter any submenu,

Use 

65

 up/down arrow buttons to move the

highlighted position up and down.

Use 

3 4

 left/right arrow buttons to switch

between left and right menus.
Press SELECT to choose the highlighted option

on the right menu.
• Some items on Setup Menu will only be

available when the player is not playing a disc.

In Play or (Pre-Stop) mode, some pages and some items

can not be accessed. On the MAIN page, you can not

access VIDEO SETUP and PARENTAL SETUP pages in

RESUME mode.

Note:
• 

In any submenu, to return to main page, select MAIN

PAGE and press 

SELECT

 button.

• 

To close the setup menu, press 

SETUP.

Содержание HTD-K180UK

Страница 1: ... Inc All rights reserved This product incorporates copyright protection technology that is protected by method claims of certain U S patents and other intelectual property rights owned by Macrovision Corporation and other rights owners Use of this copyright protection technology must be authorised by Macrovision Corporation and is intended for home and other limited viewing uses only unless otherw...

Страница 2: ...TA SYSTEM RDS 24 AUDIO FUNCTIONS 25 DVD PLAYBACK 25 RAPID ADVANCE RAPID REVERSE 26 SKIPPING AHEAD OR BACK TO CHAPTERS 26 STILL PICTURE PAUSE 26 FRAMEADVANCE STEP FORWARD 26 FRAME BACK STEP BACKWARD 27 SLOW MOTION PLAYFORWARD 27 SLOW MOTION PLAY BACKWARD 27 DIRECT SELECTION OF SCENES 27 REPEATPLAY 28 CONVENIENT FUNCTIONS 28 USING A DVD MENU 30 VIDEO CD PLAYBACK 31 MENU PLAY 31 RAPID ADVANCE RAPID R...

Страница 3: ...NTEE 53 0DQXIDFWXUHG XQGHU OLFHQVH IURP ROE DERUDWRULHV ROE DQG WKH GRXEOH V PERO DUH WUDGHPDUNV RI ROE DERUDWRULHV RQILGHQWLDO 8QSXEOLVKHG RUNV ROE DERUDWRULHV QF OO ULJKWV UHVHUYHG 7KLV SURGXFW LQFRUSRUDWHV FRS ULJKW SURWHFWLRQ WHFKQRORJ WKDW LV SURWHFWHG E PHWKRG FODLPV RI FHUWDLQ 8 6 SDWHQWV DQG RWKHU LQWHOOHFWXDO SURSHUW ULJKWV RZQHG E 0DFURYLVLRQ RUSRUDWLRQ DQG RWKHU ULJKWV RZQHUV 8VH RI WKL...

Страница 4: ... to look into the inside of this product for your own safety Use of controls or adjustments or performance of procedures other than those specified may result in hazardous radiation exposure Do not open covers and do not attempt to repair any damaged parts Refer product to a service technician or qualified professional for any necessary repair Apparatus shall not be exposed to dripping or splashin...

Страница 5: ...Ä5 ...

Страница 6: ...led with liquids such as vases to be placed on the equipment DON T place hot objects or naked flame sources such as lighted candles or nightlights on or close to equipment High temperatures can melt plastic and lead to fires DON T use makeshift stands and NEVER fix legs with wood screws to ensure complete safety always fit the manufacturer s approved stand or legs with the fixings provided accordi...

Страница 7: ...ce the player on a soft surface such as a rug that might block the ventilation holes on the bottom A location should not be selected such as a room with high humidity as the condensation arising in the kitchen for example may cause malfunction or damage the set Heating or other thermal radiation under the set also may cause malfunction or damage the set The hot air which arises during the operatio...

Страница 8: ...ur receiver is qualified to do so Do not remove the cover yourself you could get an electric shock We are proud to offer a high quality product To keep this level of quality your receiver should be serviced at a authorised service centre ...

Страница 9: ...support 16 9 Widescreen 4 3 Letterbox 4 3 PAN SCAN 12 Multi Audio up to 8 support According to disc content 13 Multi Subtitle up to 32 support According to disc content 14 Multi Angle up to 9 support According to disc content 15 8 level parental control 16 Fast forward and rewind in 5 different speeds 2x 4x 8x 16x 32x 17 Smooth and seamless playback in 2x speed 18 Slow motion playback in 4 differe...

Страница 10: ...HU SLFWXUH TXDOLW RYHU WLPH 5 LVF 7 SHV RJRV 5HFRUGLQJ 7 SHV LVF 6L H 0D 3OD LQJ 7LPH PLQ PLQ PLQ PLQ 6LQJOH VLGHG PLQ RXEOH VLGHG PLQ 6LQJOH VLGHG PLQ RXEOH VLGHG PLQ KDUDFWHULVWLFV 9 FRQWDLQV H FHOOHQWVRXQG DQG YLGHR GXH WR ROE LJLWDO DQG 03 6 VWHP 9DULRXV VFUHHQ DQG DXGLR IXQFWLRQV FDQ EH HDVLO VHOHFWHG WURXJK WKH RQ VFUHHQ PHQX 9LGHR ZLWK VRXQG 9 6 TXDOLW 03 FRPSUHVVLRQ WHFKQRORJ Q 3 LV UHFRUG...

Страница 11: ...r After playing store the disc in its case On cleaning Before playing clean the disc with a cleaning cloth Wipe the disc from the center out Do not use solvents such as benzine thinner commercially available cleaners or anti static spray intended for vinyl LPs Discs that should not be used Only the discs including the marks shown on page 7 can be played Note however that discs with special shapes ...

Страница 12: ...s the front of the AV receiver If the remote control does not work or the chosen function could not be made the batteries are most probably exhausted and they should be replaced as soon as possible Please use only the leak proof batteries If you will not be using your remote control for a long time it is recommended to take out the batteries from your remote control to avoid possible damage from b...

Страница 13: ...1 087 6281 76 68 7 7 02 8 2 1 6 5 02 5 67 1 23 1 26 352 6 8 5 3 7 7 7 63 220 0 18 67 1 23 1 26 352 6 8 5 3 7 7 7 63 220 0 18 67 1 352 5 0 7 7 6 783 63 5 3 7 23 1 26 0 18 5 7851 220 552 877216 6 7 3 3 86 6 3 92 80 68 7 7 8 2 1 180 5 877216 6723 6 5 7 67 721 63 5 92 6281 76 02 6 5 02 087 0 ...

Страница 14: ...used to adjust radio frequency manually 14 SUBTITLE button Changes the language of the subtitle while playing a DVD 15 AUDIO button ChangesthelanguageofthesoundwhileplayingaDVD Inradiomodeitisused to enable or disable stereo property 16 ANGLE button Changes the angles when playing a DVD 17 SEARCH MODE button Press to select the unit for search title chapter track time etc 18 PROGRAM button Press t...

Страница 15: ...ear on screen 4 Front Panel Display VFD Indicates the playing time title chapter track etc 5 Disc Tray Place a disc on the tray 6 OPEN CLOSE button Opens or closes the disc tray 7 SKIP buttons Press to go back to the preceding chapter track or to go to the next chapter track 8 SEARCH buttons Used to search fast forward or backward at speeds of 2 4 8 16 and 32 times normal playback speed 9 VOLUME b...

Страница 16: ...pter 5 Repeat 6 Repeat A B 7 Remain 8 Angle 9 DVD 10 VCD SVCD 11 Play Pause 12 Dolby Digital 13 DTS 14 Speaker Outputs 15 Night 16 Preset Radio Channel Info 17 Time or Radio Frequency Info 18 Track Chapter Number or Preset Radio Channel Info 19 Title Number ...

Страница 17: ...t and Audio Right 4 AUDIO OUT connectors Outputs Audio Left Right Audio signals 5 VIDEO IN OUT connector Connects video input via composite Page 23 and outputs a composite signal Page19 6 S VIDEO OUT connector Outputs an S video signal 7 SCART connector The standard 21 pin SCART connector outputs Audio and Video signals 8 SCART Input connector A standard 21 pin SCART connects Audio and Video signa...

Страница 18: ...o turn off the standby of each component before making the connections 0 17 11 9 9 5 9 3 5 79 6 9 2 RQQHFWLRQ WR WKH VSHDNHU WHUPLQDOV 5217 63 5 7 5217 63 5 5 7 5 5 63 5 7 5 5 63 5 5 7 68 22 5 17 5 63 5 0 17 11 79 9 9 5 9 3 5 20387 5 7 63 5 5 7 63 5 7 25 ...

Страница 19: ...h for both audio video connections 79 9 9 5 9 3 5 7 VIDEO AUDIO OUTPUT SOCKETS Video yellow audio Red right White left output sockets can be used to connect the DVD player to your TV set via cables To make this connection your TV set must have Video audio input connectors This type of connection is alternative to scart connection Picture quality is not as good as Scart connection but audio perform...

Страница 20: ...onnection This socket is used for only video connection For audio red white output sockets must be used S video picture quality is not as good as Scart connection 79 6 9 2 7 63 5 5 7 63 5 7 DIGITAL AUDIO OUTPUT SOCKET OPTICAL OPTIONAL The unit can be connected via optical digital audio output to recorder units or computer for recording 5 1 channel surround sound optional 20387 5 ...

Страница 21: ...Ä21 CONNECTION OF YOURAV RECEIVER S SPEAKERS You can connect 5 1 speaker set to the AV receiver as shown in the figure below 5217 63 5 7 5217 63 5 5 7 5 5 63 5 7 5 5 63 5 5 7 68 22 5 175 63 5 ...

Страница 22: ...e figures below HQWHU VSHDNHU 5HDU VSHDNHU ULJKW 5HDU VSHDNHU OHIW 6XEZRRIHU URQW VSHDNHU OHIW URQW VSHDNHU ULJKW After finishing the speaker connection use Test Tone button to test if the speaker connection is right or not A test tone will be applied to each speaker Left Right Surround Left Surround Right Center and Subwoofer You can press test tone again to stop this function ...

Страница 23: ...equency Press on the left arrow for AM and Right Arrow for FM Band name text and MHz kHz grids will be displayed on the VFD Press Search Forward or Search Backward to increase or decrease the frequency till you reach the desired channel VFD will display the frequency Storing the channel in the Memory After adjusting the desired channel you can store it in the memory In order to do that Press on th...

Страница 24: ... signals from output scart are amplified and sent to 5 1 speaker outputs RADIODATASYSTEM RDS In TUNER mode use DISPLAY key to change following RDS modes RDS OFF Frequency information is displayed PROGRAMME SERVICE NAME PS This field is 8 characters long Generally it is used for static station name But some stations broadcast longer messages dynamically using this field RADIO TEXT RT This message i...

Страница 25: ...ons Press on the standby button of your audio system if the player has been connected to an audio system Basic Play 1 Press on the standby button 2 Press OPEN CLOSE to open the disc tray 3 Place a disc onto the tray Hold the disc without touching either of its surfaces position it with the printed title side facing up align it with the guides and place it in its proper position 4 Press OPEN CLOSE ...

Страница 26: ...reen to remind you if you want to continue the play To stop the play press the STOP button again or you can press SELECT to continue RAPID ADVANCE RAPID REVERSE Press SEARCH SLOW Fast reverse or Fast forward on the remote control or Search or on the main unit during play Normal play is resumed when the SELECT button is pressed or PLAY PAUSE button is pressed twice The speed of advance 2x 4x 8x 16x...

Страница 27: ...ter Number Press SEARCH MODE on the remote control once during playback The chapter title search box is displayed on the screen You can see the currently playing and total number of chapters on right hand side of the display bar as xx Enter the number of the chapter using number buttons The selected chapter is played just after you enter the chapter number For your convenience If the chapter numbe...

Страница 28: ...our convenience You can clear the fields by pressing the C button if you enter wrong numbers If you attempt to enter a number greater than the total time of the current title the time search box disappears message is displayed on screen If you wait five seconds without pressing any key to enter time selecting scenes by time option is cancelled You can press RETURN key to cancel time search REPEAT ...

Страница 29: ... discs on which multiple subtitle languages are recorded Press SUBTITLE during play When no subtitles are recorded will be displayed instead of the selected language Press SUBTITLE a number of times until the preferred language is selected When this button is pressed once the first subtitle recorded on the disc will display The rest of the subtitles recorded will display in sequence for every pres...

Страница 30: ...only work on discs where different angles have been recorded The viewing angles are shown on the screen You can select one from them for viewing If you press ANGLE outside of a multi angle scene on a multi angle title you will see that is displayed means that there is only one angle currently available USINGA DVD MENU Some DVD discs have unique menu structures called DVD menus For example DVDs pro...

Страница 31: ...ack control If a video CD has playback control written on the jacket of disc it means that particular scenes or information can be selected for viewing interactive with TV screen using the menu screen NOTE TITLE button is dedicated to PBC playback control during VCD playback You can change PBC mode with TITLE button For using Repeat Modes you need to switch off PBC manually If you use Search mode ...

Страница 32: ...umed when the PLAY PAUSE button is pressed The speed of advance 2x 4x 8x 16x 32x or reverse 2x 4x 8x 16x 32x changes for every press of the or button Note No sound will be heard during Rapid advance or Rapid reverse SKIPPING AHEAD OR BACK TO CHAPTERS Skipping ahead Press SKIP FRAME Next on the remote control or SKIP on the main unit during play A track is skipped each time the button is pressed Sk...

Страница 33: ...buttons The title is played beginning from the desired time just after you enter the time For your convenience If you attempt to enter a number greater than the total time of the current title the time search box disappears and message appears on up left corner of screen If you give up entering the time simply press RETURN button and the operation is cancelled Accessing tracks using number buttons...

Страница 34: ...using the 3465 arrow keys This is valid for zoom in only To return to normal play After zoom ratio is 1 4x press ZOOM again The picture is now in its normal size AUDIO CD PLAYBACK Preparations Press on the power button of your audio system if the player has been connected to an audio system Basic Play 1 Press on the standby button 2 Press OPEN CLOSE to open the disc tray 3 Place a disc onto the tr...

Страница 35: ...again DIRECT SELECTION OF TRACKS Selecting by Time You can play the audio CD starting from any time point you want Press SEARCH MODE on the remote control once time during playback The time search box is displayed on the screen as DISC GOTO _ _ _ _ _ Player goes to entered time of the disc Press SEARCH MODE on the remote control two times during playback The time search box is displayed on the scr...

Страница 36: ...ay If Time Display Single elapsed is displayed the VFD display on the unit shows the elapsed time for the track which is being played If Time Display Single remain is displayed the VFD display on the unit shows the remaining time for the track which is being played If Time Display Total elapsed is displayed the VFD display on the unit shows the elapsed time for the disc which is being played If Ti...

Страница 37: ...ate in the current directory 6 Press SELECT LEFT RIGHT to switch between directories files On the right part Press LEFT to switch to directories On the left part Press RIGHT to switch to files Selected directory content is displayed on the left after reading directory NOTE you can use and buttons for page up down in file list 7 Press SELECT on a file to play MP3 File Selected MP3 starts to play El...

Страница 38: ...n are disabled DIGEST MODE Only for JPEG Press PLAY to start slide show press STOP button during JPEG slide show Unit goes into digest mode 12 pictures are displayed on screen Using the arrow keys select menu icon on the screen Press select button Remote key Function screen appears You can see help information for digest mode Program key Each time the Program key is pressed the transistion effect ...

Страница 39: ...d FOLDER When this Play mode is selected the current folder will be played once PROGRAM FUNCTION Press PROGRAM to select program mode in stop mode PROGRAM LIST Message appears Press UP DOWN keys to select files in the disc Press LEFT RIGHT to change column Press SELECT to add selected file into the program list Choose any file from the program list and use PLAY or SELECT keys to start the program ...

Страница 40: ...the setup menu select EXIT SETUP and press SELECT or press SETUP USINGSUBMENUS Once you enter any submenu Use 65 up down arrow buttons to move the highlighted position up and down Use 34 left right arrow buttons to switch between left and right menus Press SELECT to choose the highlighted option on the right menu Some items on Setup Menu will only be available when the player is not playing a disc...

Страница 41: ...le are Normal PS Pan Scan 4x3 Allows the movie to fill the entire screen of your TV but not the right and left edges Normal LB Letterbox 4x3 Allows you to see movies in their original aspect ratio You will see the entire frame of the movie but it will occupy a smaller portion of the screen Wide Widescreen 16x9 Choose this setting if your DVD player is connected to a widescreen TV Please Note Depen...

Страница 42: ...9 63 79 7 3 5 6 9 2 0 1 3 The video output of the DVD player can be selected as S VIDEO or RGB If S VIDEO is selected RGB output via scart will be disabled only CVBS will be active via Scart S Video output will be active via MiniDIN connector After switching to S Video TV should be switched to S Video input with TV remote control If S Video is selected in order to disable RGB via Scart and user pr...

Страница 43: ...t present Otherwise serious sound quality problems may occur NOTE If downmix mode is enabled that is one of SURROUND STEREO or V SURR options are selected SPEAKER page in setup menu will be disabled since this page contains speaker settings related with multi channel audio out If you disable DOWNMIX mode speaker page will be activated again DYNAMIC DYNAMIC RANGE COMPRESSION Boosts frequency respon...

Страница 44: ...NTER This item allows you to enable disable the CENTER speaker 63 5 6 783 3 5 5 63 5 68 22 5 21 7 67 721 17 5 5 5 0 1 3 2 REAR This item allows you to enable disable the REAR Left surround right surround speakers 63 5 6 783 3 175 63 5 68 22 5 21 7 67 721 17 5 5 5 0 1 3 2 SUBWOOFER You can enable disable the subwoofer by changing the option to ON OFF 63 5 6 783 3 175 63 5 5 5 63 5 21 7 67 721 17 5 ...

Страница 45: ... delay for rear speakers 63 5 6 783 3 5 5 63 5 68 22 5 0 1 3 175 63 5 7 67 721 0 6 0 6 0 6 2 17 5 TEST TONE You can test all your speakers using test tone function A noise signal will be sent to all speakers one by one 63 5 6 783 3 175 63 5 5 5 63 5 2 21 5 5 17 5 68 22 5 0 1 3 ...

Страница 46: ... can select the default audio language if supported by the DVD disc DISC MENU You can select the DVD s disc menu language among these languages Disc menu appears in the selected language if supported by the DVD disc SUBTITLE You can select the default subtitle language if supported by the DVD disc ...

Страница 47: ...rental level can be set by using this option Factory preset of the password is 0000 You have to enter XXXX digital password every time you want to change the parental level If you forget your password please contact technical service 3 5 17 6 783 3 3 5 17 1 0 1 3 CHANGE PASSWORD Using this item you can change the current password To change the password you will be prompted to enter your old passwo...

Страница 48: ...ivated whenever no key is pressed for the selected time duration in stop mode 35 5 1 3 1 0 5 2 0 18 0 1 8 7 75 163 5 1 0 1 3 0 1 0 1 CD MENU This option allows you to enable or disable the CD MENU which is used for playing MP3 or JPEG CDs 35 5 1 3 1 0 5 7 0 18 67 1 7 0 12 0 18 8 7 75 163 5 1 0 1 3 DEFAULT If you choose RESET and press SELECT the factory presets are loaded Parental level and parent...

Страница 49: ...J V WLWOH PHQX 6RPH V GR QRW DOORZ WKH XVHU WR FKDQJH WKHVH VHWWLQJV ZLWKRXW XVLQJ WKH GLVFV PHQX 7KHVH IXQFWLRQV DUH QRW DYDLODEOH RQ WKH QJOH FDQ RQO EH FKDQJHG ZKHQ WKH DQJOH V PERO LV GLVSOD HG KHFN WKDW WKH SOD HU LV FRQQHFWHG WR 79 SURSHUO DQG WKDW DOO FRQQHFWLRQV EHWZHHQ WKH 9 SOD HU DQG RWKHU DWWDFKHG HTXLSPHQW DUH VHFXUH DYH RX SUHVVHG WKH FRUUHFW EXWWRQV RQ WKH UHPRWH FRQWURO 7U RQFH PRU...

Страница 50: ... VIDEO CD CD player Radio Amplifier 3RZHU 5HTXLUHPHQWV 7 SHV RI LVFV 6XSSRUWHG 9LGHR 7 SH 9LGHR QSXW 2SWLRQDO 9LGHR 2XWSXW XGLR 7 SH XGLR 2XWSXW XGLR QSXWV 3RZHU DPSOLILHU 7XQHU VHFWLRQ LPHQVLRQV LJLWDO XGLR 2XWSXW 2SWLRQDO ...

Страница 51: ...he TV monitor Subtitles These are printed lines appearing at the bottom of the screen which translate or transcribe the dialogue They are recorded on the DVD s Time Number This indicates the playtime which has elapsed from the start of a disc or a title It can be used to find a specific scene quickly Not all discs permit the time search feature to be used Availability is determined by the disc s m...

Страница 52: ...ghted candles or nightlights on or close to equipment High temperatures can melt plastic and lead to fires DON T use makeshift stands and NEVER fix legs with wood screws to ensure complete safety always fit the manufacturer s approved stand or legs with the fixings provided according to the instructions DON T use equipment such as personal stereos or radios so that you are distracted from the requ...

Страница 53: ...product serial number has not been removed or altered This guarantee does not apply to product acquired second hand or for commercial or communal use This guarantee does not cover the replacement of exhausted batteries the adjustment of user controls or head cleaning and general consumer maintenance tasks Any parts replaced under this guarantee shall become the property of Hitachi Europe Ltd Any c...

Страница 54: ...47 Milano Italia ITALY Tel 39 02 487861 Tel 39 02 38073415 Servizio Clienti Fax 39 02 48786381 2 Email customerservice italy hitachi eu com HITACHI Europe AB Box 77 S 164 94 Kista SWEDEN Tel 46 0 8 562 711 00 Fax 46 0 8 562 711 13 Email csgswe hitachi eu com HITACHI EUROPE S A S Lyon Office B P 45 69671 BRON CEDEX FRANCE Tel 33 04 72 14 29 70 Fax 33 04 72 14 29 99 Email france consommateur hitachi...

Отзывы: