--- 9 ---
8-2. Reassembly
Push the parts together in the reverse order of disassembly, with the precautions given below.
(1) Ensure that the terminals of the stator are not bent or otherwise damaged.
(2) Generously lubricate the teeth of Gear [17] and Pinion [5] with grease. Rub grease onto the teeth with your
fingers so that the grease reaches each tooth bottom. Note that the Gear [17] and the Pinion [5] may wear
faster than normal if under-lubricated.
(3) Be sure to soak the inner diameter of the Felt Packing [21] with machine oil. Otherwise, its dust-sealing
function will fail to work properly, resulting in earlier damage of the Ball Bearing 6001VVCMPS2L [20].
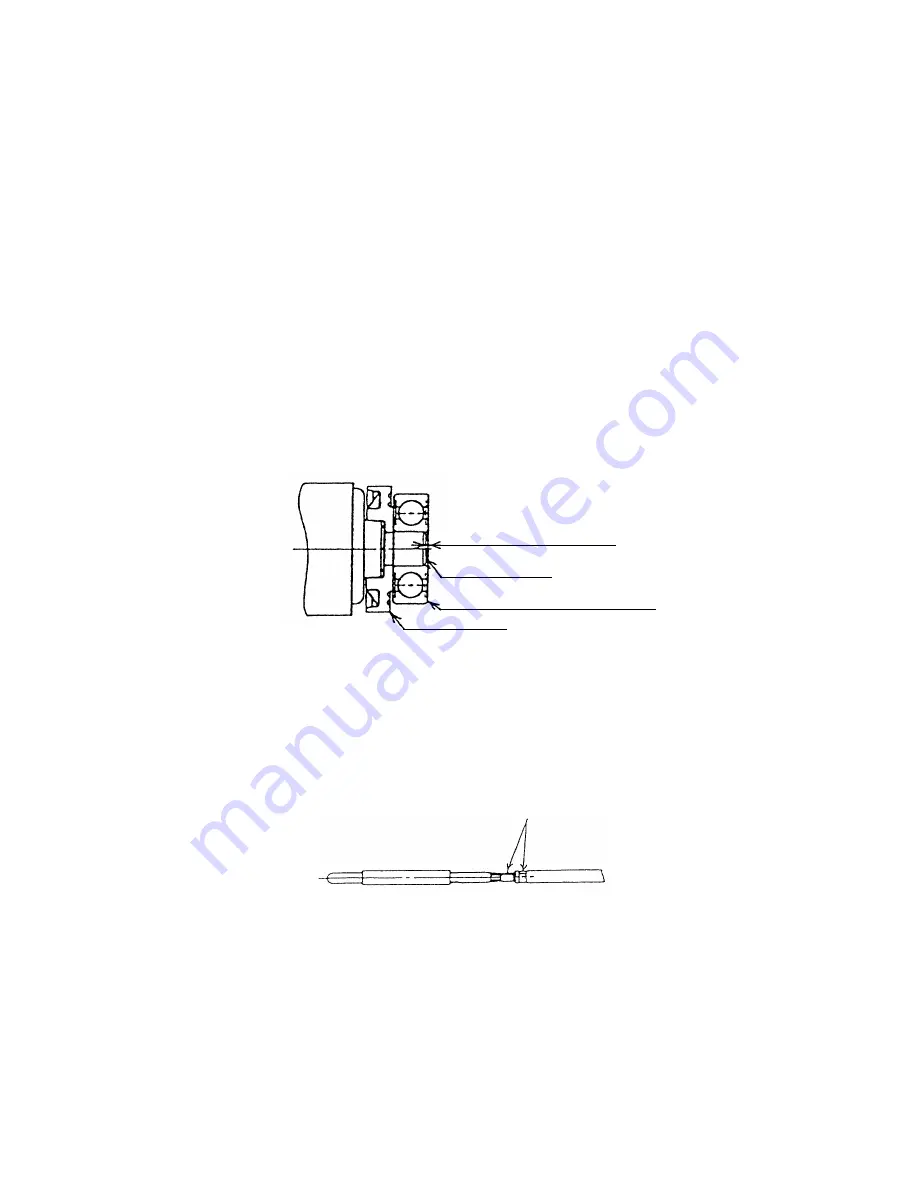
(4) When replacing the Armature 220 V [9] and the Ball Bearing 608VVC2PS2L [7] on the commutator side, press
inward on the Dust Seal [15] while taking care of its direction until the end face of the Dust Seal [15] contacts
against the end surface of the Armature 220 V [9] and make sure that Dust Seal [15] cannot be turned freely
by hand. Keep the end face of the armature shaft approximately 0.2 mm (reference) distance inward of the
end face of the Ball Bearing 608VVC2PS2L [7]. (See Fig. 5.)
The Dust Seal [15] is an important element for improved dust protection of the Ball Bearing 608VVC2PS2L
[7]. Be sure to replace with a new one each time.
Fig. 5
Armature shaft
About 0.2 mm (reference)
Ball Bearing 608VVC2PS2L [7]
Dust Seal [15]
(5) When connecting the Earth Terminal [44] to the internal wire (the middle wire among three) of the Noise
Suppressor [46], strip the insulation sheath on the internal wire by about 6 mm and press connect it together
with the Earth Terminal [44] with a clamping tool available on the market.
Fig. 6
Solderless connection
(6) Connect the Internal Wires [12], [13] and [14] to the Stator [11] correctly as shown in Fig. 7.
(7) Connect each internal wire correctly as shown in Fig. 8 being careful not to put them between the parts.


