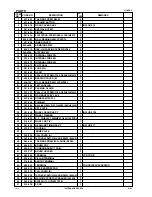
--- 7 ---
8. PRECAUTIONS IN DISASSEMBLY AND REASSEMBLY
Procedures and precautions for disassembly and reassembly are described below. The [Bold] numbers in the
descriptions below correspond to the item numbers in the Parts List and the exploded assembly diagram.
8-1. Disassembly
(1) Disassembly of the armature
Remove the Brush Caps [39], and take out the Carbon Brushes [40].
Loosen the four Tapping Screws D5 x 25 [1] which fix the Gear Cover Ass'y [3], and remove the Inner
Cover [8] together with the Armature 220 V [9] from the Housing [34].
(2) Disassembly of the pinion
Loosen the Special Nut M7 [4] on the Armature 220 V [9], and remove the Pinion [5].
(3) Disassembly of the stator
Remove the Armature 220 V [9] and loosen the Tapping Screw (W/Flange) D4 x 25 (Black) [48] to remove
Tail Cover (B) [47].
Loosen the Machine Screw (W/Washer) M3.5 x 6 [49] that secures the internal wire of the Cord [51] to the
Switch [50] and also the screw on the cord side of the Pillar Terminal [43]. Remove the two internal wires
from the Cord [51].
Remove the Tapping Screw (W/Flange) D4 x 40 [38] and the Tapping Screw (W/Flange) D4 x 20 (Black)
[37]. Remove Tail Cover (A) [36] then remove the Earth Terminal [44] from the Housing [34].
Disconnect the two Internal Wires [13] coming from the Brush Holder [41] from the Stator [11].
Remove the Internal Wires [12] and [14] from the Stator [11] with the Pillar Terminal [43], Noise Suppressor
[46] and Switch [50] connected.
Loosen the Hex. Hd. Tapping Screw D4 x 65 [10] securing the Stator [11]. Remove the Stator [11] from the
Housing [34].


