21
s
Do not attempt to use the rotary hammer in the rotation and striking function
with the drill chuck and chuck adaptor attached. This would seriously shorten
the service life of every component of the machine.
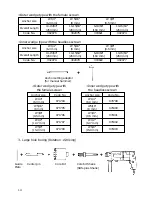
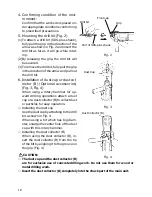
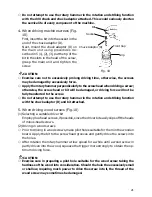
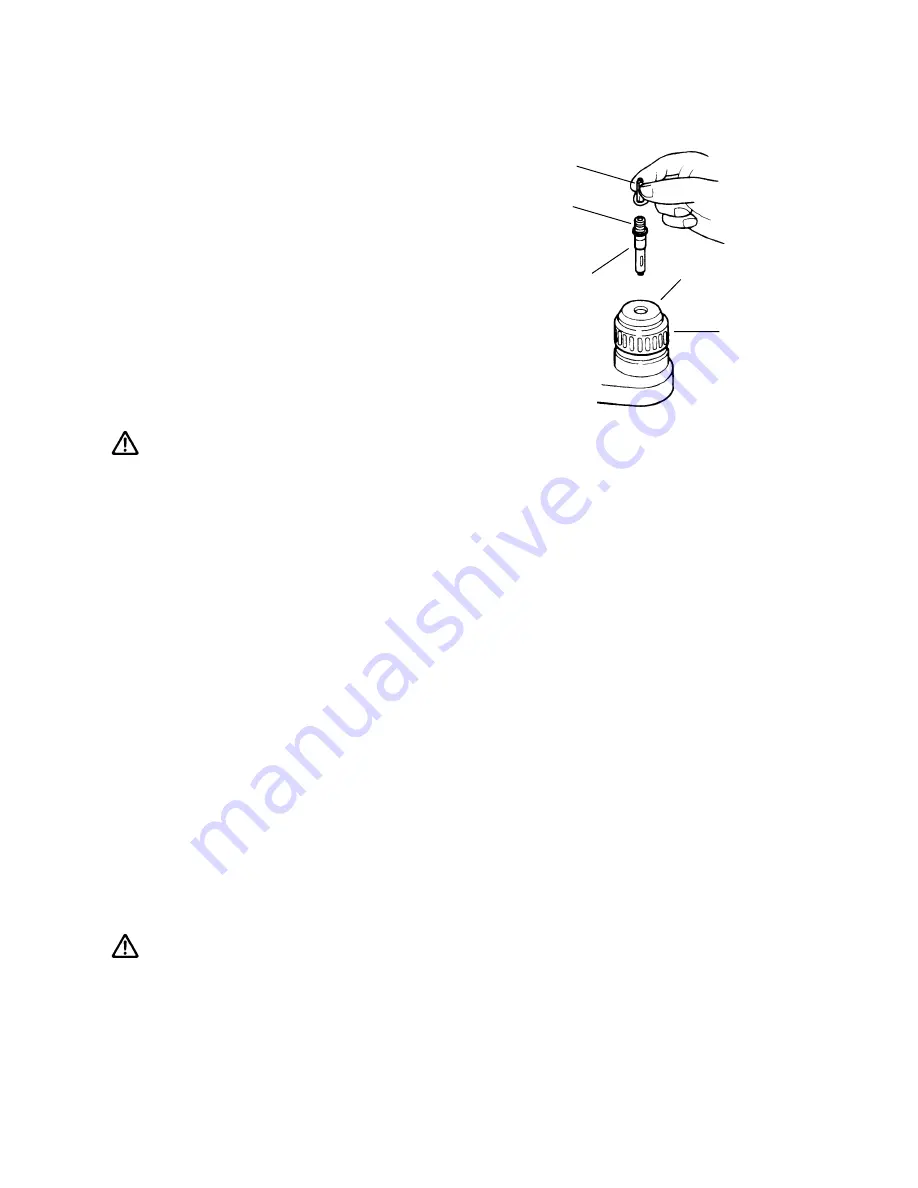
4. When driving machine screws (Fig.
10)
First, insert the bit into the socket in the
end of the chuck adaptor (D).
Next, mount the chuck adaptor (D) on
the main unit using procedures de-
scribed in 5 (1), (2), (3), put the tip of the
bit in the slots in the head of the screw,
grasp the main unit and tighten the
screw.
CAUTION:
s
Exercise care not to excessively prolong driving time, other wise, the screws
may be damaged by excessively force.
s
Apply the rotary hammer perpendicularly to the screw head when driving a screw;
otherwise, the screw head or bit will be damaged, or driving force will not be
fully transferred to the screw.
s
Do not attempt to use the rotary hammer in the rotation and striking function
with the chuck adaptor (D) and bit attached.
5. When driving wood screws (Fig. 10)
(1)Selecting a suitable driver bit
Employ plus-head screws, if possible, since the driver bit easily slips off the heads
of minus-head screws.
(2)Driving in wood screws
s
Prior to driving in wood screws, make pilot holes suitable for them in the wooden
board. Apply the bit to the screw head grooves and gently drive the screws into
the holes.
s
After rotation the rotary hammer at low speed for a while until a wood screw in
partly driven into the wood, squeeze the trigger more strongly to obtain the op-
timum driving force.
CAUTION:
s
Exercise care in preparing a pilot hole suitable for the wood screw taking the
hardness of the wood into consideration. Should the hole the excessively small
or shallow, requiring much power to drive the screw into it, the thread of the
wood screw may sometimes be damaged.
Fig. 10
1
Bit
1
Socket
1
Chuck Adaptor (D)
1
Front Cap
1
Grip

