– 4 –
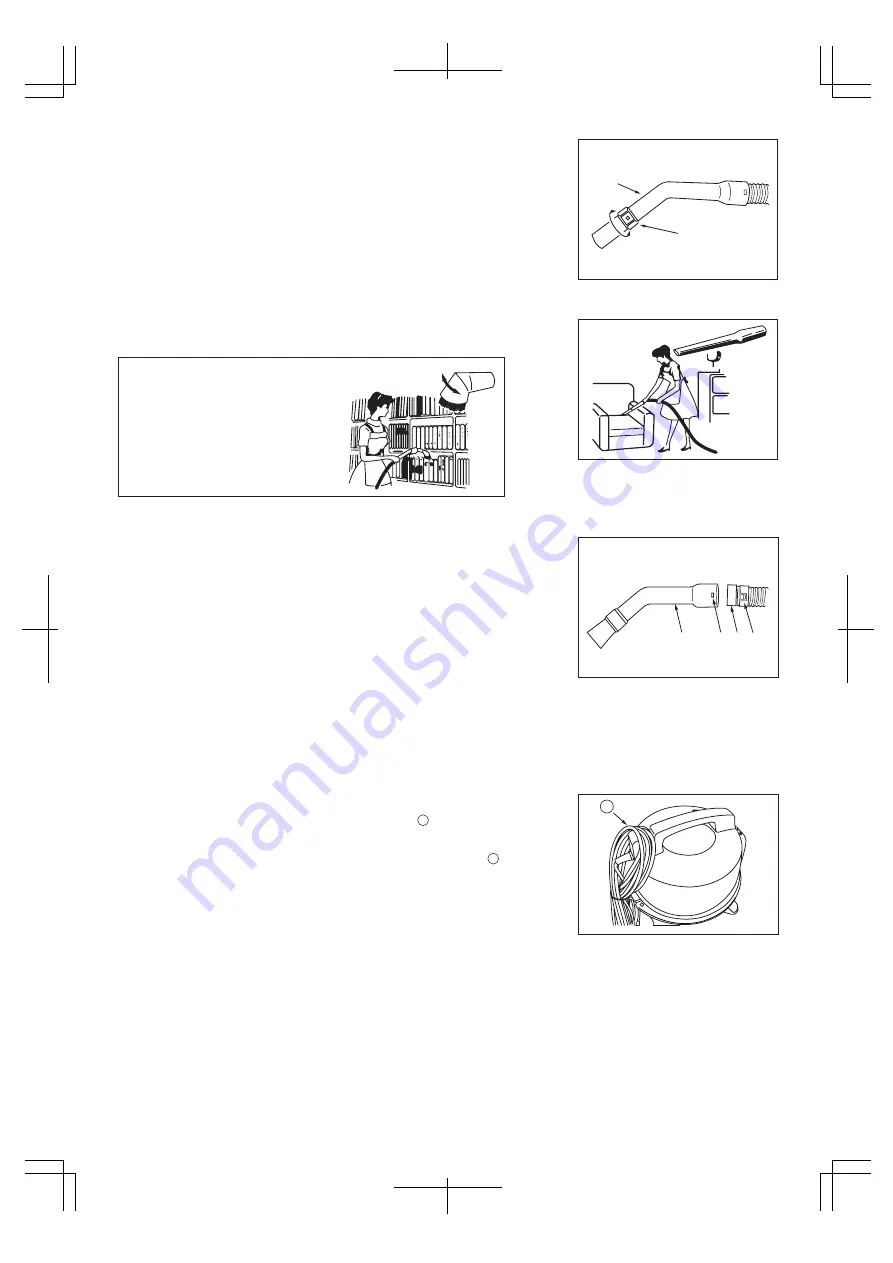
SUCTION CONTROL (FIG. 8)
Suction pressure can be reduced by moving the adjustment ring
D
on the curved
joint pipe
1
to expose a hole.
The more hole area exposed, the lower the suction. Low suction pressure is
recommended for cleaning curtains, blinds, delicate fabrics, etc.
SAUGKRAFTREGULIERUNG (ABB. 8)
Die Saugkraft kann durch Drehen des Einstellrings
D
an dem gekrümmten
Verbindungsrohr
1
verändert werden.
Je größer die dabei erscheinende Öffnung ist, desto geringer wird die Saugkraft.
Für das Reinigen von Vorhängen, Rollos, empfindlichen Stoffen u.ä. empfiehlt sich eine
niedrige Einstellung der Saugkraft.
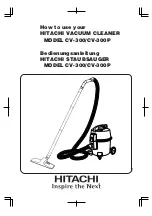
TO USE ATTACHMENTS (FIG. 9, 10)
SAUGZUBEHÖR BENUTZEN (ABB. 9, 10)
Brush head can be turned to adjust
the angle.
Der Büstenkopf kann zur Einstellung
des Winkels gedreht werden.
Fig. 9
To use attachments
Abb. 9
Saugzubehör benutzen
TO DISCONNECT JOINT PIPE (FIG. 11)
Blockages may be cleared by separating the curved joint pipe
1
from the hose.
To separate the joint pipe, pull the hose while pressing the two claws
4
that are
clicked into the holes
6
on both sides of the joint pipe.
If needed, the hose collar
E
can be removed from the hose end by turning it (left-
handed screw). To re-connect, push hose back into joint pipe and twist until the
two claws
4
are aligned with the holes
6
. Likewise, you can disconnect the joint
pipe on the other end of the hose.
ABTRENNEN DES VERBINDUNGSROHRES (ABB. 11)
Blockierungen können durch Abtrennen des gebogenen Verbindungsrohres
1
vom
Schlauch beseitigt werden. Um das Verbindungsrohr abzutrennen, den Schlauch
ziehen und dabei die beiden Klauen
4
, die in den Löchern
6
auf beiden Seiten des
Verbindungsrohres eingerastet sind, drücken.
Bei Bedarf kann die Schlauchmuffe
E
vom Schlauch durch Drehen (entgegen den Uhrzeigersinn) entfernt werden. Um das
Verbindungsrohr wieder anzuschließen, den Schlauch in das Verbindungsrohr schieben und drehen, bis die beiden Klauen
4
auf die
Löcher
6
ausgerichtet sind. Auf die gleiche Weise lässt sich auch das Verbindungsrohr am anderen Ende des Schlauches abtrennen.
Roll the power cord and hang on the back of the Handle
.
HOW TO KEEP POWER CORD (FIG. 11A)
Rollen Sie das Netzkabel und die Blockierung auf der Rückseite des Handgriffs .
WIE KANN MAN NETZKABEL BEHALTEN (ABB. 11A)
1
D
Fig. 8
Suction control
Abb. 8
Saugkraftregulierung
Fig. 10 To use attachments
Abb. 10
Saugzubehör benutzen
6
1
E 4
Fig. 11 To disconnect joint pipe
Abb. 11
Abtrennen des
Verbindungsrohres
Fig. 11A To keep power cord
Abb. 11A Das Netzkabel behalten
HOW TO CHANGE PAPER BAG
TO DETACH PAPER BAG FOR CV-300P (FIG. 12)
1. Switch off the power supply and disconnect the power cord.
2. Remove the upper case
F
by pressing the clamp
G
.
3. Remove the filter cloth
H
and lift up the clip of the adapter
I
slightly to detach the paper bag
J
from the adapter.
4. Dispose the paper bag in the proper manner.
SO WECHSELT MAN DEN PAPIERBEUTEL
HERAUSNEHMEN DES PAPIERBEUTELS FÜR CV-300P (ABB. 12)
1. Den Netzschalter ausschalten und das Stromkabel abziehen.
2. Das obere Gehäuse
F
durch Drücken der Klemme
G
entfernen.
3. Das Filtertuch
H
entfernen und die Klemme des
Passstückes
I
leicht hochziehen, um den Papierbeutel
J
aus dem Passstück herauszunehmen.
4. Den Papierbeutel auf die übliche Weise entsorgen.
15A
15A
15A


