background image

ENGLISH

Liquid Crystal Projector

USER'S MANUAL

ENGLISH-1

Thank you for purchasing this liquid crystal projector.

Please read the accompanying manual “SAFETY INSTRUCTIONS” and this “USER'S
MANUAL” thoroughly to ensure correct usage through understanding. After reading,
store this instruction manual in a safe place for future reference.

CONTENTS

FEATURES ....................................P.2

BEFORE USE ................................P.2

Contents of Package...........................P.2
Part Names .........................................P.3
Loading the Battery .............................P.5
Fixing the Handle ................................P.5

INSTALLATION .............................P.6

Installation of the projector and Screen.....P.6
Angle Adjustment ................................P.6
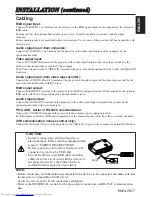
Cabling ................................................P.7
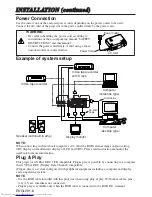
Power Connection...............................P.8
Example of System Setup...................P.8
Plug & Play..........................................P.8

OPERATIONS................................P.9

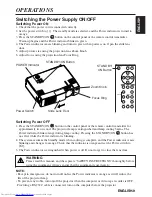
Switching the Power Supply ON/OFF ....P.9
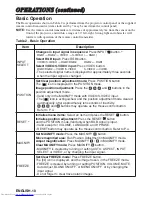
Basic Operation.................................P.10
Setup Menu.......................................P.12
Input Menu ........................................P.13
Image Menu ......................................P.14
Options Menu....................................P.15
No Signal Menu.................................P.16

MAINTENANCE...........................P.17

Lamp .................................................P.17
Air Filter Maintenance .......................P.19
Other Maintenance............................P.19

TROUBLESHOOTING.................P.20

OSD Message...................................P.20
Indicators Message ...........................P.21
Symptom ...........................................P.22

SPECIFICATIONS .......................P.23

WARRANTY AND AFTER-SERVICE...P.24

Tables:

Table 1. Installation Reference .............P.6
Table 2. Basic Operations...................P.10
Table 3. Setup Menu...........................P.12
Table 4. Input Menu ............................P.13
Table 5. Image Menu ..........................P.14
Table 6. Options Menu........................P.15
Table 7. No Signal Menu.....................P.16
Table 8. OSD Message.......................P.20
Table 9. Indicator Message.................P.21
Table 10. Symptom .............................P.22
Table 11. Specifications ......................P.23

For "TECHNICAL" and "REGULATORY
NOTICE", see the end of this manual.

NOTE: 

• The information in this manual is subject to change without notice.
• The manufacturer assumes no responsibility for any errors that may appear in this manual 
• The reproduction, transmission or use of this document or contents is not permitted without

express written authority.

TRADEMARK ACKNOWLEDGMENT:

• PS/2, VGA and XGA are registered trademarks of International Business Machines Corporation.
• Apple, Mac and ADB are registered trademarks of Apple Computer, Inc.
• VESA and SVGA are trademarks of the Video Electronics Standard Association.
• Windows is a registered trademark of Microsoft Corporation.
• Carefully observe the trademarks and registered trademarks of all companies, even when not

mentioned.

Содержание CP-S310

Страница 1: ...ONI Vi preghiamo voler leggere attentamente il manuale d sitruzioni in modo tale da poter comprendere quanto riportato ai fini di un corretto utilizzo del proiettore MANUAL DE USUARIO Lea cuidadosamente este manual del usuario para poder utilizar corretamente el producto GEBRUIKSAANWIJZNG Lees voor het qebruik alstublieft deze handleiding aandachtig door om volledig profijt te hebben van de uitgeb...

Страница 2: ... P 22 SPECIFICATIONS P 23 WARRANTY AND AFTER SERVICE P 24 Tables Table 1 Installation Reference P 6 Table 2 Basic Operations P 10 Table 3 Setup Menu P 12 Table 4 Input Menu P 13 Table 5 Image Menu P 14 Table 6 Options Menu P 15 Table 7 No Signal Menu P 16 Table 8 OSD Message P 20 Table 9 Indicator Message P 21 Table 10 Symptom P 22 Table 11 Specifications P 23 For TECHNICAL and REGULATORY NOTICE s...

Страница 3: ...Bedienungsanleitung zugunsten der korrekten Bedienung aufmerksam MANUEL D UTILISATION Nous vous recommandons de lire attentivement ce menuel pour bien assimiler le fonctionnement de l appareil MANUAL D ISTRUZIONI Vi preghiamo voler leggere attentamente il manuale d sitruzioni in modo tale da poter comprendere quanto riportato ai fini di un corretto utilizzo del proiettore MANUAL DE USUARIO Lea cui...

Страница 4: ...on Air Filter and Intake for the Cooling Fan Rear Foot Adjuster INPUT Button LAMP Indicator TEMP Indicator POWER Indicator RESET Button MENU Button Ventilation Openings exhaust REAR RIGHT VIEW OF THE PROJECTOR Terminal Panel Refer below TERMINAL PANEL S VIDEO Terminal VIDEO IN Terminal AUDIO IN L Terminal AUDIO IN R Terminal AUDIO IN 1 Terminal AUDIO IN 2 Terminal AUDIO OUT Terminal Remote Control...

Страница 5: ... to drop Do not place the heavy objects on the remote control transmitter Do not wet the remote control transmitter or place it on any wet object Do not place the remote control transmitter close to the cooling fan of the projector Do not disassemble the remote control transmitter in case of malfunction Please bring it to the service station Used to operate the mouse shift function Used to click t...

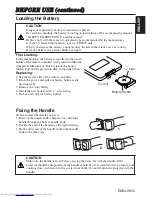
Страница 6: ...is installed in the battery holder of the remote controller with protection film the transparent filmsome of which is inside the battery folder Pull out the protection film to load the battery Replacing 1 See the reverse side of the remote controller 2 Pinch the groove and pull out battery holder as the drawing right 3 Remove the worn battery 4 Install the new battery with side facing 5 Push in an...

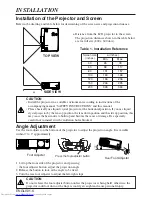
Страница 7: ...e LCD projector to the screen The projection distances shown in the table below are for full size 800 x 600 dots Table 1 Installation Reference Screen size inches a inches Min Max 40 65 78 60 98 117 80 131 157 100 163 196 120 196 236 150 246 295 200 328 394 a Angle Adjustment Use the foot adjuster on the bottom of the projector to adjust the projection angle It is variable within 0 to 9 approximat...

Страница 8: ...ojector to the RGB signal input terminal of the monitor by the optional RGB cable with D sub 15 pin shrink jack and inch thread screws Audio signal output Connect the AUDIO OUT terminal of the projector to the audio signal input terminal of the speaker by the optional audio cable with stereo mini jack PS 2 ADB Serial or RS 232C communication Connect the CONTROL terminal of the projector to the com...

Страница 9: ... computer and display and an operating system NOTE Use the RGB cable included with this projector when using plug play With other cables pins 12 15 are sometimes not connected Plug play is available only when the RGB cable is connected to the RGB IN 1 terminal RGB Cable RS 232C Cable ENGLISH 8 I IN NS ST TA AL LL LA AT TI IO ON N c co on nt ti in nu ue ed d Power Connection Use the correct one of ...

Страница 10: ...ling Pressing the STANDBY ON button has no effect while the Power indicator is blinking 2 The system assumes the Standby mode when cooling is complete and the Power indicator ceases blinking and changes to orange Check that the indicator is orange and set the Power switch to O 3 The Power indicator is extinguished when power is off Do not forget to close the lens door WARNING Please read this manu...

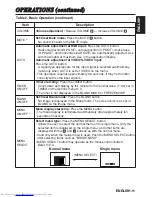
Страница 11: ...de Image position adjustment Press the and buttons in the position adjustment mode Valid only in the MAGNIFY mode with VIDEO S VIDEO input The icon is extinguished and the position adjustment mode cleared automatically after approximately ten seconds of inactivity and buttons may operate as the mouse control button Refer to P 4 RESET Initialise menu items Select an item and press the RESET button ...

Страница 12: ... button Count down and display by the minute from the initial value 1 99 set in TIMER on the Options menu to 0 The timer is not displayed in the BLANK MODE or FREEZE MODE BLANK ON OFF Set Clear Blank mode Press the BLANK button No image is displayed in the Blank mode The screen color is as set in BLANK on the Image menu MENU ON OFF Menu display start stop Press the MENU button The menu display is ...

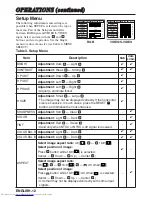
Страница 13: ...GHT Adjustment Dark Light CONTRAST Adjustment Weak Strong V POSIT Adjustment Down Up H POSIT Adjustment Left Right H PHASE Adjustment Left Right Adjust to eliminate flicker H SIZE Adjustment Small Large The image may not be displayed correctly if the horizontal size is excessive In such cases press the RESET button and initialize the horizontal size SHARPNESS Adjustment Soft Clear COLOR Adjustment...

Страница 14: ... this function when the image becomes unstable eg the image becomes irregular or lacks color Auto Adjust requires approximately ten seconds It may not function correctly with some input signals Pressing the AUTO button in this case may correct this problem AUTO Automatic adjustment at RGB input Select EXECUTE with the button Horizontal position vertical position clock phase and horizontal size are...

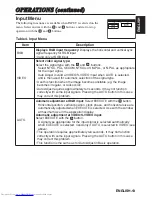
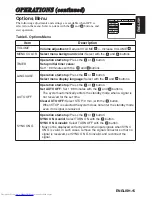
Страница 15: ...mage may not be displayed correctly with some input signals BLANK Select blank screen color Select color with the and buttons The image is cleared when the BLANK mode is set with BLANK ON or when there is no signal and the entire screen is displayed in the selected color MIRROR Operation start stop Press the or button Select Mirror status Select mirror status with and buttons START UP Operation st...

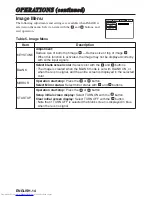
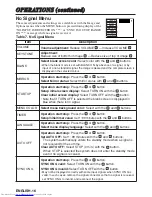
Страница 16: ...LANGUAGE Operation start stop Press the or button Select menu display language Select with the and buttons AUTO OFF Operation start stop Press the or button Set AUTO OFF Set 1 99 minutes with the and buttons The system automatically enters the standby mode when a signal is not received for the set time Clear AUTO OFF Select STOP 0 min with the button When STOP is selected the system does not enter...

Страница 17: ...etup initial screen display Select TURN ON with the button Clear initial screen display Select TURN OFF with the button Note that if TURN OFF is selected the blank screen is displayed in blue when there is no signal MENU COLOR Select menu background color Select with the and buttons TIMER Operation start stop Press the or button Setup initial timer value Set 1 99 minutes with the and buttons LANGU...

Страница 18: ...oved MAINTENANCE Lamp HIGH VOLTAGE HIGH TEMPERATURE HIGH PRESSURE Contact your dealer before replacing the lamp Option lamp DT00331 Before replacing the lamp switch power OFF remove the power cord from the power outlet and wait approximately 45 minutes until the lamp has cooled The lamp may explode if handled at high temperatures Lamp Life Projector lamps have a finite life The image will become d...

Страница 19: ... in injury or accidents Do not use the projector with the lamp cover removed Resetting the Lamp Timer Reset the lamp timer after replacing the lamp When the lamp has been replaced after the LAMP indicator is red or the CHANGE THE LAMP message is displayed complete the following operation within ten minutes of switching power ON The power will be turned off automatically in over 10 minutes 1 Switch...

Страница 20: ...tral detergent and wipe dry with a soft dry cloth CAUTION Switch power OFF and remove the power cord from the power outlet before beginning maintenance work Please read the separate SAFETY INSTRUCTIONS thoroughly to ensure that maintenance is performed correctly Replace the air filter if contamination cannot be removed or if it is damaged Contact your dealer in such case Option Air filter MU01421 ...

Страница 21: ... reset the lamp timer after replacing the lamp CHANGE THE LAMP AFTER REPLACING LAMP RESET THE LAMP TIME THE POWER WILL TURN OFF AFTER 0 hr The lamp has reached the end of its life Power will be switched OFF in a few minutes Switch power OFF immediately and replace the lamp as shown in P 17 Lamp Always reset the lamp timer after replacing the lamp NO INPUT IS DETECTED ON No input signal found Check...

Страница 22: ... t been fitted in correctly Switch power OFF and wait for 45 minutes until the equipment cools Check fitting of the lamp and lamp cover and switch power ON again Contact your dealer if the same problem occurs again Lights red Turns off Blinks red The cooling fan is not operating Switch power OFF and wait for 20 minutes until the equipment cools Check for foreign matters in the fan and switch power...

Страница 23: ...not correctly connected Connect correctly 7 8 The volume is set to minimum Press VOLUME on the remote control or display the menu screen and adjust the volume 11 15 Mute is turned on Press the MUTE button 11 Audio is present but no video The projector is not correctly connected Connect correctly 7 8 The brightness adjustment knob is rotated fully clockwise Select BRIGHT with the MENU button and th...

Страница 24: ...kg RGB signal input RGB IN 1 2 Video Analog 0 7Vp p 75Ω terminator positive H V sync TTL level positive negative Composite sync TTL level D sub 15 pin shrink jack AUDIO IN 1 2 200mVrms 50 kΩ max 3 0Vp p Stereo mini jack Video signal input VIDEO IN 1 0Vp p 75Ω terminator RCA jack S VIDEO IN Brightness signal 1 0Vp p 75Ω terminator Color signal 0 286Vp p burst signal 75Ω terminator Mini DIN 4 pin ja...

Страница 25: ... problem occurs with the equipment first refer to the P 20 TROUBLESHOOTING section and run through the suggested checks If this does not resolve the problem contact your dealer or service company If repairs are possible and desirable they will be charged ...

Страница 26: ...C 3 Video input Blue RGB IN 2 4 RGB OUT 5 Ground 13 H sync Composite sync 6 Ground Red 7 Ground Green 14 Vertical sync 8 Ground Blue 15 RGB IN 1 SCL DDC 9 RGB IN 2 10 Ground RGB OUT S Video Signal Pin Assignment Pin No Signal 1 Color 0 286Vp p burst signal 75Ω terminator 2 Brightness 1 0Vp p 75Ω terminator 3 Ground 4 Ground 1 2 3 4 5 6 7 8 9 10 11 12 13 14 15 D sub 15 pin shrink jack mini DIN 4 pi...

Страница 27: ...fV Hz Rating Signal mode Display mode 720 400 37 9 85 0 VESA TEXT Zoom in 640 480 31 5 59 9 VESA VGA 60Hz Zoom in 640 480 35 0 66 7 Mac13 mode Zoom in 640 480 37 9 72 8 VESA VGA 72Hz Zoom in 640 480 37 5 75 0 VESA VGA 75Hz Zoom in 640 480 43 3 85 0 VESA VGA 85Hz Zoom in 800 600 35 2 56 3 VESA SVGA 56Hz 800 600 37 9 60 3 VESA SVGA 60Hz 800 600 48 1 72 2 VESA SVGA 72Hz 800 600 46 9 75 0 VESA SVGA 75...

Страница 28: ... VGA 75Hz 2 0 3 8 20 3 0 5 VGA 85Hz 1 6 2 2 17 8 1 6 SVGA 56Hz 2 0 3 6 22 2 0 7 SVGA 60Hz 3 2 2 2 20 0 1 0 SVGA 72Hz 2 4 1 3 16 0 1 1 SVGA 75Hz 1 6 3 2 16 2 0 3 SVGA 85Hz 1 1 2 7 14 2 0 6 Mac 16 mode 1 1 3 9 14 5 0 6 XGA 60Hz 2 1 2 5 15 8 0 4 XGA 70Hz 1 8 1 9 13 7 0 3 XGA 75Hz 1 2 2 2 13 0 0 2 XGA 85Hz 1 0 2 2 10 8 0 5 1280 1024 60Hz 1 0 2 3 11 9 0 4 Computer Signal Vertical signal timimg lines a ...

Страница 29: ... USB cable Consult your dealer to get the cable if you need 2 Start the mouse function Refer to the descriptions of DISC PAD and MOUSE RIGHT button of page 4 NOTE Before connecting read the instruction manuals of the devices to be connected In the case of notebook type computers with an internal pointing device the mouse control function will not work unless the internal pointing device is disable...

Страница 30: ... 12 11 14 13 15 RTS GND 5V ADB GND 5V POWER ON DATA 2 1 4 3 Mouse jack Mini DIN 4 pin Projector Computer 1 2 3 4 5 6 7 8 9 10 11 12 13 14 15 CONTROL Terminal D sub 15 pin shrink jack Serial Mouse 2 1 4 3 6 5 2 1 4 3 6 5 8 7 10 9 8 7 9 12 11 14 13 15 RI CD RD TD DTR GND DSR CTS RTS RTS GND SEL0 TD 2 1 4 3 6 5 8 9 7 Mouse jack D sub 9 pin Projector Computer 1 2 3 4 5 6 7 8 9 10 11 12 13 14 15 CONTRO...

Страница 31: ...S DTS RI 1 2 3 4 5 6 7 8 9 RS 232C jack D sub 9 pin Projector Computer Communications setting 19200bps 8N1 1 Protocol Consist of header 7 bytes command data 6 bytes 2 Header BE EF 03 06 00 CRC_low CRC_high CRC_low Lower byte of CRC flag for command data CRC_high Upper byte of CRC flag for command data 3 Command data byte_0 byte_1 byte_2 byte_3 byte_4 byte_5 Action Type Setting code low high low hi...

Страница 32: ...06H to the computer Decreasing the projector setting value Decrement command 1 The computer sends the decrement code Header Command data 05H 00H type 2 bytes 00H 00H to the projector 2 The projector decreases the setting value on the above setting code 3 The projector returns the response code 06H to the computer When a command sent by the projector cannot be understood by the computer When the co...

Страница 33: ...d BE EF 03 06 00 7F D3 01 00 03 30 00 00 Orange BE EF 03 06 00 EF D2 01 00 03 30 01 00 Green BE EF 03 06 00 1F D2 01 00 03 30 02 00 BLUE BE EF 03 06 00 8F D3 01 00 03 30 03 00 Purple BE EF 03 06 00 BF D1 01 00 03 30 04 00 Transparent BE EF 03 06 00 2F D0 01 00 03 30 05 00 Gray BE EF 03 06 00 DF D0 01 00 03 30 06 00 Get BE EF 03 06 00 4C D3 02 00 03 30 00 00 Startup Set Turn ON BE EF 03 06 00 0B D2...

Страница 34: ...06 70 00 00 Aspect Reset Execute BE EF 03 06 00 2C D2 06 00 07 70 00 00 Video Format Reset Execute BE EF 03 06 00 38 D1 06 00 08 70 00 00 Sharpness Reset Execute BE EF 03 06 00 C4 D0 06 00 09 70 00 00 Color Reset Execute BE EF 03 06 00 80 D0 06 00 0A 70 00 00 Tint Reset Execute BE EF 03 06 00 7C D1 06 00 0B 70 00 00 Keystone Reset Execute BE EF 03 06 00 08 D0 06 00 0C 70 00 00 Mirror Reset Execute...

Страница 35: ... 03 20 00 00 Decrement BE EF 03 06 00 3E D3 05 00 03 20 00 00 Contrast Get BE EF 03 06 00 FD D3 02 00 04 20 00 00 Increment BE EF 03 06 00 9B D3 04 00 04 20 00 00 Decrement BE EF 03 06 00 4A D2 05 00 04 20 00 00 Color Balance R Get BE EF 03 06 00 01 D2 02 00 05 20 00 00 Increment BE EF 03 06 00 67 D2 04 00 05 20 00 00 Decrement BE EF 03 06 00 B6 D3 05 00 05 20 00 00 Color Balance B Get BE EF 03 06...

Страница 36: ... Sharpness Get BE EF 03 06 00 F1 72 02 00 01 22 00 00 Increment BE EF 03 06 00 97 72 04 00 01 22 00 00 Decrement BE EF 03 06 00 46 73 05 00 01 22 00 00 Color Get BE EF 03 06 00 B5 72 02 00 02 22 00 00 Increment BE EF 03 06 00 D3 72 04 00 02 22 00 00 Decrement BE EF 03 06 00 02 73 05 00 02 22 00 00 Tint Get BE EF 03 06 00 49 73 02 00 03 22 00 00 Increment BE EF 03 06 00 2F 73 04 00 03 22 00 00 Decr...

Страница 37: ...measures Reorient or relocate the receiving antenna Increase the separation between the equipment and receiver Connect the equipment into an outlet on a circuit different from that to which the receiver is connected Consult the dealer or an experienced radio TV technician for help INSTRUCTIONS TO USERS This equipment complies with the requirements of FCC Federal Communication Commission equipment ...

Страница 38: ... ITALY Tel 39 02 487861 Tel 39 02 38073415 Servizio Clienti Fax 39 02 48786381 2 Email customerservice italy hitachi eu com HITACHI Europe AB Box 77 S 164 94 Kista SWEDEN Tel 46 0 8 562 711 00 Fax 46 0 8 562 711 13 Email csgswe hitachi eu com HITACHI EUROPE S A S Lyon Office B P 45 69671 BRON CEDEX FRANCE Tel 04 72 14 29 70 Fax 04 72 14 29 99 Email france consommateur hitachi eu com HITACHI EUROPE...

Отзывы: