4 OPERATION
4-18
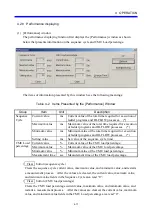
• Change time button
Opens the [Change Measurement Time] window, which allows you to change the
measurement time. The measurement time setting entered from the [Change
Measurement Time] window appears in the “Measurement time” box in the [Performance]
window.
This button also clears the current value, maximum value, and minimum value from the
“CMU Load percentage” area, and starts a CMU load percentage measurement process at
the changed measurement time setting.
• OK button
Closes the [Performance] window.
• Refresh button
Displays the current values.
• Start Monitoring button
Starts monitoring the sequence cycle and CMU load factor.
• Stop Monitoring button
Stops monitoring the sequence cycle and CMU load factor.
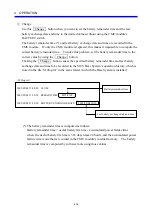
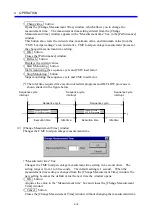
(*) The total time required for execution of ladder programs and HI-FLOW processes is
shown shaded in the figure below.
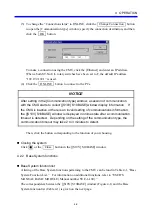
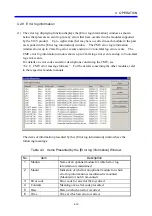
(2) [Change Measurement Time] window
Changes the CMU load percentage measurement time.
• “Measurement time” box
Changes the CMU load percentage measurement time setting in 1-second units. The
setting range is from 1 to 60 seconds. The default setting is 1 second. When the
measurement time setting is changed from the [Change Measurement Time] window, the
new setting becomes the default value the next time the window opens.
• OK button
Acquires the value in the “Measurement time” box and closes the [Change Measurement
Time] window.
• Cancel button
Closes the [Change Measurement Time] window without changing the measurement time.
Sequence cycle
interrupt
Sequence cycle
interrupt
Sequence cycle
interrupt
Ladder p
HI-FLOW process
Sequence cycle
Execution time
Idle time
Sequence cycle
Execution time
Idle time
t
Ladder p
HI-FLOW process
Содержание CMU LPQ520
Страница 1: ......
Страница 2: ......
Страница 17: ...This Page Intentionally Left Blank ...
Страница 19: ...This Page Intentionally Left Blank ...
Страница 23: ...This Page Intentionally Left Blank ...
Страница 28: ...v 6 4 Replacing the CMU Module 6 49 6 4 1 Replacing the module 6 49 6 5 Trouble Report 6 51 ...
Страница 30: ...1 SPECIFICATIONS ...
Страница 38: ...2 NAMES AND FUNCTIONS OF EACH PART ...
Страница 43: ...This Page Intentionally Left Blank ...
Страница 44: ...3 MOUNTING AND WIRING ...
Страница 52: ...4 OPERATION ...
Страница 85: ...This Page Intentionally Left Blank ...
Страница 86: ...5 USER GUIDE ...
Страница 101: ...This Page Intentionally Left Blank ...
Страница 102: ...6 MAINTENANCE ...
Страница 153: ...This Page Intentionally Left Blank ...

