3 MOUNTING AND WIRING
3-4
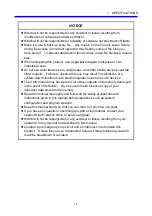
NOTICE
z
Dust or other foreign matter might accumulate on the connector, resulting in
poor contact. Immediately after the module is unpacked, perform the
mounting and wiring procedures.
z
To prevent the module from being damaged, observe the following precautions
when you mount or demount the module:
• Before mounting the module to the mount base connector, check that the
connector pins are properly aligned and not bent, broken, or soiled with dirt
or the like.
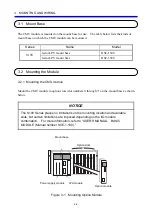
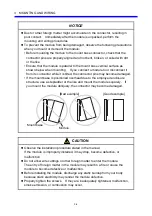
• Ensure that the module is parallel to the mount base vertical surface as
shown below when mounting. If you connect a module to or disconnect it
from its connector while it is tilted, the connector pins may become damaged.
• If the mount base is positioned overhead due to the employed enclosure
structure, use a stepladder or the like and mount the module squarely. If
you mount the module obliquely, the connector may become damaged.
CAUTION
z
Observe the installation procedure stated in the manual.
If the module is improperly installed, it may drop, become defective, or
malfunction.
z
Do not allow wire cuttings or other foreign matter to enter the module.
The entry of foreign matter in the module may result in a fire or cause the
module to become defective or malfunction.
z
Before installing the module, discharge any static buildup from your body
because static electricity may render the module defective.
z
Properly tighten the screws. If they are inadequately tightened, malfunction,
smoke emission, or combustion may occur.
[Bad example]
[Good example]
Mount base
Module
Содержание CMU LPQ520
Страница 1: ......
Страница 2: ......
Страница 17: ...This Page Intentionally Left Blank ...
Страница 19: ...This Page Intentionally Left Blank ...
Страница 23: ...This Page Intentionally Left Blank ...
Страница 28: ...v 6 4 Replacing the CMU Module 6 49 6 4 1 Replacing the module 6 49 6 5 Trouble Report 6 51 ...
Страница 30: ...1 SPECIFICATIONS ...
Страница 38: ...2 NAMES AND FUNCTIONS OF EACH PART ...
Страница 43: ...This Page Intentionally Left Blank ...
Страница 44: ...3 MOUNTING AND WIRING ...
Страница 52: ...4 OPERATION ...
Страница 85: ...This Page Intentionally Left Blank ...
Страница 86: ...5 USER GUIDE ...
Страница 101: ...This Page Intentionally Left Blank ...
Страница 102: ...6 MAINTENANCE ...
Страница 153: ...This Page Intentionally Left Blank ...

