background image


1 - 10


EN

G

L

ISH


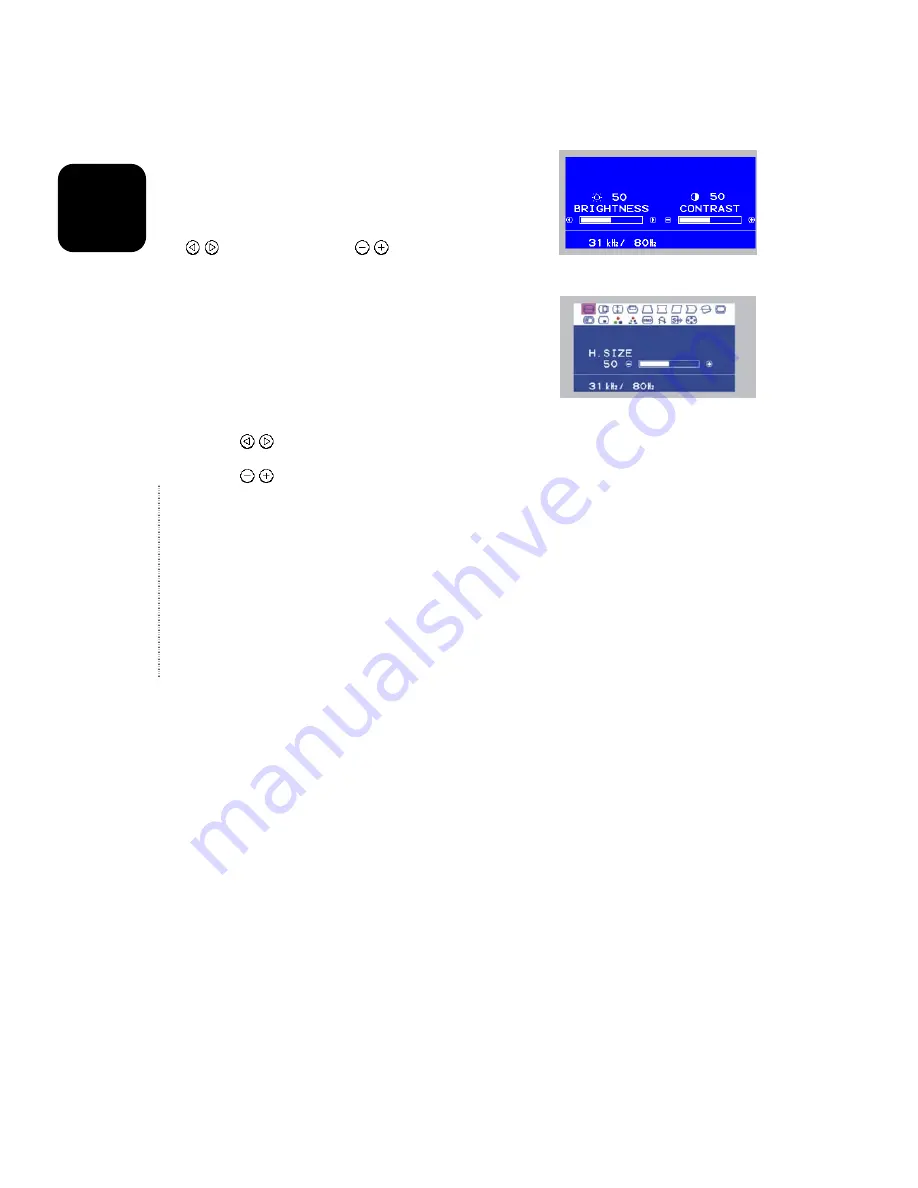
Brightness/Contrast Adjustment


(1) Press one of the adjustment buttons when the OSD 

(On Screen Display) is not shown. The OSD function 
“EasyMenu” will then show the brightness and 
contrast settings. 

(2) To adjust these settings, use the adjustment buttons 

/  for brightness, and  /  for contrast. 

 
Other Functions


(1) Press the menu button when the OSD is not shown. 

The OSD function “EasyMenu” will then show  the 
main menu. The EasyMenu has 4 submenus (Screen 
Menu, Recall Menu, OSD Menu and Colour Menu).  
You can call these up through the main menu 
functions . 

(2) To select the menu function, use the adjustment 

buttons  / . 

(3) To execute the selected function, use the adjustment 

buttons  /  as shown in Table 1-1. 

Brightness/Contrast Menu 

Main Menu


NOTE:


• 

You can select the OSD language by using the  “LANGUAGE SELECT” function of 
the “OSD MENU”. 


• 

To return to the main menu from any sub menu, simply press the menu button. 


• 

To clear the OSD, press the menu button at the main menu, then choose the “OSD 
EXIT” function, or wait for a few seconds, the menu window will disappear 
automatically.


• 

The adjusted settings will be stored automatically. The OSD might flicker on and 
off  for a short period while  the OSD is displayed in certain screen settings.  This 
phenomenon is not a failure.  Simply move the OSD position a little up or down, 
and the OSD will become stable.


Содержание CM827ET

Страница 1: ...onitor SERIAL No The serial number is located on the rear of the monitor This monitor is ENERGY STAR compliant when used with a computer equipped with VESA DPMS The ENERGY STAR emblem does not represent EPA endorsement of any product or service As an ENERGY STAR Partner Hitachi Ltd has determined that this product meets the ENERGY STAR guidelines for energy efficiency USER MANUAL MANUEL D UTILISAT...

Страница 2: ... and during their manufacture Since it is not so far possible to satisfactorily recycle the majority of electronics equipment most of these potentially damaging substances sooner or later enter nature There are also other characteristics of a computer such as energy consumption levels that are important from the viewpoints of both the work internal and natural external environments Since all metho...

Страница 3: ...ng layers of certain computer displays Cadmium damages the nervous system and is toxic in high doses The relevant TCO 99 requirement states that batteries the colour generating layers of display screens and the electrical or electronics components must not contain any cadmium Mercury Mercury is sometimes found in batteries relays and switches It damages the nervous system and is toxic in high dose...

Страница 4: ...ed without express written authority TRADEMARK ACKNOWLEDGMENT VGA is a registered trademark of International Business Machines Corporation VESA is a trademark of a nonprofit organization Video Electronics Standard Association ENERGY STAR is a trademark of Environmental Protection Agency EPA CONTENTS FEATURES 1 2 CAUTIONS 1 3 INSTALLATION 1 7 OPERATION 1 9 POWER SAVING SYSTEM 1 16 PLUG PLAY 1 16 SI...

Страница 5: ...metry settings including the default factory settings Digital Colour Control Function Red green and blue colour balance are adjustable through digital control An adjusted colour setting can be stored and recalled through the colour select function Power Saving System The Environmental Protection Agency EPA has established a voluntary program by which manufacturers enable computer products to go in...

Страница 6: ...its sides not only the top but also including the right and left side of the monitor The ventilation holes in the cover prevent excessive temperatures inside the monitor Beware of magnetic fields DO NOT place a magnet loudspeaker system floppy disk drive printer or any appliance which generates a magnetic field near the unit A magnetic field may cause blurred colours or distortion of the displayed...

Страница 7: ...tallation meet the conditions in the table prior to installing the equipment Be careful of static electricity on the CRT surface To prevent electrical shock through static electricity on the CRT surface disconnect the power cord for at least 30 seconds after turning OFF the power before touching the monitor s surface Avoid frequent turning ON and OFF switching Do not repeatedly turn the monitor OF...

Страница 8: ...pment off and on the user is encouraged to try to correct the interference by one or more of the following measures Reorient or relocate the receiving antenna Increase the separation between the equipment and receiver Connect the equipment into an outlet on a circuit different from that to which the receiver is connected Consult the dealer or an experienced radio TV technician for help INSTRUCTION...

Страница 9: ... appropriate safety approved extension lead or consult your dealer Changing the mains plug if necessary should be carried out by an qualified electrician If there is no alternative to cutting off the mains plug ensure that you dispose of it immediately having first removed the fuse to avoid a possible shock hazard by inadvertent connection to the mains supply WARNING THIS EQUIPMENT MUST BE GROUNDE...

Страница 10: ...uld you discover that the equipment has been damaged during transport or that the consignment does not correspond with the delivery list please notify your dealer immediately Delivery Note one Monitor one Power Cord one Signal Cable this User Manual NOTE Keep the original packing material as you will be required to use it for shipping if your monitor needs warranty service ...

Страница 11: ...itor with attention to the suitability and secure the screws on the connector shell firmly 3 Connect the other connector end of the signal cable to the host computer 3 Power Cord Connection 1 Make sure to use a power cord that meets the safety standard of the country in which you are using the monitor 2 Insert the connector of the power cord to the AC Input of the monitor 3 Insert the plug of the ...

Страница 12: ... second delay is not observed the monitor may operate incorrectly Input Select This monitor has two input terminals INPUT1 and INPUT2 This will let you connect two computers simultaneously When two computers are active you can switch the input signal by uses the Input Select Button Every time this button is pushed the monitor alternately uses the input signal from either INPUT1 and INPUT2 computer...

Страница 13: ...e menu function use the adjustment buttons 3 To execute the selected function use the adjustment buttons as shown in Table 1 1 Brightness Contrast Menu Main Menu NOTE You can select the OSD language by using the LANGUAGE SELECT function of the OSD MENU To return to the main menu from any sub menu simply press the menu button To clear the OSD press the menu button at the main menu then choose the O...

Страница 14: ...N MENU ROTATION PIN BALANCE PARALLELOGRAM PINCUSHION TRAPEZOID V POSITION V SIZE H POSITION H SIZE changes to the next mode H SIZE H POSITION V SIZE V POSITION TRAPEZOID PINCUSHION PARALLELOGRAM PIN BALANCE ROTATION SCREEN MENU RECALL MENU OSD MENU COLOUR SELECT COLOUR MENU DMS DEGAUSS OSD EXIT ZOOM H SIZE H SIZE shrinks the picture horizontally expands the picture horizontally H POSITION moves th...

Страница 15: ...and right side of the picture to the left curves the left and right side of the picture to the right ROTATION rotates the picture counter clockwise rotates the picture clockwise SCREEN MENU no function Calls up the SCREEN MENU RECALL MENU no function Calls up the RECALL MENU OSD MENU no function Calls up the OSD MENU COLOUR SELECT changes the colour to the previous mode DMS USER 5000 6500 9300 DMS...

Страница 16: ...LINEARITY V LIN BALANCE HEMISPHERE H MOIRE H MOIRE makes the operation of the horizontal moiré changing circuit weaker makes the operation of the horizontal moiré changing circuit stronger V MOIRE makes the operation of the vertical moiré changing circuit weaker makes the operation of the vertical moiré changing circuit stronger Continued on the next page NOTE Moire may appear on the screen due to...

Страница 17: ...red up and blue down V LINEARITY expands the top and the bottom of the picture vertically shrinks the top and the bottom of the picture vertically V LIN BALANCE shrinks the top and expands the bottom of the picture vertically expands the top and shrinks the bottom of the picture vertically HEMISPHERE set the northern hemisphere mode N set the southern hemisphere mode S RECALL MENU changes to the p...

Страница 18: ...panish ITALIANO Italian FRANÇAIS French ENGLISH COLOUR MENU changes to the previous mode R B G R changes to the next mode R G B R R RED makes the Green and Blue stronger When the Green or Blue reaches the upper limit it makes the Red weaker makes the Red stronger When the Red reaches the upper limit it makes the Green and Blue weaker G GREEN makes the Blue and Red stronger When the Blue or Red rea...

Страница 19: ...tem manufacturers comply for this user friendly function This function works when the monitor is connected to a DDC enabled computer that is runs on an operating system that incorporates the Plug Play function SIGNAL CHECK Your monitor is equipped with an automatic Signal Verification System Table 1 3 below outlines the operation of this system Table 1 3 Signal Check Signal Condition Indication of...

Страница 20: ... Power Connection to the computer Check Input Select status POWER SAVE message appears Check the Signal Cable Connection Check the Power Connection to the computer Check Input Select status INVALID SCAN FREQ message appears Check the Signal Cable Connection Check the video input specification Wavy or elliptical Moiré pattern appears Adjust the unit with the Moiré control as outlined in Table 1 1 C...

Страница 21: ...Image Area Horizontal 406 mm typical Vertical 305 mm typical Colour Temperature 9300 Standard colour balance 9300 K 6500 Standard colour balance 6500 K 5000 Standard colour balance 5000 K USER User defined DMS Standard colour balance 9300 K for the DMS mode Power Supply AC 100 120 200 240 V automatically selected Power Consumption 115 W typical provided with power save circuit Warm up Time 30 minu...

Страница 22: ...es may be regarded as the same signal The following horizontal timing conditions are recommended at sync H V separate or H V composite for 31 kHz 55 kHz horizontal frequency Horizontal front porch should be more than 0 1 µs Horizontal sync width should be within 1 0 3 8 µs Horizontal back porch should be more than 1 2 µs Horizontal blanking width should be more than 3 5 µs for 55 kHz 115 kHz horiz...

Страница 23: ... Video Green Video 3 Blue Video Blue Video 4 No pin No pin 5 No connection No connection 6 Red Ground Red Ground 7 Green Ground Green Ground 8 Blue Ground Blue Ground 9 No connection No connection 10 Ground Ground 11 No connection No connection 12 Bi directional Data SDA No connection 13 H Sync or H V H Sync or H V 14 V Sync VCLK V Sync 15 Data Clock SCL No connection ...

Страница 24: ... ITALY Tel 39 02 487861 Tel 39 02 38073415 Servizio Clienti Fax 39 02 48786381 2 Email customerservice italy hitachi eu com HITACHI Europe AB Box 77 S 164 94 Kista SWEDEN Tel 46 0 8 562 711 00 Fax 46 0 8 562 711 13 Email csgswe hitachi eu com HITACHI EUROPE S A S Lyon Office B P 45 69671 BRON CEDEX FRANCE Tel 04 72 14 29 70 Fax 04 72 14 29 99 Email france consommateur hitachi eu com HITACHI EUROPE...

Отзывы: