background image

GB   

- 13 -

Other Features

TV Status

Programme Number

Programme Name (

or

 AV)

, (they are

displayed on the upper left of the screen) and 

Sleep Timer

(shows the time left on the upper right screen if enabled). In

stereo options the sound indicator is displayed with them too.

They are displayed after programme change for 3 seconds.

 Programme Number

 Programme Name (5 characters)

These OSD’s are displayed when a new programme is en-
tered by digit button, by pressing “

P<P

” button, or by “ “ or “ ”

button, or by “

TV

” button.

Programme Swap (P<P)

This button is used to re-enter the preceding entered pro-

gramme again. Pressing "

P<P

" consecutively allows to swap

into two last entered  programmes.

Double-digit (- -)

This OSD is displayed when the "Double-Digit" button pressed

in place of the programme number indicator.

After that, in order to enter a programme press two digits con-

secutively. Both digits must be entered within 3 seconds or the

function will disappear.

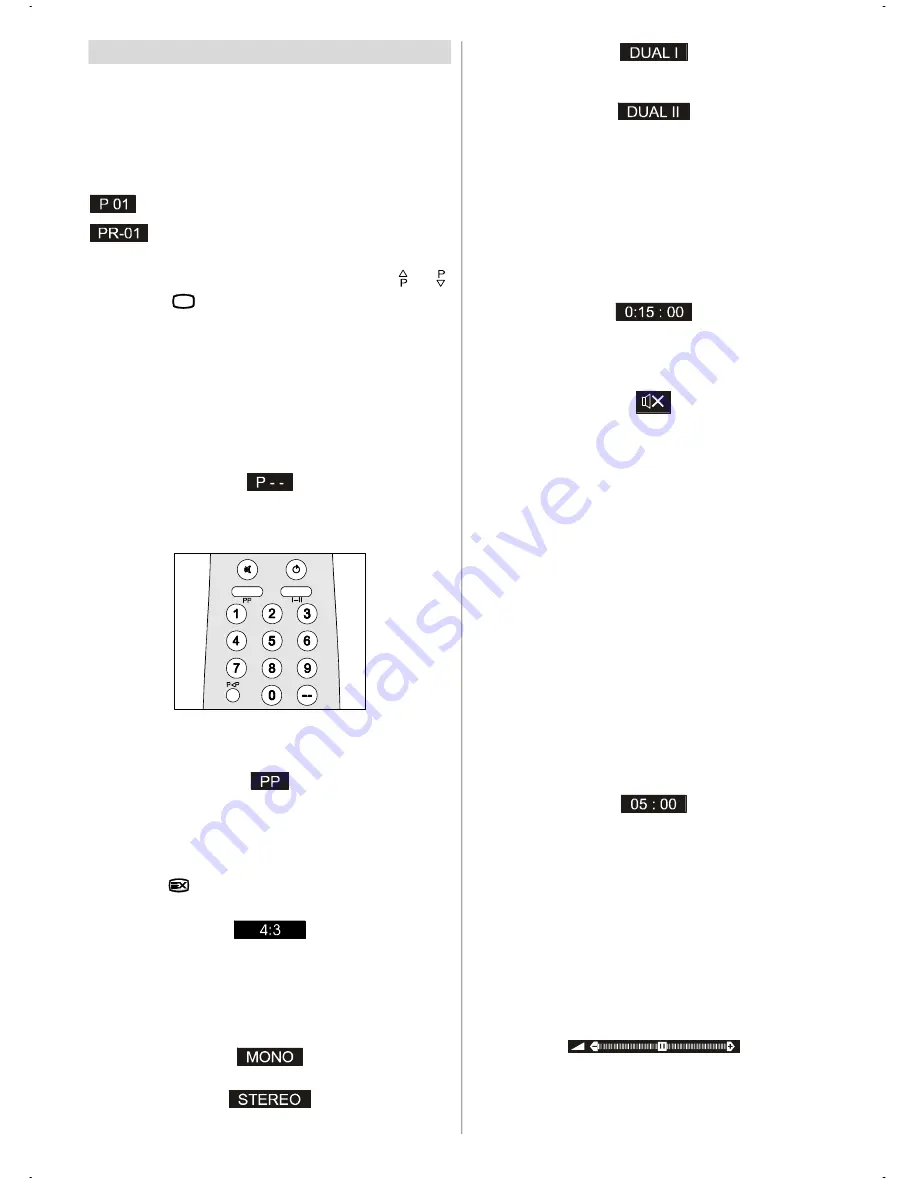
Personal Preferences (PP)

All the preset values will be restored, when pressing "

PP

".

Picture Mode

The picture mode OSD is displayed below the sound indica-

tor, by TV Status OSD’s. According to the WSS data, inside of

the OSD box “4:3”, “16:9” or “AUTO” is written.
By pressing “

” button (if Teletext is not active) the picture

mode can be switched into 4:3, 16:9 or Auto Mode.

Sound Indicator

This is a stereo option. The alternatives of the indicator are

Mono, Stereo, Dual I and Dual II. This indicator is displayed

under the programme number indicator on the screen. "

I-II

"

button is used to select Mono or Stereo, or Dual I or Dual II.

In Mono broadcast or in forced-mono (for stereo broadcast).

In Stereo

 broadcast.

If dual broadcast detected. Dual I is selected in default and also

can be selected after Dual II by Remote Control.

If Dual II selected by Remote Control.

Sleep Timer Last Minute Indicator

It is displayed on the upper right of the screen. If sleep timer is

activated it is displayed with the TV status and erased with it

after 3 seconds.
If there is only one minute of the countdown left of the timer, it

is displayed automatically on the upper left of the screen, and

stays there until time is reached. Then TV goes automatically

to stand-by.

Mute Indicator

It is placed in the upper middle of the screen when enabled,

and it stays there until it is disabled.

To cancel mute, there are two alternative; the first one is press-
ing to " " button, thus volume is set to the preceding value, and

the second one is increasing the volume level, thus it starts at

the minimum level to increase. By decreasing the volume level

in mute state, mute will not be ignored, only the volume level

will decrease. If mute is cancelled after decreasing the volume

level, the volume will return at the decreased level.

No-Signal

No-Signal Timer Indicator

It is displayed in the middle of the screen when no valid sig-

nal detected. It shows the time remaining before the switch-

ing to the Stand-By mode (it takes 5 minutes when no signal

detected or no any Remote Control command is accessed).

The indicator is displayed for 3 seconds when there is no valid

signal.
After a Remote Control command (if No-Signal Timer is active)

the timer stops and if no signal detected again the timer is ini-

tialized to 5 minutes and starts 3 seconds later again to count

down.
It is not valid in AV mode.

Blue Background During No-Signal

In case, no valid signal is detected (in TV or AV mode) Blue Back-

ground is activated.During search process Blue Background

is not active. But instead there is another feature given; the

semi-transparent menu background is becomes blue.

Volume Bar

It is displayed in the lower middle of the screen. When a vol-

ume command is received (pressing 

“VOL+”

 or 

“VOL-”

 by

Remote Control or Front panel) and no menu is active, it stays

on the screen for 3 seconds, after the last volume command

or until another command is received in between.

01-ENG-(CG2143S)-2172H-AV-3040-AK30-ST7P-PLL-FS-BG-50050789.p65

13.07.2004, 13:26

13

Содержание CG2143S

Страница 1: ...GB Instructions for use CG2143S ...

Страница 2: ...emote Control 15 No solution 15 Specifications 16 Remote Control Buttons 2 Control Panel Buttons 3 Connect Peripheral Equipment 3 Connect Peripheral Equipment 4 Via the Euroconnector 4 Via Aerial Input 4 Decoder 4 TV and Video Recorder 4 Search for and store the test signal of the video recorder 4 Camera and Camcorder 4 Connect the decoder to the video recorder 4 Preparation 5 Features 5 Safety Pr...

Страница 3: ... Up Cursor Up Cursor Right VOL VOL Volume Volume Yellow FEATURE Feature Menu Blue INSTALL Installation Menu External Source AV 1 F AV RGB Teletext Buttons Teletext Update Hold Index Page Reveal Expand Time Mix TV Quit Menu Red SOUND Sound Menu Green PICTURE Picture Menu Programme Down Cursor Down Cursor Left Menu Change Picture Preset Mute ...

Страница 4: ...right red VIDEO VCR yellow Front AV ConnectPeripheralEquipment There is a wide range of audio and video equipment that can be connected to your TV The connection diagrams show the back of the TV where the different equipment should be connected DECODER FORSATELLITERECEIVER VIDEO AUDIO CAMERA SCART 1 Aerial External 1 REARPANEL ...

Страница 5: ... decoder has a SCART connector you can obtain better picture quality if you connect a SCART lead toEXTERNAL Then select the appropriate AV mode by pressing the AV button TV and Video Recorder If your video recorder has a SCART socket please connect it to the TV using a SCART lead Your TV should also be con nected to your video recorder using the aerial RF output socket Please note using a SCART le...

Страница 6: ...lug This plug must not be cut off as it may contain a special radio interference fil ter the removal of which could lead to impaired performance If you wish to extend the lead obtain an appropriate safety ap proved extension lead or consult your dealer Observe the manufacturers instructions when connecting ex tension leads to the TV Check the fuse rating on the new plug this should be fitted with ...

Страница 7: ...fied by the manufacturer or have the same specifications as the origi nal one Unauthorized substitutions may result in fire electri cal shock or other hazards 7 Servicing Please refer all servicing to qualified personnel Do not remove the back cover as this may result in an electric shock 8 X rays This television has sheilding for protection against the emis sion of X rays 9 Flame sources Do not p...

Страница 8: ...ow the TV turns on 2 To switch on the TV from stand by mode either Press a digit button on the remote control so that a programme number is selected or Press Programme Up or Down buttons on the front of the TV or on the remote control so that last switched off programme is selected In either case the TV will switch on and theRED LED will turn toGREEN To switch the TV off Press the stand by button ...

Страница 9: ...s not entered within 3 sec onds this function will disappear Press directly the programme number to reselect single digit programmes Programme Swapping Press P P programme swap button to select the last selected programme This button provides swapping be tween last two selected programmes For example select programme 8 then select programme 2 Now if you press P P button programme 8 will be selecte...

Страница 10: ...l turn on and off this feature If the current sound system isMONO and the sound effect is setON then the sound will be heard as if it isSTEREO If the current sound system is STEREO switching this effect on will give a more spatial sound VOLUME BALANCE EFFECT STORE MODE AVL EQUALIZER MONO ON OFF Equalizer To enter Equalizer sub menu select Equalizer using or button then enter Equalizer menu pressin...

Страница 11: ...ectly by pressing button on your remote control 4 3 This option forces the picture ratio to 4 3 mode 16 9 This option forces the picture ratio to 16 9 mode AUTO This allows to change the picture mode automatically according to the transmission of the selected channel For example your TV is 4 3 mode but the transmission of that channel is in 16 9 mode If you select theAUTOmode the TV is switched to...

Страница 12: ...ly Install Menu To enter the Install menu directly press theBLUE button or Press button now you are in Main menu In the Main menu select INSTALL using or button Then enter the Install menu pressing or button Selecting Programme To select programme number you can use or button Digit Buttons or The Double Digit button with digit buttons Selecting Band BAND can be chosen either VHF1 VHF3 or UHF by or...

Страница 13: ...essing button moves the cursor at the end 01 PR01 02 03 04 05 06 07 08 09 10 PR02 PR03 PR04 PR05 PR06 11 12 13 14 15 16 17 18 19 20 21 22 23 24 25 26 27 28 29 30 AUTOSTORE INSERT DELETE NAME After changing the name by pressing theRED button STORE it is stored After activating the name process the INSERT DELETE and AUTOSTORE processes will be inactive and CANCEL option will be valid This option can...

Страница 14: ...is displayed on the upper right of the screen If sleep timer is activated it is displayed with the TV status and erased with it after 3 seconds If there is only one minute of the countdown left of the timer it is displayed automatically on the upper left of the screen and stays there until time is reached Then TV goes automatically to stand by Mute Indicator It is placed in the upper middle of the...

Страница 15: ... press to will change the mode fromTVtothe latest Teletext page we left In theTVmode enter a page number using digit keys As you enter digits first line of teletext page will appear on top screen and will remain there until the requested page is found Then teletext line will be replaced by page number to indicate that page has been found Now you can display this teletext page pressing button To Se...

Страница 16: ...es you can improve the picture qual ity by changing the direction of the aerial Is the picture or Teletext unrecognisable Check if you have entered the correct frequency The picture quality may degrade when two peripherals are connected to the TV at the same time In such a case discon nect one of the peripherals No Picture Is the aerial connected properly Are the plugs connected tightly to the aer...

Страница 17: ... TV S1 S20 S21 S41 NUMBEROFPRESETCHANNELS 100 CHANNELINDICATOR On Screen Display RFAERIALINPUT 75 Ohm unbalanced OPERATINGVOLTAGE 220 240VAC 50 Hz AUDIOOUTPUT German Stereo AUDIO OUTPUT POWER WRMS 10 THD 2 x 8 POWER CONSUMPTION W max 95 PICTURETUBE 21 55 cm DIMENSIONS mm D L H WEIGHT kg 473 563 442 18 5 ...

Страница 18: ...47 Milano Italia ITALY Tel 39 02 487861 Tel 39 02 38073415 Servizio Clienti Fax 39 02 48786381 2 Email customerservice italy hitachi eu com HITACHI Europe AB Box 77 S 164 94 Kista SWEDEN Tel 46 0 8 562 711 00 Fax 46 0 8 562 711 13 Email csgswe hitachi eu com HITACHI EUROPE S A S Lyon Office B P 45 69671 BRON CEDEX FRANCE Tel 04 72 14 29 70 Fax 04 72 14 29 99 Email france consommateur hitachi eu co...

Отзывы: