


-14-
MN1-5827 Rev. 6
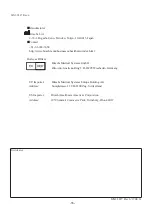
(3) Put the holding clip on the fixing position.
(4) When part marked “G**” is pushed, holding clip closes and fixes on the probe.
Push
Figure 10 Attaching of the puncture guide tube 3
Caution
Carefully attach the puncture guide tube.
There is a risk of infection if the rubber boot is damaged. If the position of the puncture guide tube is
misaligned, check the position of the puncture guide tube again without forcibly trying to attach it.
Note
Remove any air bubbles or wrinkles. Any air bubbles on the ultrasonic irradiation area of the probe or wrinkles
in the rubber boot can result in reduced quality of the ultrasound image.
5) Move the rear guide and check that puncture guide tube is attached firmly on probe. Before inserting into the
patient, check for air bubbles on the acoustic irradiation area again.
Move and check
the fixing condition.
Confirm that there are
no air bubbles on the
acoustic irradiation area
Figure 11 Attaching of the puncture guide tube 4
Содержание C41RP
Страница 2: ...ii MN1 5827 Rev 6 ...


