background image

- 26 -

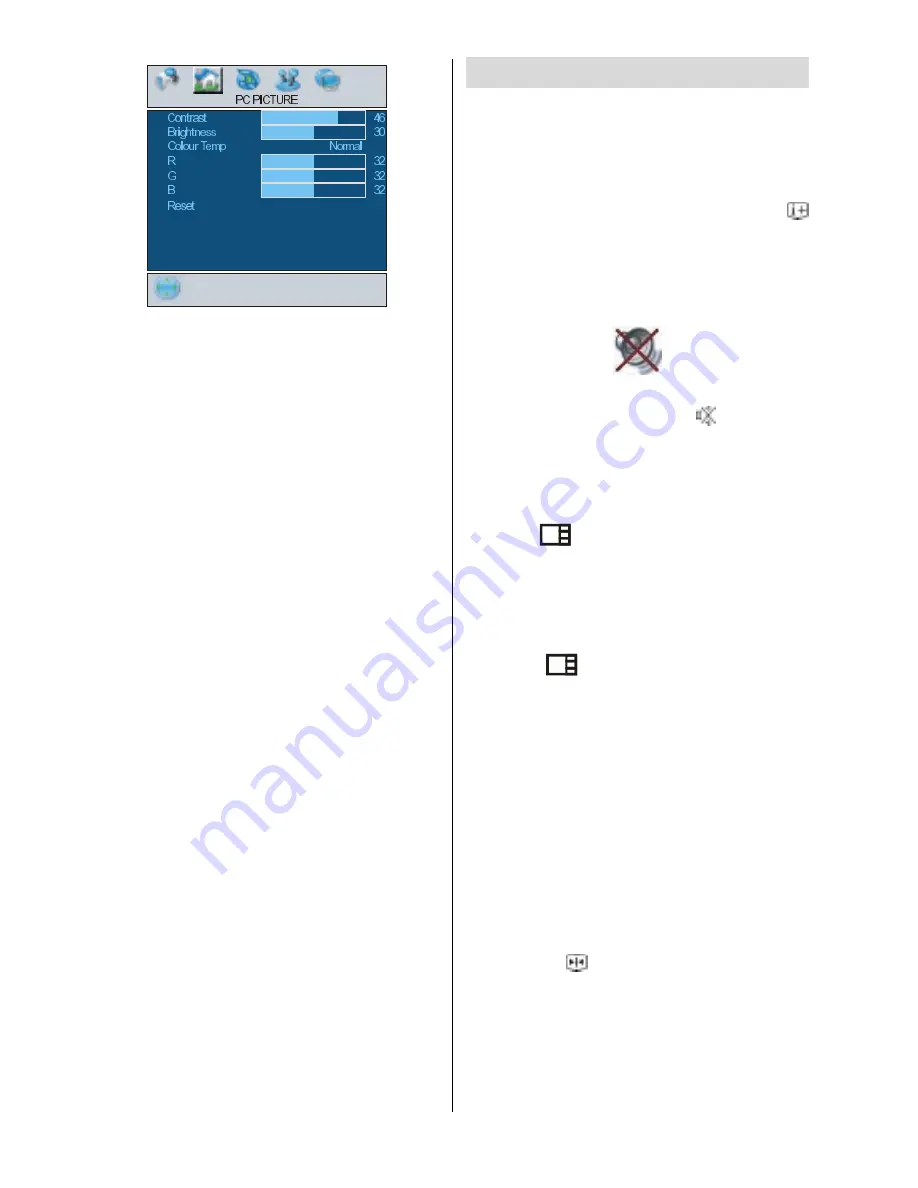
Contrast,  Brightness  and  Colour  Tempera-

ture  adjustments  in  this  menu  are  identical

to adjustments defined in TV picture menu.
When Colour Temp is Manual, you can also

adjust  the  R,G,B  items.  R,  G  and  B  adjust

the  TV  image  colour  in  PC  mode.  You  can

change the TV colour to your desired colour:

R (Red), G (Green), B (Blue)
Select 

Reset 

and


press 

_

 / 

`

 or “

OK

” button

to reset the picture modes to factory default

settings.

Sound Menu

By pressing 

_

 / 

`

 button, select the third icon.

Sound menu appears on the screen.
The  items  in  this  menu  are  described  at

Sound menu

 starting

 page 19

.

Feature Menu

By  pressing 

_

  / 

`

  button,  select  the  fourth

icon. Feature menu appears on the screen.
The  items  in  this  menu  are  described  at

Feature menu

 starting

 page 21

.

Source Menu

By pressing 

_

 / 

`

 button, select the fifth icon.

Source menu appears on the screen.
In  source  menu,  highlight  a  source  by

pressing 

a

  / 

b

  button  and  switch  to  that

mode by pressing 

_

 / 

`

 or “

OK

”button.

Sound in PC mode

• Connect the PC’s Audio output to the TV’s

PC Audio In

 socket with an audio cable.

Other Features

TV Status

Programme  Number

Programme  Name,

Sound  Indicator

 and

  Zoom Mode 

are  dis-

played on the upper right side of the screen
when  a  new  programme  is  entered  or 

button is pressed.

Mute Indicator

It  is  placed  in  the  upper  left  side  of  the

screen when enabled.

To  cancel  mute,  there  are  two  alternatives;
the  first  one  is  pressing  the 

  button  and

the  second  one  is  increasing/decreasing

the volume level.

PIP and PAP modes

Press the


 button to switch to PIP mode.

At PIP Mode, a small picture (PIP picture) is

displayed on the main picture.
For  PIP  picture  restrictions,  see  table  on

page 36.
Press the 

 button twice to switch to PAP

mode.
At PAP Mode, two pictures with equal sizes

are  displayed  on  the  screen.  Aspect  Ratios

of the windows are fixed.
When you switch to PAP Mode, Main window

in PIP Mode is displayed on the right side of

the screen.
Source  restrictions  of  PAP  Mode  are  same

as in PIP Mode.

Freeze Picture

You can freeze the picture on the screen by
pressing the   button. At 

PIP

 and 

PAP

 lay-

outs; only the main picture can be frozen.

Содержание 42PD6700U

Страница 1: ...42PD6700U GB Instructions for use ...

Страница 2: ...Position Menu 25 PC Picture Menu 25 Sound Menu 26 Feature Menu 26 Source Menu 26 Sound in PC mode 26 Other Features 26 TV Status 26 Mute Indicator 26 PIP and PAP modes 26 Freeze Picture 26 Zoom Modes 26 Teletext 27 To Operate Teletext 27 To Select A Page Of Teletext 27 To Select Index Page 28 To Select Teletext WithATV Programme 28 To Reveal Concealed Information 28 To Select A Subcode Page 28 To ...

Страница 3: ... 2 RemoteControlButtons ...

Страница 4: ...d in Teletext mode YELLOW Only used in Teletext mode Reveal P Programme Down SLIDE SHOW No function Subtitle PHOTO No Function SWIVEL No Function Aspect ratio Teletext On Off Time Guide for DTT Index Pagefor TV GREEN Only used in Teletext mode RED PAT Picture and Text Freeze On Off Volume Up Down Mono Stereo Dual A B Equalizer Sound Mode _ Cursor Left a Cursor Up Menu On Off AV5 AV5 mode AV4 AV4 m...

Страница 5: ... 4 PLASMATV FRONT VIEW REAR VIEW ...

Страница 6: ...ttons MENU button TV AV button Power cord input S VHS Input Video Input Audio Inputs Headphone Audio Line Outs Subwoofer Out PC Audio Input Aerial Scart 2 AV 2 Scart 1 AV 1 HDMI Input AV 5 Component Audio Inputs Component Video YPbPr Inputs VGA Input CI Slot AV 4 AV 3 ...

Страница 7: ... has PIP PAP PAT functions AVL Automatic Volume Limiting TV Picture in PC When no valid signal is detected after 5 minutes the TV switches itself automatically to stand by mode PLL Channel Search PC Input Support up to SXGA 1280 x 1024 Stereo PC Audio Input Plug Play for Windows 9X ME 2000 XP 3D Comb Filter Audio Line Out Panel Features 42 inch PLASMA display High resolution 1024x1024 Contrast rat...

Страница 8: ...tand with the fixings provided DON T allow electrical equipment to be ex posed to rain or moisture ABOVE ALL NEVER let anyone especially children push anything into holes slots or any other opening in the case this could re sult in a fatal electric shock NEVER guess or take chances with elec trical equipment of any kind it is better to be safe than sorry 1 Power Source The receiver should be opera...

Страница 9: ...STAND BY OR OPERATING WHEN YOU LEAVE YOUR HOUSE nal one Unauthorised substitutions may re sult in fire electrical shock or other hazards 8 Servicing Please refer all servicing to qualified per sonnel Do not remove cover as this may re sult in electric shock 9 Naked Flame Sources Do not place naked flame sources on the apparatus WARNING When the device is not in use for a long time disconnect from ...

Страница 10: ...ert two AA R6 or equivalent type batteries inside Place the batteries in the right direc tions Replace the battery cover NOTE Remove the batteries from remote control handset when it is not to be used for a long period Otherwise it can be damaged due to any leakage of batteries SwitchingTheTVON OFF To switch the TV on Your TV will switch on in two steps 1 Connect the power supply cord to the sys t...

Страница 11: ...arch process is com pleted the following message asking for analogue channel search appears on the screen TV switches to the analogue TV mode To seach for analogue channels select Yes Press the BLUE button to cancel APS if you do not want to delete your existing programme list To continue APS first select the country by pressing _ button and then press the RED or OK button After APS is finalized t...

Страница 12: ...n Menu System section Volume Setting Press the button to increase volume Press the button to decrease volume A volume level scale slider will be displayed at the bottom of the screen Programme Selecting Previous or next programme Press the P button to select the previous programme Press the P button to select the next programme Programme Selecting direct access Press digit buttons on the remote co...

Страница 13: ...llowing message appears on the screen Press or button to highlight the desired option If OK button is pressed while Yes is highlighted the highlighted channel is de leted Selecting No cancels the delete op e r a t i o n Renaming channels To rename a specific channel the channel must be highlighted via pressing or button and then highlight the Edit Name item by pressing or button Press OK to ac tiv...

Страница 14: ...ht each channel you want to add to the favourites list using the and buttons and press the OK button A channel selected as a favourite appears in the main channel list with a favourites icon against the channel name You must then set the Favourite mode to ON in the Configuration menu see page 15 for further details On Screen Help Pressing INFO Button For all menus press the button to dis play the ...

Страница 15: ...irm for deleting all channels and settings By selecting YES and pressing the OK but ton the existing channel table will be de leted After factory settings is loaded First Time Installation menu will be displayed Press the OK button to start installation Af ter search is completed for digital channels a message asking search for analogue channels appears on the screen Press the OK button to search ...

Страница 16: ...disables the favourite channel list mode See Channel List menu Favourites on page 13 Use or button to turn on off favourite mode If the Favourite Mode is on in nor mal operating mode pressing P and P buttons will only navigate through the chan nels that were previously defined as favourites in Channel List EPG Preference Digital terrestrial television channels can broadcast simultaneous Next Now a...

Страница 17: ...ey is displayed There is only one key which is set to 0000 initially Enter lock key If wrong Lock key is entered the following message is displayed on the screen and it is returned back If it is correct the Parental Settings Menu in cluding following items is displayed There you can set reset locking for the Main Menu or the Installation Menu to restrict ac cess If the menu lock is disabled there ...

Страница 18: ...e remote control Set your VCR to correspond with the time set on your TV and select external input refer to your VCR instruction book NB If you switch on your TV whilst the timer recording is active and then switch back to standby the timer recording will be cancelled the timer setting will be deleted and the desi red programme will not be recorded Language Some programmes are broadcast in two or ...

Страница 19: ... fully if reversed The CAM or the TV terminal may be damaged if the CAM is forcefully inserted 3 Connect the TV to the mains supply switch on and then wait for few moments until the card is activated Some CAMs may require the following set up Please set the CAM by entering the IDTV menu Common Interface then pressing the SELECT button CAM set up menu is not displayed when it is not required To see...

Страница 20: ...to decrease colour Colour level can be adjusted between 0 and 99 Hue This item is displayed in picture menu when the TV receives an NTSC signal By press ing a b button select hue Press button to increase hue Press _ button to decrease hue Hue level can be adjusted between 31 and 31 Colour Temp By pressing a b button select Colour Temp Press _ button to choose one of these options Cool Normal and W...

Страница 21: ...Select the desired fre quency by a b button and increase or de crease the frequency gain by pressing _ button Press the button to return to the previous menu Balance By pressing a b button select Balance Press button to increase balance to the right Press _ button to decrease balance to the left Balance level can be adjusted be tween 31 and 31 Headphone By pressing a b button select Head phone Pre...

Страница 22: ...d to increase bass ef fect of the TV set By pressing a b button select Dynamic Bass By pressing _ button set Dynamic bass to Low High or OFF It is not recom mended to select High if listening at high volume levels There is a subwoofer output that can accept an active subwoofer if you wish to create very high levels of Bass 3DS This feature is used to create the impres sion that sound is coming fro...

Страница 23: ...By pressing a b button select Menu Background You can change menu back ground to Translucent or Opaque by press ing _ button Menu Timeout By pressing a b button select Menu Timeout Press _ button to change menu timeout to 15 sec 30 sec or 60 sec Teletext Language By pressing a b button select Teletext Language Press _ button to change Teletext Language to West East Cyrillic Turk Gre or Arabic This...

Страница 24: ...Tune By pressing a b button select Fine Tune Press _ button to adjust the tuning Search By pressing a b button select Search Press _ button to start program search ing The searching will stop when a signal is found You can also enter a frequency value directly by pressing the digit buttons VCR Video Cassette Recorder This item can be seen in all modes except Av 3 and PC If you want to watch a VCR ...

Страница 25: ...rogramme press the YELLOW button Pressing the YELLOW button again erases the selected programme from the programme list and the programmes below shift one up APS Automatic Programming System When you press the BLUE button for APS the following warning screen will be dis played Press the BLUE button to cancel APS if you do not want to delete your existing programme list To continue APS first select...

Страница 26: ...be done with the full screen im age for the proper adjustment H Horizontal Position This item shifts the image horizontally to right hand side or left hand side of the screen Select H Position item by using a b but ton Use _ button to adjust the value V Vertical Position This item shifts the image vertically towards the top or bottom of the screen Select V Position item by using a b but ton Use _ ...

Страница 27: ...in PC mode Connect the PC s Audio output to the TV s PC Audio In socket with an audio cable OtherFeatures TV Status Programme Number Programme Name Sound Indicator and Zoom Mode are dis played on the upper right side of the screen when a new programme is entered or button is pressed Mute Indicator It is placed in the upper left side of the screen when enabled To cancel mute there are two alternati...

Страница 28: ... 16 9 aspect ratio pictures that have been squeezed into a normal picture 4 3 aspect ratio use the Full mode to restore the pic ture to its original shape 16 9 Zoom This zooms up the wide picture 16 9 aspect ratio to the full screen 16 9 Subtitle This zooms up the wide picture 16 9 aspect ratio with subtitles to the full screen Default Zoom Modes 4 3 Use to view a normal picture 4 3 aspect ra tio ...

Страница 29: ...es that can only be displayed on the screen one section at a time Select the required Teletext page Select the required subcode page number by pressing four digit buttons e g 0001 If the selected subcode page is not displayed in a short time press the button TV programme will be displayed on the screen Teletext page number will be displayed on the upper left corner of the screen when the selected ...

Страница 30: ...0p or 1080i sig nals Via The Scart Plasma TV has 2 Scart sockets If you want to connect peripherals e g video decoder etc which have Scart sockets to the TV use SCART 1 SCART 2 inputs If an external device is connected via the Scart sockets the TV will be switched to AV mode automatically Via Aerial Input If you want to connect to your TV peripherals like video recorders or decoders but the de vic...

Страница 31: ...test sig nal under programme number 0 Replace the aerial cable in the aerial socket of your video recorder once you have stored the test signal Camera And Camcorder To Connect To AV Input Connect your camera or camcorder to AV AV 4 input at the rear side of the TV Connect your equipment to the TV via VIDEO yellow AUDIO R red and AUDIO L white inputs You must connect the jacks to the in put using t...

Страница 32: ... 31 AerialConnection ConnectPeripheralEquipment ...

Страница 33: ...he TV re fer to the TV and Video Recorder section If you want to connect more equipment to your TV consult your dealer Connecting Headphones Use the stereo headphone socket at the rear side of the TV to connect headphones Connecting Subwoofer Use Subwoofer Out socket to connect an external active subwoofer to the set to give a much deeper bass effect ...

Страница 34: ...D 2 x 10 POWER CONSUMPTION W max 325 W 3 W Stand by PANEL 42 106 cm visible Screen Size DIMENSIONS mm 0 16 216 PP ISO 13406 2 Pixel fault class Class II DTT Specifications MHEG 5 ENGINE compliant with ISO IEC 13522 5 UKengine Profile1 Object carousel support compliant with ISO IEC 135818 6 and UK DTT profile Frequency range 474 850 MHz Signal level 82 3dBm Transmission standards DVB T MPEG 2 Demod...

Страница 35: ...80x 1024 vertical sync frequency range of 56 85 Hz and a horizontal sync frequency range of 30 69 KHz The following table is an illustration of some of the typical video display modes RUL RQWDO 9HUWLFDO RU N 9HU 0RGH UHTXHQF 5HVROXWLRQ Only available in Full and PAP modes not in 4 3 mode ...

Страница 36: ...y pressing the following buttons on the remote control simultaneously Example To operate HITACHI DVD player press and hold the INFO button followed by the 1 button Note Not all models of the listed brands can be operated using this remote control Note Slide Show Photo Swivel and Rotate buttons have no function ...

Страница 37: ...Appendix C Main and PIP PAP Picture Combinations 36 ...

Страница 38: ...odified by any person other than an Hitachi authorised engineer iii The product serial number has not been removed or altered This guarantee does not apply to product acquired second hand or for commercial or com munal use This guarantee does not cover the replacement of exhausted batteries the adjustment of user controls or aerial alignment Any parts replaced under this guarantee shall become the...

Страница 39: ...u com HITACHI EUROPE S A GREECE HITACHI EUROPE S A HITACHI EUROPE AB SWEDEN HITACHI EUROPE LTD 364 Kifissias Ave 1 Delfon Str 152 33 Chalandri Athens Tel 1 6837200 Fax 1 6835694 Email Gran Via Carlos III 86 Planta 5ª Edificios Trade Torre Este 08028 Barcelona Tel 93 409 2550 Fax 93 491 3513 Email Box 77 S 164 94 KISTA Tel 08 562 711 00 Fax 08 562 711 11 Email Norwegian Branch Office Strandveien 18...

Отзывы: