background image

English   

- 6 -

vice technician has used replacement parts which are

specified by the manufacturer or have the same speci-

fications as the original one. Unauthorised substitutions

may result in fire, electrical shock, or other hazards.

9. Servicing

Please refer all servicing to qualified personnel. Do

not remove the cover yourself as this may result in an

electric shock.

Instructions  for  waste  disposal:

• Packaging and packaging aids are recyclable and

should  principally  be  recycled.  Packaging  materi-

als, such as foil bag, must be kept away from chil-

dren.

• Batteries, including those which are heavy metal-

free,  should  not  be  disposed  of  with  household

waste. Please dispose of used batteries in an envi-

ronmentally sound manner. Find out about the le-

gal regulations which apply in your area.

• Cold cathode fluoresant lamp in LCD PANEL con-

tains a small amount of mercury, please follow lo-

cal  ordinates  or  regulations  for  disposal.


“The  mains  plug  of  the  power  supply  is  used

as  disconnect  device  and  therefore  shall  re-

main  readily  operable.”
Warning

: To prevent injury, this device must be se-

curely attached to the floor/wall in accordance with

the installation instructions.
"The LCD panel is very high technology product with

about  a  million  thin  film  transistors,  giving  you  fine

picture details. Occasionally, a few non-active pixels

may appear on the screen as a fixed point of blue,

green or red. Please note that this does not affect the

performance  of  your  product."
“DO NOT LEAVE YOUR TV AT STAND-BY OR OPER-

ATING WHEN YOU LEAVE YOUR HOUSE”

Before Switching On Your TV

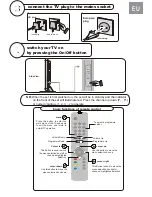
Power Connection

IMPORTANT :

 The TV set is designed to operate on

220-240V AC.  For  this,  an  adaptor  is  used  which

gives 12V DC voltage.

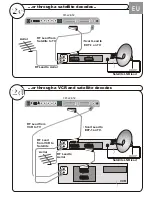
Connections To The Aerial Input Socket

• Connect the aerial or cable TV plug to the Aerial input

socket located at the rear of the TV and connect the

cable plug coming out from the TV out socket lo-

cated on the devices (VCR, DVB etc.) to this socket

as  well.

9+)8+)

5($52)7+(79

&$%/(79

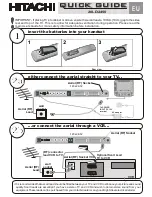
Inserting Batteries In The Remote

Control Handset

WARNING :

 Remote control is batteries are included.

A plastic protector is used to disconnect the batteries

in  order  to  prevent  the  battery  life  from  reducing.

Please remove the plastic protector before the first

use.

Inserting The Battery In The Remote

Control Handset

• Remove the battery cover located on the back of the

handset by gently pulling backwards from the indi-

cated part.

• Insert two

  AAA  (R03) 

or equivalent type batteries

inside.

• Replace the battery cover.

‘’In order to avoid possible accidents,

please do keep children away from the

moving gear located at the rear bottom

side of your TV.”

01-ENG-2016-1243UK-17MB24-HITACHI-(LINE OUT-WO YPbPr)(LG-SDB1)-50098458.p65

11.01.2007, 17:45

6

Содержание 20LD2450

Страница 1: ...GB N S Instructions for use Bruksanvisning Bruksanvisning 20LD2450 ...

Страница 2: ...a VCR Aerial RF Socket Aerial RF Socket wall socket wall socket Aerial RF Lead Aerial RF Lead Optional Scart Lead TV to VCR Aerial RF Socket VCR RF connector lead VCR to TV It is recommended that a scart lead should be fitted between your TV and VCR to enhance your picture and sound quality Scart leads are essential if you have a stereo TV and VCR and wish to obtain stereo sound from your equipmen...

Страница 3: ...IN ANT IN RF Lead to Aerial RF Lead to Aerial RF Lead from VCR to Satellite RF Lead from VCR to TV Satellite LNB lead Satellite LNB lead RF Lead from Satellite to TV Aerial Aerial VCR Scart Lead to on TV EXT 1 Scart Lead to EXT 1 on TV AV 1 TV TV VCR VCR AV 2 TFT LCD TV TFT LCD TV EU ...

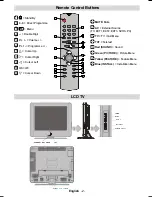
Страница 4: ...lug Side View Programme Up Volume Up Volume Down Programme Down To select a programme number TV AV MENU P CH TV AV MENU P CH Cursor left This Button is used to move the menu selection box left or change a highlighted selection cursor down Use this button to move the menu selection box down cursor up Use this button to move the menu selection box up cursor right This Button is used to move the menu...

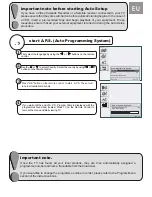
Страница 5: ...re recorded tape and begin playback of your equipment These measures ensure that all your external equipment is tuned in during the Auto Setup procedure Auto Programming System Language Country English U K Check the antenna cable Auto Programming System Automatic tuning runs at 78 State Fine scanning Exit TV First select the language by using the or buttons on the remote control Use the or to sele...

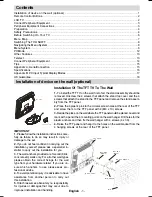
Страница 6: ...the rear of the TFT and screw them to the TFT panel with 4 M4 x 10 screws 3 Decide the place on the wall where the TFT panel would be placed Level and mark with a pencil the 4 mounting points on the wall hanger Drill holes for the plastic anchors and then fix the wall hanger with 4 screws 4 x 30 4 Raise the TFT panel and hang it to the holes on the wall bracket from the 4 hanging screws at the rea...

Страница 7: ...or Up Cursor Right Cursor Left OK OK Cursor Down MUTE Mute AV External Source TV EXT1 EXT2 EXT3 SVHS PC TV TV Quit Menu TXT Teletext Red SOUND Sound Green PICTURE Picture Menu Yellow FEATURE Feature Menu Blue INSTALL Installation Menu 7 9 9 0 1 8 3 79 9 0 18 3 92 80 3 0 18 32 5 21 2 1 5 5 5 9 5 79 9 67 1 723 29 5 ...

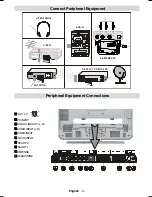
Страница 8: ...l Equipment Peripheral Equipment Connections 17 1 8 2 1 5 9 2 1 1 287 1 287 3 21 8 2 9 2 6 7 7 5 9 5 17 11 0 25 5 DC 12 V 9 9 9 9 PCINPUT AUDIO LINE OUT L R AUDIO INPUT L R VIDEOINPUT S VHS INPUT SCART 2 SCART 1 ANTENNA HEADPHONE ...

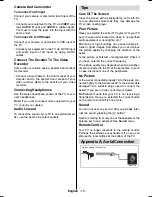
Страница 9: ...conforms to either ASTA or BSI BS1 362 approvals these are easily identifiable by either the or symbols If you are in any doubt about the installation of an extension lead please consult a competent electrician DON Ts DON T continue to operate the equipment if you are in any doubt about it working normally or if it is damaged in any way switch off withdraw the mains plug and consult your dealer Pr...

Страница 10: ...re etc on the power cord mains lead or pinch the cord Handle the power cord by the plug Do not pull out the plug by tugging the cord and never touch the power cord when your hands are wet as this could cause a short circuit or electric shock Never make a knot in the cord or tie it with other cords The power cords should be placed in such a way that they are not likely to be stepped on A damaged po...

Страница 11: ... product with about a million thin film transistors giving you fine picture details Occasionally a few non active pixels may appear on the screen as a fixed point of blue green or red Please note that this does not affect the performance of your product DO NOTLEAVE YOUR TVAT STAND BY OR OPER ATING WHEN YOU LEAVEYOUR HOUSE Before Switching On Your TV Power Connection IMPORTANT The TV set is designe...

Страница 12: ...FN 0HQX LW 79 6281 0 18 3 785 0 18 785 6 0 18 167 0 18 9ROXPH DODQFH 6RXQG 0RGH 9 IIHFW TXDOL HU 0RGH 3 9ROXPH 6WRUH 3LFWXUH 0RGH ULJKWQHVV RQWUDVW RORXU 6KDUSQHVV RORXU 7 HPS 5RRP LJKWQLQJ 3LFWXUH RRP 6WRUH 6OHHS 7LPHU DQJXDJH KLOGORFN 7 2XWSXW 0HQX RORXU DYRULWH 0RGH 3URJUDPPLQJ 3URJUDPPH DQG KDQQHO 6WDQGDUG RORXU 6 VWHP 6HDUFK 9 5 0RGH HFRGHU 6WRUH 36 XWR 3URJUDPPLQJ 6 VWHP 7 W 5HJLRQ 3URJUDP 7...

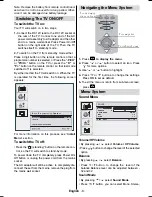
Страница 13: ...nformation on this process see Install Menu section To switch the TV off Press the stand by button on the remote con trol so the TV will switch to stand by mode To power down the TV completely press Power On Off button or unplug the power cord from the mains socket The AC adaptor will still be active to completely dis connect the set from the mains remove the plug from the mains wall socket Naviga...

Страница 14: ...e TV receives an NTSC signal Colour Temp By pressing a b button select Colour Temp Press _ to choose from one of these options Cool Normal and Warm RoomLightning By pressing a b button select Room Lightning By pressing button you can select one of these options Normal Bright and Movie Picture Zoom By pressing a b button select Picture Zoom Use _ buttons to change picture zoom to Auto 4 3 and Wide ...

Страница 15: ...tandard to B G D K I or L L Colour System By pressing a b select Colour System Use _ button to change the colour system to PAL SECAM or AUTO Search By pressing a b select Search Press _ button to start search The search will stop when a signal is found Note If you press the buttons with one step moves a frequency of 0 25 Mhz will be advanced However if you press the buttons continually it will adv...

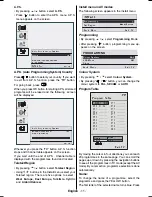
Страница 16: ...menu select your Teletext region There are five options to select West Europe East Europe Turk Gre Cyrillic and Arabic Hebrew Install menu in AV modes The following screen appears in the install menu 167 3URJUDPPLQJ 7 W 5HJLRQ HVW XURSH DFN 0HQX LW 79 Programming By pressing a b select Programming Mode After pressing button programming menu ap pears on the screen 352 5 00 1 RORXU 6 VWHP 3 9 5 0RGH...

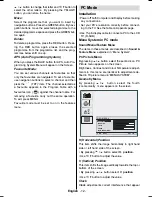
Страница 17: ...de must be set to on in the features menu PC Mode Installation Power off both Computer and Display before making any connections Set your PC s resolution correctly before connect ing to the TV See the table on Appendix page Use 15 pin display cable to connect a PC to the LCD TV D SUB Menu System in PC mode Sound Menu Feature Menu The items in these menus are described in Sound Feature Menu explain...

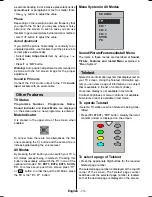
Страница 18: ...ecreasing the volume level AV Modes By pressing the AV button you can switch your TV to AV modes except being in teletext Pressing this button consecutively will switch the TV in one of the optional AV modes TV EXT1 EXT2 EXT3 SVHS PC To remove source osd from screen press TV or button In order the quit the AV Mode press the TV or the P P button Menu System in AV Modes 6285 79 7 7 7 69 6 3 Sound Pi...

Страница 19: ...ripheral Equipment Via The Scart The TV has 2 Scart sockets If you want to connect peripherals e g video decoder etc which have Scart sockets to the TV you can use SCART socket of the TV Note If an external device is connected via the Scart sockets the TV will automatically switch to AV mode If both sockets are employed at the sime time SCART 1 becomes the preferential Via Aerial Input If the devi...

Страница 20: ...Picture Have you selected the correct TV system Is your TV set or house aerial located too close to non earthed audio equipment or neon lights etc Mountains or high buildings can cause double pic tures or ghost images Sometimes you can improve the picture quality by changing the direction of the aerial Is the picture or Teletext unrecognisable Check if you have entered the correct frequency The pi...

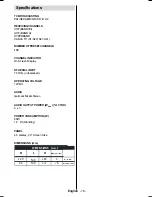
Страница 21: ... TV S1 S20 S21 S41 NUMBEROFPRESETCHANNELS 100 CHANNELINDICATOR On Screen Display RF AERIAL INPUT 75 Ohm unbalanced OPERATING VOLTAGE 12V DC AUDIO German Nicam Stereo AUDIO OUTPUT POWER WRMS 10 THD 2 x 3 POWER CONSUMPTION W 60W 1 2 W Stand by PANEL 4 3 display 20 Screen Size DIMENSIONS mm HLJKW NJ LWK IRRW LWKRXW IRRW 0 16 216 PP ...

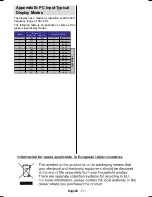
Страница 22: ...isplay has a maximum resolution of 800 x 600 frequency range of 56 75 Hz The following table is an illustration of some of the typical video display modes RUL RQWDO 9HUWLFDO 0 9 0 9 9 6 9 6 9 6 9 6 9 6 9 6 9 6 9 6 9 6 9 6 9 6 5HVROXWLRQ UHTXHQF 2 3 7 2 1 0RGH ...

Страница 23: ...ined or modified by any person other than an Hitachi authorised engineer iii The product serial number has not been removed or altered This guarantee does not apply to product acquired second hand or for commercial or communal use This guarantee does not cover the replacement of exhausted batteries the adjustment of user controls or aerial alignment Any parts replaced under this guarantee shall be...

Страница 24: ...erservice italy hitachi eu com france consommateur hitachi eu com Digital Media Group 94 Quai Charles de Gaulles 69006 Lyon HITACHI EUROPE LTD Kodanska 46 101 00 Praha 10 CZECH REPUBLIC Tel 234 064 512 Fax 234 064 213 Email info hitachi be dmg eeu hitachi eu com HITACHI EUROPE S A 364 Kifissias Ave 1 Delfon Str 152 33 Chalandri Athens GREECE Tel 1 6837200 Fax 1 6835694 Email HITACHI EUROPE S A Gra...

Отзывы: