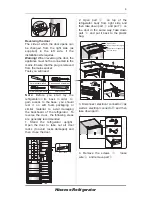
Hisense Refrigerator
Special
flange
self-tapping
screws
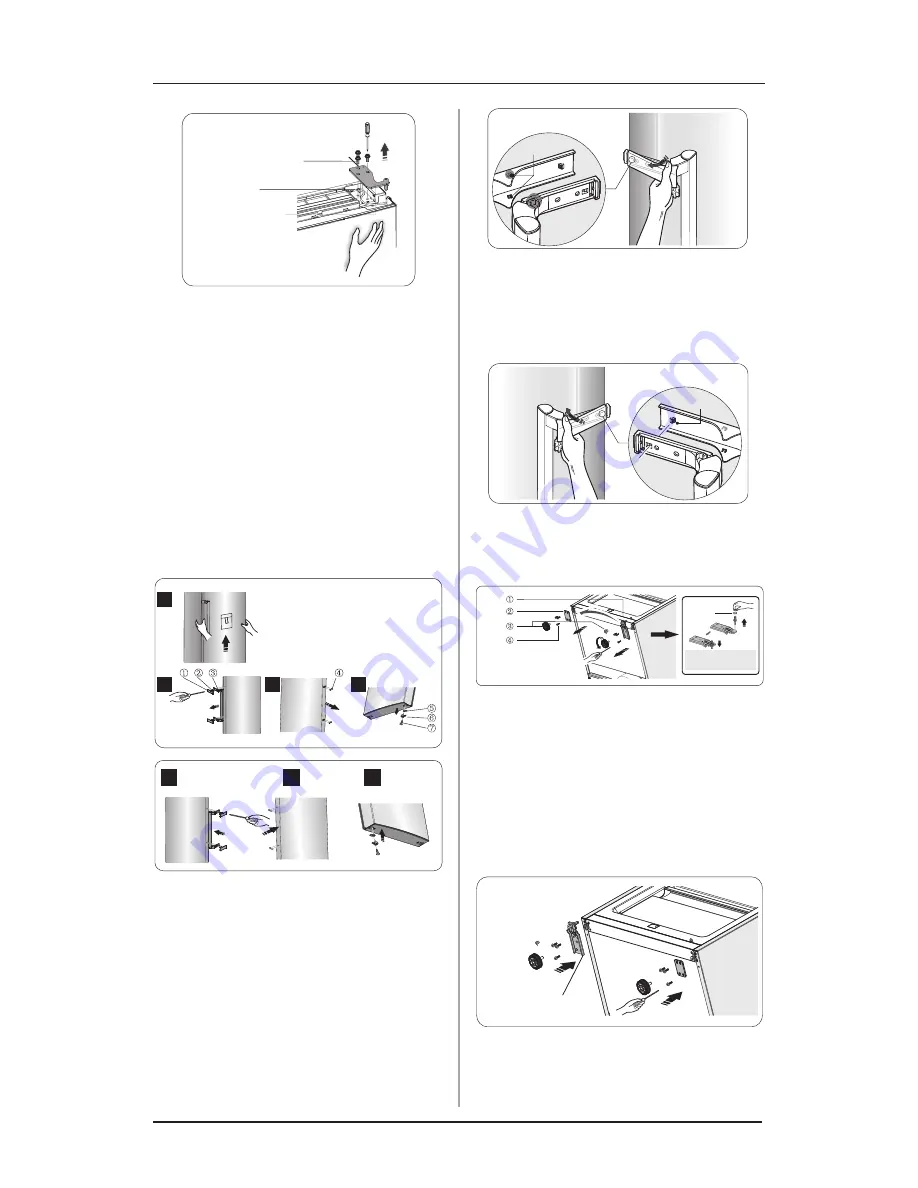
Earth wire
①
②
③
Upper hinge part
Note:
Please hold the door by hand
during step 4 to prevent door dropping.
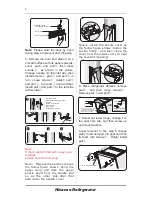
5. Remove the door and place it on a
smooth surface with its panel upwards.
Lever
part
①
and
part
④
,then loose
screws
②
,
as shown in the picture.
Change
handle
③
to the right side, then
install screws
②
, part
①
and part
④
in
turn. Loose screws
⑦
, detach part
⑥
and part
⑤,
turn part
⑥
over and
then
install part
⑤
and part
⑥
to the left side
with screws
⑦.
Note 2
:
Install the handle cover as
the follow figure shows :button the
buckle firstly , and then close the
cover from the inside until you hear
the sound of "popping" .
Note
1 :
Remove the handle cover as
the follow figure shows :bend
the
upper
wing
and
take
the
upper
buckle
apart
from
the
handle
,
and
so
as
the
other
side
,
after
that
take
down
the
handle
cover
.
buckle
buckle
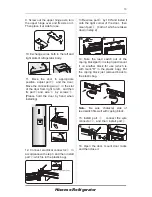
6. Place refrigerator flatwise, remove
part
③
and then loose screws
④ .
Remove part
②
and part
①.
Note: washer may
stick to door.
washer
②
Front
foot
fixed
board
④
Self
-
tapping
screws
③
Adjustable
bottom feet
part
①
Lower
hinge
part
(
right
)
7. Screw out lower hinge, change it to
the near hole site, and then screw up
and mount washer.
8.Just remount to the step 6,change
part
①
to left and part
②
to right and then
fix them with screws
④ .
Finally install
part
③.
Lower
hinge
part (left)
1
2
3
②
Special
self-tapping
screws
③
Handle
①
Handle
covers
④
Screw
hole
covers
⑤
Door
holder
⑥
Stop
block
⑦
Self-tapping
screws
1
2
3
4
9
Note:
If the model is fitted with 'easy open'
handles,
please note the following.
Содержание RL462N4EC1
Страница 1: ...RL462N4EC1 ...
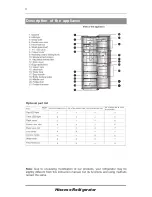
Страница 11: ...Hisense Refrigerator Description of the appliance 11 RS 47WL4SIB CLA1 002 RL462N4EC1 ...
Страница 21: ......


