


12
Adjusting the picture
To adjust the picture:
1
Press
MENU
. The
Main
menu opens.
2
Press
ENTER
or . The
Picture
menu opens.
3
Press or to highlight an option, then press or to access
the option, and press or to adjust the option. You can select:
Picture Mode
—Selects the picture mode. You can select:
Vivid
(a bright and vivid picture)
Standard
(a standard picture)
: You can also press
PICTURE
on the remote control to select the
Backlight
–Adjust backlight to suit light conditions in the room.
Under low room illumination, the use of lower backlight settings
is recommended for reduced power consumption and extended
life of the flat panel of your television.
Saturation
– Adjusts the intensity of the colours.
Sharpness
–Lets you increase the sharpness level for clearer
images or decrease the sharpness level for smoother images.
Color temperature
–Lets you change the color
temperature. You can select the color temperature from
three options:
Cool, Normal
or
Warm
.
4
Press
MENU
to return to the previous menu, or press
EXIT
to
close the menu.
Choosing the display format (aspect ratio)
To choose the display format:
1
Press
ASPECT
on the remote control repeatedly to cycle through
the available display formats. Options include:
Normal
—Selects the 4:3 aspect ratio to show a picture
with black bar on both right and left hand side.
Zoom1
—Enlarges the picture but may crop the top and
bottom of picture. And has less black bar on right and left
Full Screen
—Shows a full-screen picture.
Panorama
—Stretches the picture at the edges, but
maintains a good aspect ratio at the center of the screen.
Adjusting the sound
To adjust the sound:
1
Press
MENU
. The
Main
menu opens.
2
Press
or
to
highlight
Audio
, then press
ENTER
or . The
Audio
menu opens.
3
Equalize
4
Press
MENU
to return to the previous menu, or press
EXIT
to
close the menu.
Selecting the audio mode
To select the audio mode:
Press
SOUND
on the remote control one or more times to cycle
through the available sound modes. Options include:
Standard
e
r
u
t
ci
P
e
r
u
t
ci
P
picture mode.
–Lets you increase or decrease the contrast of the
picture. Increase the contrast to adjust the white areas of the
picture or decrease the contrast to adjust the black areas of
the picture.
Contrast
–Lets you increase or decrease the brightness of
the picture. Increasing the brightness can add more light to
dark areas of the picture, while decreasing the brightness
can add more darkness to light areas of the picture.
Brightness
Note
ENTER
Press or to highlight an option, then press or to access
the option, and press or to adjust the option. You can select:
ENTER
Balance
—
—
Adjusts the balance between the left and right
audio channels.
than Normal aspect mode.
Note:
In analog TV mode, allows you to select all aspect modes.
In digital TV mode, allows you to select Normal mode and full-
screen mode. Zoom and panorama modes are not available.
(for normal programs).
Music
(for music programs).
Clear Voice
(for music programs).
Custiom
(for a customized sound mode).
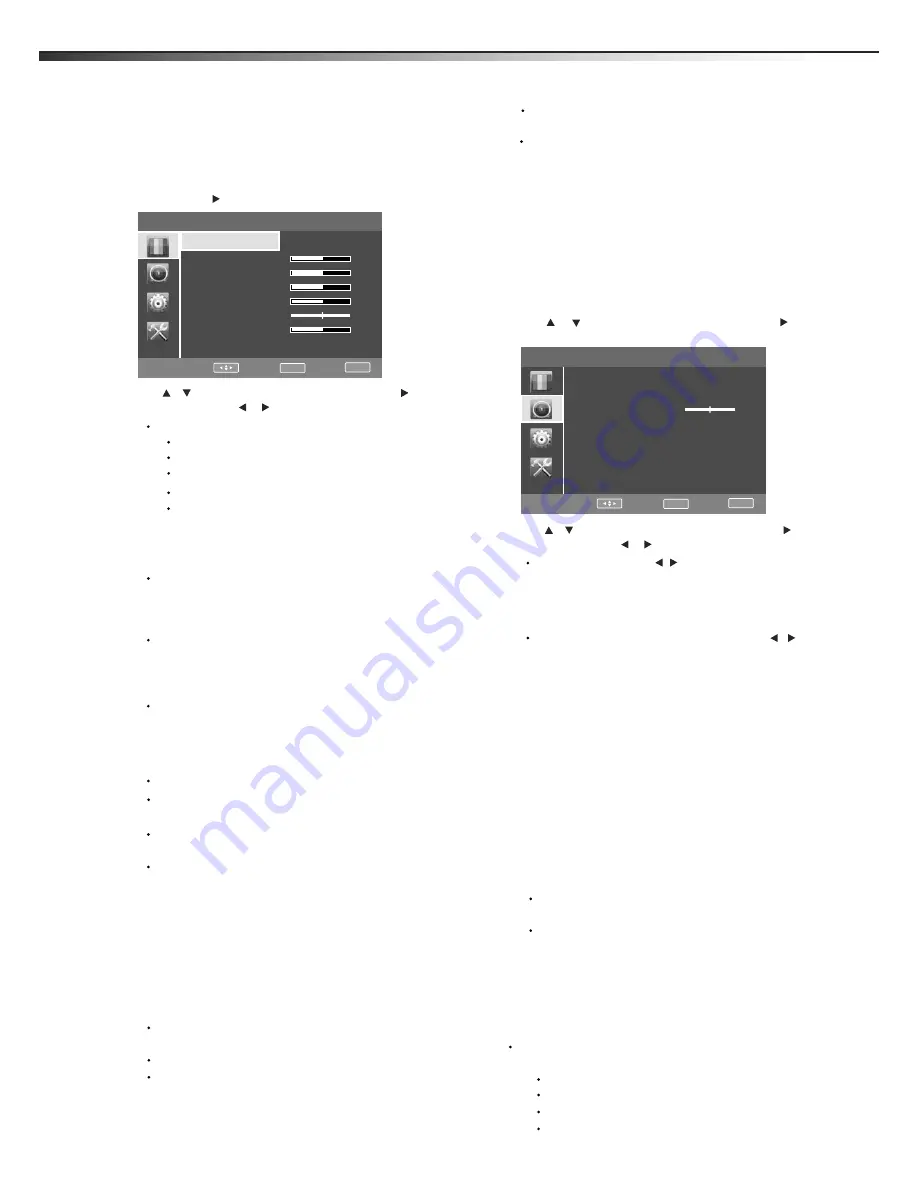
Adjusting picture and sound
LTDN40V86MH
Picture TV
.
.
.
.
.
.
.
Picture mode
Standard
Contrast
Brightness
Backlight
Saturation
Hue
Sharpness
Color temperature
Normal
50
50
5
50
0
5
Move:
Enter:
OK
Exit:
EXIT
Game
(a finely detailed picture)
ciema
(the brightness rightness is decreaced)
power saver
(decrease the backlight for to save energy)
Hue
– change the picture quality when there is a NTSC signal at
AV source.
Sound TV
Sound mode
Standard
English
Equalizer >>>
Balance
Digital audio language
0
Move:
Enter:
OK
Exit:
EXIT
— Press [ / ] to select between 4 different
pre-adjusted sound modes:Custom,Standard,music,and Clear
voice. The User mode preserves your preferred sound settings
after using the Equalizer available under the Sound submenu.
Sound Mode
—Set the users' mode of sound, press [
/ ] button
to select the sound component of 120HZ, 500HZ, 1.5K, 5K, and 10K.
Press [
▲
/
▼
] button to weaken or enlarge the sound to the
proper value.
The sound Equalizer can also be easily configured for most frequent
situations by pressing the [SOUND] button on your remote controller.
Preset settings are provided for User, Music, Standard and Speech
conditions. Standard mode delivers a flat frequency response, which
preserves the natural characteristics of the original sound. In Music
mode the extremes of low and high frequencies are accentuated to
enhance musical instrument reproduction. The opposite effect is
accomplished in Speech mode where very low and high frequencies
are attenuated to improve the reproduction and intelligibility of the
human voice.
In TV mode, you can adjust:
In TV mode, you can adjust:
Zoom2
—Enlarges the picture but may crop the top and
bottom of picture. And no black bar on right and left.
Digital audio language
In digital TV mode,allows you
to select the audio language for a program. In analog TV mode,
you can't see this option
Содержание LTDN40V86MH
Страница 1: ...ES Innovation for life MODEL NO LTDN40V86MH HOSPITALITY LCD TELEVISION...
Страница 21: ......


