Hisense K600HK3D series Скачать руководство пользователя страница 19

USER MANUAL       

Basic Features


14

1. Use an AC cord to connect the TV's Power input jack 

to AC outlet.

2. Press  the 

Power button 

 on the TV set. When the 

TV is on, press the 

Standby button 

 on the remote 

control, and the TV will enter Standby mode. Press 
this button again, and you can watch TV normally.

3. Press  the 

Power button 

 again to turn off the TV.

1

Press 

Setting   button

, select the 

More

 option to open 

the menu.

2

Press 

▲/

/

/


to select a menu option, then press 

OK 

to enter the menu.

3

In each level of menu, you can select the following 
operations according to different menus: 

Press

/


or 

▲/


to select an item

Press 

OK 

to confirm operation or enter the submenu. 

Press

/


to adjust the value

Press

▲/


to select the item

4

Press 

Return   button

 to exit the current menu.

1. Press  the

 +/

(or 

CH +/▲, CH 

-

/▼

) on the


remote 

control / TV to change the channel.

2. Press  the 

 /   

(or 

VOL+/

, VOL-/

) on the


remote 

control / TV to adjust the volume.

3. Press 

0~9 buttons

 on the remote control directly to 

select the channel.

NOTES

In order to save power consumption, set the TV in 

Standby mode if you do not watch TV for a short 

time, if you do not watch TV for a very long time, 

shut down the main power of the TV.

If the TV is turned off , to turn it on again, please 

wait 5 seconds at least in case the abnormal 

phenomena occurred.

NOTE

Changing the channels can also be achieved by 

directly pressing the programme No. If you want 

to choose the programme No. from 1~9, press 

Numeric buttons

 directly. If you want to select a 

programme No. that double-digit or three-figure, the 

time between twice pressing the numbers should 

not be more than 3 seconds.

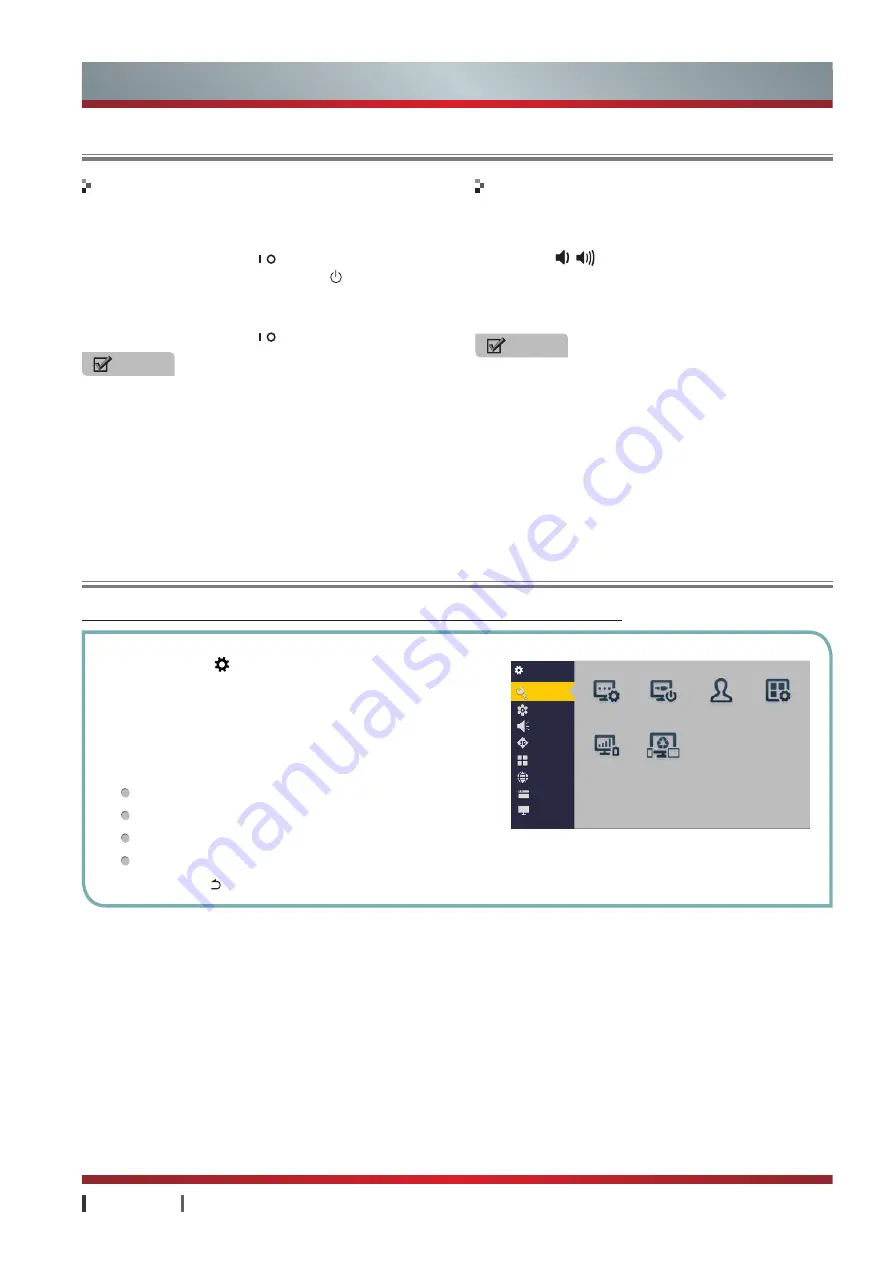
Menu is a easy interactive window to achieving most of the basic functions of the TV.

Basic Features

Using the TV for the First Time

Using the Menu

Turning the TV On or Off

Changing the Channel and Volume

  Wizard 

Switch-on... 

Account  App Manag...

  Eco Setting  Multi-scree... 

 Settings

General

Picture
Sound
3D
Channel
Network
System
About

All manuals and user guides at all-guides.com

Содержание K600HK3D series

Страница 1: ...HK3D series RSAG2 025 4136SS English USER MANUAL Before using the TV Please read this manual thoroughly retain it for future reference All manuals and user guides at all guides com a l l g u i d e s c...

Страница 2: ...ssume any liability for any accident arising from violation of the matters of attention and instruction on use in this manual The TV set is a Type II equipment and used without requiring grounding Att...

Страница 3: ...ode Multimedia Port is trademarks registered by SRS Labs Inc SRS Labs Inc have approved the product to apply TruSurround HD technology Characteristics Special Statement This statement is applicable th...

Страница 4: ...io power Standard Receiving systems RF AV Channel range Environmental conditions Antenna input DTV specification Analogue Tune Component Input The level charactaristics of terminals Interface name Int...

Страница 5: ...must pay attention to the following items Alerts Before using the product please read the following clauses carefully Product Watching TV Others Power and signal Maintenance LCD display instruction an...

Страница 6: ...TV Monitor or VCR 11 Connecting an Ex Speaker 12 Connecting a Headphone 12 Connecting a USB Device 12 Connecting a TF card 13 Selecting the Input Source 13 Basic Features 14 Using the TV for the First...

Страница 7: ...with your TV If any item is missing contact your dealer Getting Started Accessories List Installing the Stand NOTE Install the base stand with the provided screws in the accessory bag in case of caus...

Страница 8: ...d to overheating of the TV and may cause damage to your TV or cause fire Leave enough space around the set Install with stand Install on the wall Leave enough space around the set Wall Wall Air circul...

Страница 9: ...e position of symbol on the entity remote control code matching In the home page and menu operation you can use the arrow button to select part of the interfaces and applications does not support the...

Страница 10: ...ute button Return button Home button Micro USB port OK button OFN Mute button Volume increasing button Code matching indicator Numeric buttons button button button Quantity description Charging the ba...

Страница 11: ...left mouse button to achieve single clicking operation In the home page operation and browsing the webpage you can use air mouse and part of the interfaces and applications cannot be supported tempor...

Страница 12: ...rogram from the external equipment you should choose the connection mode corresponding to the device and use the remote control to select the correct signal source See Connections 3D 2D NOTE 3D mode o...

Страница 13: ...pter to match with the port in such case Illustrations for reference only TV Terminal Connections ETHERNET COAXIAL VGA USB HDMI VIDEO IN COMPONENT HEADPHONE AUDIO OUT AUDIO IN AV USB USB HDMI HDMI Ant...

Страница 14: ...th lower version may be compatible supported by this machine but it may not be able to achieve the best visual effects Some lower versions of the HDMI cables may result in screen flashing or no displa...

Страница 15: ...is connected to external devices with Comp Video Adapter provided The audio signal are connected to external devices with Audio Adapter provided Please make sure that the audio connects otherwise the...

Страница 16: ...requency Making Connections NOTES The audio signal are connected to external devices with Audio Adapter provided When used as TV monitor please read the Attention on still images of the TV carefully E...

Страница 17: ...he single USB jack is connected with external devices and the total current should be no more than 1200 mA when all the USB jacks are connected with external devices Hisense warranty does not cover th...

Страница 18: ...13 Input Jacks Input Source Connections Selecting the Input Source EXTERNAL DEVICE TV JACK Connecting a TF card Making Connections TF card TF All manuals and user guides at all guides com...

Страница 19: ...abnormal phenomena occurred NOTE Changing the channels can also be achieved by directly pressing the programme No If you want to choose the programme No from 1 9 press Numeric buttons directly If you...

Страница 20: ...ht Stereoscopic Frequency Comfort Frequency Custom Multi screen Service Picture Mode 3D NR NOTE If the TV has no signal this option is not available Zoom Full screen Standard Zoom 1 Zoom 2 Smart Zoom...

Страница 21: ...the Geometry varies with different source H Position V Position H Size V Size Clock Phase Auto Adjust Display Area Brightness Contrast Color Sharpness Color Temperature Hue NOTE Adjust the Hue for NTS...

Страница 22: ...tired or dizzy please stop watching TV and have a rest 2 Kids at or below 6 years of age should not view 3D video as they are incomplete in visual development The parents shall watch and consult whet...

Страница 23: ...nning Manual Scanning OK OK button Return button Search channel in ATV signal Video System Audio System Manual Scanning OK OK button Return button Auto Scanning Channel Edit Rename Delete Move Skip OK...

Страница 24: ...ADSL Modem Basic Features Network WB PPPoE OK Wireless Network OK OK OK Manual Setting OK OK Added network management OK Soft AP Settings NOTE The default SSID is set randomly and the password is 123...

Страница 25: ...ay Network Information System About Input Method Location Language Retail Mode Sleep Boot LED Standby LED Boot Music Subtitles Settings TV Info Upgrade TV Name Restore Factory Settings All manuals and...

Страница 26: ...fill in the correct mailbox this will be the only way to retrieve your password Forgot Password Account inquiries and recharge Account inquiries Recharge NOTE You have to login Hisense account before...

Страница 27: ...ns from the HiMarket as any problem with applications at stores not designated by Hisense is not in the scope of warranty Menu is an easy interactive window to achieving most of the applications of th...

Страница 28: ...d Upload Download Manager Cycling Mode Play List button button Delete Detail Information Open the Multi screen Service Setting button More General Multi screen Service NOTES PC Android mobile device I...

Страница 29: ...ward button button button Previous Next button Exit Return button Menu Instructions Cute button Upload Download Upload Download Manager Play List button OK Audio Track Subtitle Advanced Settings Play...

Страница 30: ...the files or this may damage your system files 5 Don t press other buttons repeatedly when the system is processing your last operation otherwise it will affect the processing speed 6 Multi system wor...

Страница 31: ...ing wrong with your TV you can try turning off the TV and then restart it You can also operate according to the following chart If the problem still cannot be solved please contact the professional te...

Отзывы: