background image

24


Basic Operation 


Turning On the Tablet 

Note: This device has been equipped with Android 7.1 system at the factory, so user need not perform 

Android setup again before using for the first time. 

Press and hold the Power button to turn on your tablet. The lock screen appears.   
Now the tablet is ready for use. 

 
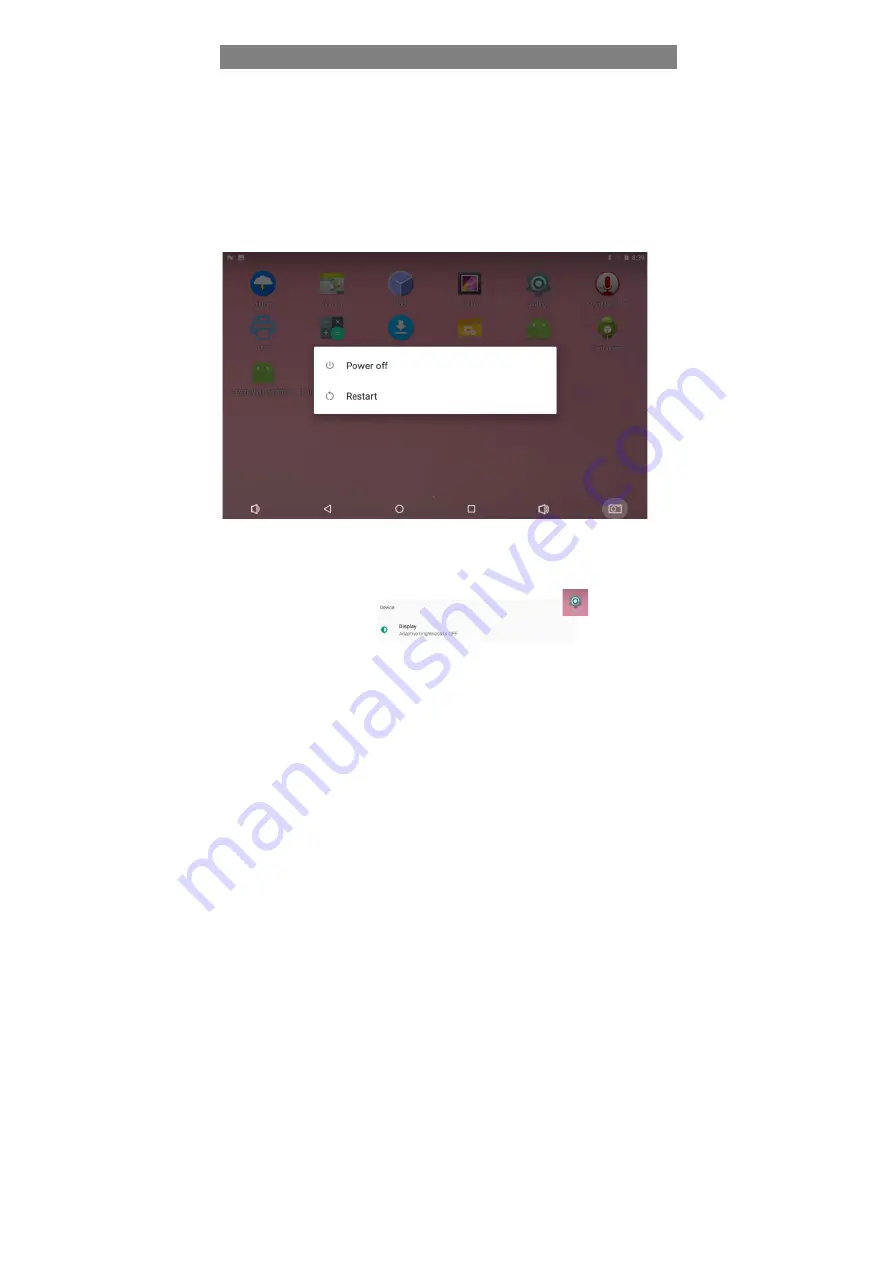
Turning Off the Tablet 

1.


Press and hold the Power button for at least 4 seconds. 

2.


    Touch 

Power off/Restart

 to turn off/restart the tablet.     


Turning On/Off screen 

Usually, user can press once the power button to turn on/ off the screen display

.   

You can also set the automatic screen sleep: 

1.


Slide up to bring up the main menu and click the Settings button


2.


Click the display item

.


3.


Open the automatic screen sleep to set the time of the automatic screen sleep. 


Connecting to a wireless network 
 

Содержание HM626R

Страница 1: ...HM626R Tablet POS User Guide ...

Страница 2: ... will not occur in a particular installation If this device does cause harmful interference to radio or television reception which can be determined by turning the device off and on the user is encouraged to try to correct the interference by one or more of the following measures Reorient or relocate the receiving antenna Increase the separation between the device and receiver Connect the device i...

Страница 3: ...dles should be placed on the apparatus Attention should be drawn to environmental aspects of battery disposal Use the apparatus in moderate climates We are not responsible for damage or lost data caused by malfunction misuse modification of the device or battery replacement Do not attempt to disassemble repair or modify the product This will invalidate the warranty If the device will not be used f...

Страница 4: ...the user to the presence of important operating and maintenance instructions in the literature accompanying the device Correct Disposal of this product This marking indicates that this product should not be disposed of with other household waste in the EU To prevent possible harm to the environment or human health from uncontrolled waste disposal recycle it responsibly to promote the sustainable r...

Страница 5: ...5 Features Functionality Tablet Front view 1 Power indicator Indicates the battery charge status 2 Front camera Capture a front view picture or record videos 3 Tounch screen Support with multi touch ...

Страница 6: ...barcode scanner or 2 D scanner optional Tablet Left side view 1 AC power apdapter jack Connects to theAC power adapter 2 USB 2 0 port Connects to USB devices 3 Micro USB port Connects to USB devices 4 Nano card slot Accommodate Nano card 5 Micro SD card slot Accommadate micro SD card 6 Volum button Adjust the volum level 7 Power button Press and hold on to turn on or turn off the devices ...

Страница 7: ...ew 1 Dock latch Attaches the table to the dock keeping the tablet fixed in place 2 Pogo pin connector Connects the tablet to the dock 3 Micro HDMI port Connects the tablet to a TV or an external display Tablet Rear view ...

Страница 8: ...udio output 7 Lock latch Lock the tablet on the smart dock Notes Stander models do not support RFID please refer to the actual product Charging Dock Standard Attach the tablet to the dock Top view Rear view 1 Charging Dock 2 Dock latch Attaches the table to the dock keeping the tablet fixed in place 3 Pogo pin connector Connects the tablet to the dock 4 AC power apdapter jack Connects to the AC po...

Страница 9: ...t 4 Dock latch Attach the tablet to the dock keeping the tablet fixed in place 5 Pogo pin connector Connects the tablet to the dock 6 Lock tongue Lock the tablet on the Smart dock 7 Cash Drawer port Access CashDrawer 8 AC power adapter jack Connects to the AC power adapter 9 COM RS232 COM 10 Ethernet port Connects to cable 11 USB 2 0 port Connects to USB devices ...

Страница 10: ...tery Charge the device when the battery level is low 1 Plug the power adapter into the DC In socket 2 Open the port cover on the left 3 Connect the power adapter to an electrical outlet and charge the tablet until the battery is fully charged Caution Charge the battery in an ambient temperature of 0 C to 35 C Use only the supplied power adapter to charge your tablet Using unauthorized power adapte...

Страница 11: ... 3 Touch Eject XXXX SD Card A message appears confirming that the micro SD card can be safely removed If a warning message appears stating the micro SD card cannot be removed ensure all data transfers involving the micro SD card are complete 4 Press on the micro SD card to release it 5 Slide the card out after it pops out from the micro SD card slot Caution Removing the micro SD card while it is i...

Страница 12: ...en plane like the top of a desk 2 Connect the tablet to the base connector aligning the Pogo pin jack and the positioning slots 3 To separate the tablet from the base connector hold the base connector with one hand then grab the top edge of the tablet and drag it apart ...

Страница 13: ... for use Turning Off the Tablet 1 Press and hold the Power button for at least 4 seconds 2 Touch Power off Restart to turn off restart the tablet Turning On Off screen Usually user can press once the power button to turn on off the screen display You can also set the automatic screen sleep 1 Slide up to bring up the main menu and click the Settings button 2 Click the display item 3 Open the automa...

Страница 14: ... Fi connection Connecting to a wireless network 1 Select a wireless network clik the network name from the list 2 Input the password if necessary then touch Connect to start connecting to the Internet Connecting to Bluetooth devices 1 Turn on Bluetooth searching for available Bluetooth devices automatically 2 Select the device from the Bluetooth devices list and click pair ...

Страница 15: ...26 ...

Страница 16: ... can disable automatic screen rotation and lock the screen in portrait or landscape mode Note Some apps may not support automatic screen rotation and are designed to work only in one orientation 1 Change the screen to the desired orientation 2 Slid the screen from side to center then you will access to below interface you may touch Auto rotate icon to lock or unlock screen rotation ...

Страница 17: ...ur finger on an item on the screen 2 Keeping your finger in contact with the display move your fingertip to the desired location 3 Take your finger off the display to drop the item in the desired location Move items such as images and icons on the screen Swipe or Slide Move your finger in a vertical or horizontal direction on the display Scroll through the Start screen web pages lists entries phot...

Страница 18: ...ot clear A certain vertical column of the printed page is not clear Paper feeding and unloading are noisy The steps for cleaning the print head are as follows a Turn off the power of the printing unit turn the opening wrench over and pull out the rubber roller b If you have just finished printing wait for the print head to cool down completely c Use an alcohol cotton ball should be wrung out to wi...

Страница 19: ...int head with your hands and metal objects and do not use tweezers or other tools to scratch the print head printing rubber roller and sensor surface Do not use organic solvents such as gasoline and acetone After the cleaning solution is completely evaporated turn on the power to continue printing The maintenance period is recommended not to be longer than 1 month ...

Страница 20: ...devices headphones and speakers from the tablet and from their electrical outlets 3 Moisten a soft lint free cloth with either water or a display cleaner and wipe the surface of the tablet until it is clean Do not allow water from the cloth to seep down to the tablet ports or buttons Caution 1 To avoid damaging the tablet or display do not spray cleaning solution directly onto the display Only use...

Страница 21: ...resolution Resolution 1280 800 Pixels 10 1 inch LCD Battery pack Rechargeable lithium battery 11000 mAh AC power adapter AC power adapter for pad and Charging dock Input 100 240 V 50 60 Hz AC Output 12 V 24W AC power adapter for Smart dock Input 100 240 V 50 60 Hz AC Output 24 V 90W I O Ports Pad Combo audio jack 1 Micro HDMI port 1 Micro USB 2 0 port 1 USB 2 0 port 1 Micro SD card slot 1 I O Port...

Отзывы: