Monitoring Temperature Changes
23
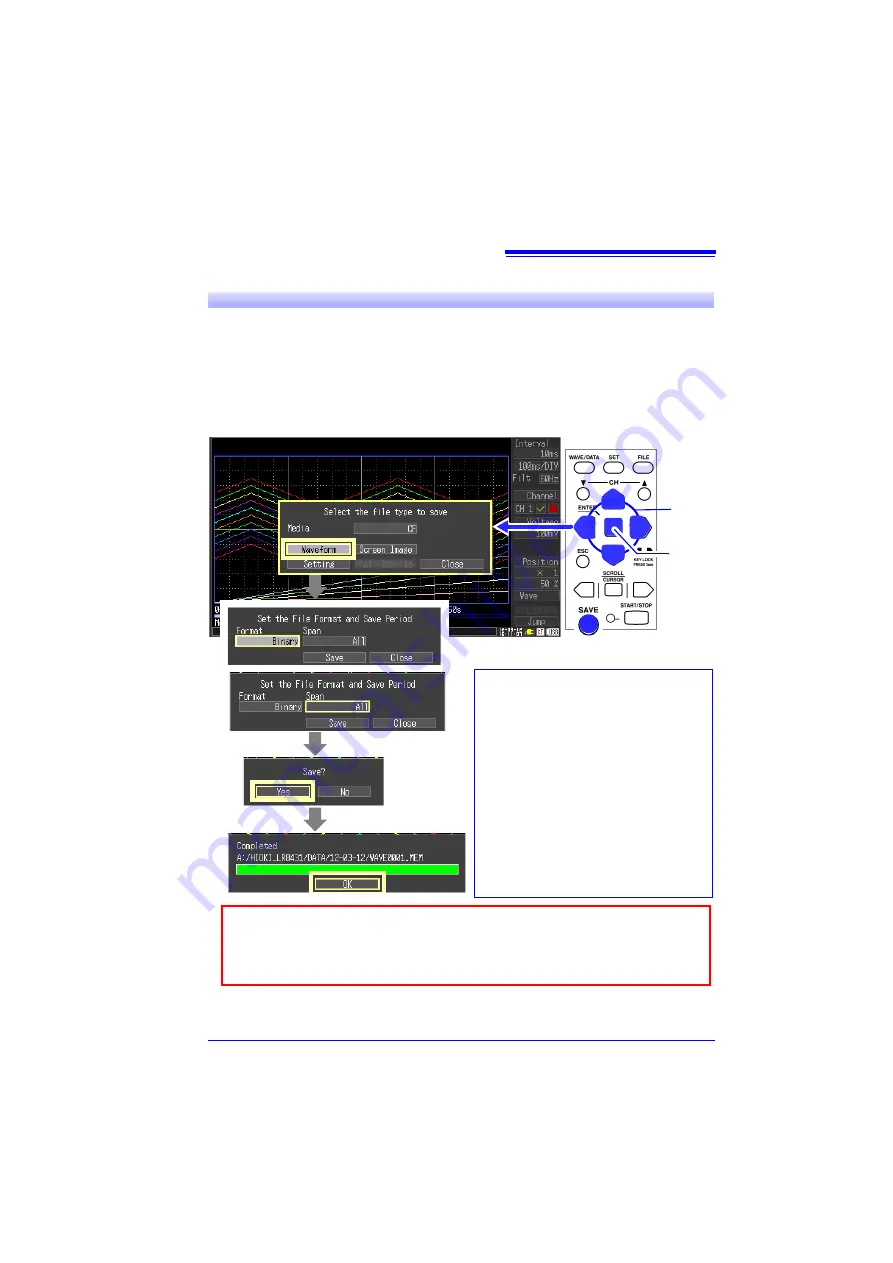
This section describes how to save data after measuring.
Two methods are available for saving measurement data to a CF card or USB flash
drive after recording:
[Select & Save]
and
[Quick Save]
.
Press the
SAVE
key and select
[Select & Save]
to set the saving data type and make
other settings.
[Quick Save]
causes data to be saved immediately when the
SAVE
key is pressed, according to the settings made beforehand.
In this case, we use the default
[Select & Save]
method to save waveform data.
Refer to "Analysis" (p. 26) for analysis methods.
4
Saving Data After Measuring
1
2
Select
Apply
Displays the Save
dialog.
• To view waveforms on the HiLogger or
with the Logger Utility, set the [Format] to
[Binary].
• To save the span defined by the A/B cur-
sors, specify the span before pressing the
SAVE
• To capture a screen image (screen shot),
display the screen to be saved, and select
[Screen Image]
in the dialog that appears
when you press the
SAVE
key.
• You can confirm the saved data on the
File screen by pressing the
FILE
key (p.
30).
For long-term measurement, set the Auto-Save setting to
[Waveform(realtime)]
When
[Cont]
is enabled, data recording is limited to the size of the HiLogger’s internal
memory.
To avoid data loss, we recommend using both the AC adapter and battery pack.
www.
GlobalTestSupply
.com
Find Quality Products Online at:


