background image

9

―――――――――――――――――――――――――――

Chapter 5 3286 (-20) Settings

――――――――――――――――――――――――

NOTE

5.2 DATA OUTPUT SETUP Mode

is displayed, then turn the power off.

is displayed, and the option setting reverts to

its default.

The digits may not flash, depending on the version

of software used for the 3286 (-20). When using a
version of software for which the digits do not flash,
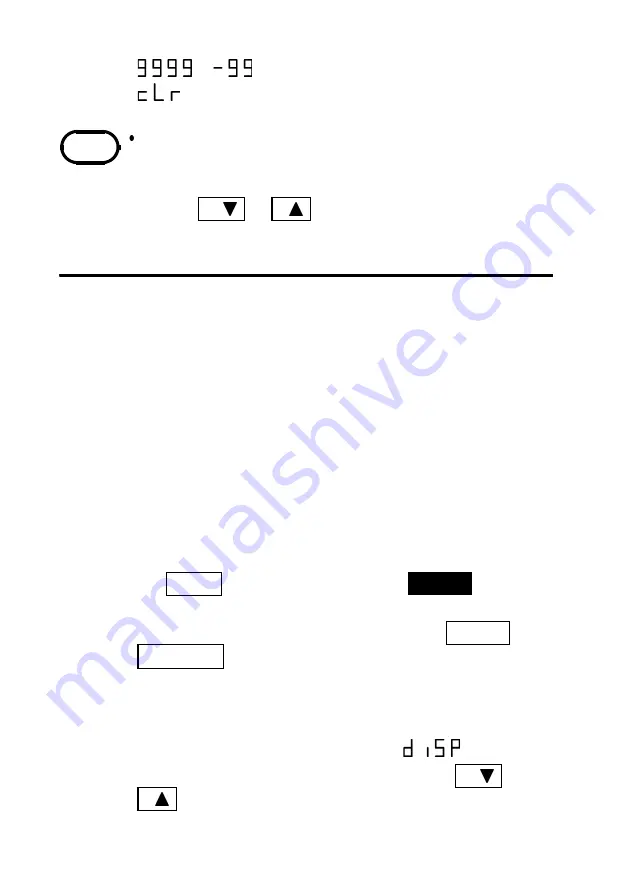
use the

U/

or

I/

key to change the input type

setting.

The DATA OUTPUT function must be enabled in
the DATA OUTPUT SETUP mode.
The DATA OUTPUT SETUP mode also allows
setting the output type, output items and
communications parameters.
The RS-232C communications speed (item 2-04),
RS-232C data length (item 2-05), RS-232C stop bits
(item 2-06) and RS-232C parity bit (item 2-07)
must be set to be the same as the RS-232C
PACKAGE.

1. To activate the DATA OUTPUT SETUP mode, hold

the

SET2

key while pressing the

POWER

key to

turn the 3286 (-20) on.

2. Select the appropriate settings. Use the

MODE

and

MAX/MIN

keys to increment and decrement the

item number, respectively. The communications
status display (item 2-03) is off by default. Items 2-
04 to 2-07 are displayed by setting the
communications status display to

.

3. Change the settings as needed using the

U/

or

I/

keys.

Содержание 9636-01

Страница 1: ...INSTRUCTION MANUAL For は専用機種 複数の場合は で区切る 不要の場合はとる 形名を入力 複数の場合は で区切る 9636 01 品名を入力 RS 232C PACKAGE ...

Страница 2: ......

Страница 3: ...hapter 2 Specifications 2 2 1 General Specifications 2 2 2 RS 232C PACKAGE Function Specifications 3 2 3 Screen Example 4 Chapter 3 Connection Procedure 6 Chapter 4 Program Installation 7 Chapter 5 3286 20 Settings 8 5 1 OPTION Mode 8 5 2 DATA OUTPUT SETUP Mode 9 5 3 Default Settings 11 5 4 Data Format 12 Chapter 6 Troubleshooting 19 ...

Страница 4: ......

Страница 5: ...this manual as close to perfection as we could achieve If perchance you find any unclear portions mistakes omissions or the like we would be most obliged if you could please notify us of them via any HIOKI agent or directly When the product is delivered check and make sure that it has not been damaged in transit If the product is damaged or fails to operate according to the specifications contact ...

Страница 6: ...efore using the equipment The manufacturer disclaims all responsibility for any accident or injury except that resulting due to defect in its product Safety This Instruction Manual provides information and warnings essential for operating this product in a safe manner and for maintaining it in safe operating condition Before using this product be sure to carefully read the following safety notes ...

Страница 7: ...d to locations on the product where the operator should consult corresponding topics in this manual which are also marked with the symbol before using relevant functions of the product In the manual this mark indicates explanations which it is particularly important that the user read before using the product The following symbols are used in this Instruction Manual to indicate the relative import...

Страница 8: ... by law The RS 232C PACKAGE may be subject to revision or upgraded for purposes of technological improvement without notification Republishing portions of the RS 232C PACKAGE requires the prior consent of our company The HIOKI trademark may not be used In no case shall we accept responsibility for consequential effects resulting from use of the RS 232C PACKAGE CD Handling Precautions Always hold t...

Страница 9: ...of data To remove dirt dust or fingerprints from the disc wipewith a dry cloth or use a CD cleaner Always wiperadially from the inside to the outside and do no wipewith circular movements Never use abrasives orsolvent cleaners Hioki shall not be held liable for any problems with a computer system that arises from the use of this CD or for any problem related to the purchase of a Hioki product Regi...

Страница 10: ...1 Chapter 1 RS 232C PACKAGE Overview Chapter 1 RS 232C PACKAGE Overview The RS 232C PACKAGE is a PC software program that processes data from the HIOKI Model 3286 20 CLAMP ON POWER HiTESTER ...

Страница 11: ...y 32 MB or greater Hard Disk At least 20 MB free space Chapter 2 Specifications 2 1 General Specifications Media One CD Exclusive PC application software Compatible Measuring Instrument HIOKI Model 3286 20 CLAMP ON POWER HiTESTER This software is not guaranteed to operate normally unless the operating environment is as specified Even if the conditions are satisfied this software may not operate no...

Страница 12: ...pecifications Maximum readings accepted 32700 File operations Open file and save file Printing Data printing Recording CSV format Communications Acquires data via RS 232C 2 2 RS 232C PACKAGE Function Specifications ...

Страница 13: ...4 Chapter 2 Specifications The screen of 3φPF Meter The screen of harmonics 2 3 Screen Example ...

Страница 14: ... enabled the auto selected range is indicated within parenthesis as in AUTO 600V 3 Measured Value Display Each measurement value is shown 4 Remaining Battery Indication The remaining battery charge in the 3286 20 is shown 5 LEAD LAG Indication Phase lead and lag of the current relative to voltage is shown 6 RS 232C Indication Shows RS 232C communications It is on during the communication It goes o...

Страница 15: ... Connection Procedure RS 232C connector PC Connection NOTE Chapter 3 Connection Procedure Use the supplied cable to connect the 3286 20 to the PC Be careful of the cable direction when connecting it to the 3286 20 ...

Страница 16: ...ications above and insert the RS 232C PACKAGE diskette into the CD ROM drive 2 Open My Computer and select the CD ROM drive with the RS 232C PACKAGE diskette 3 Copy all of the files from the CD to a folder on the hard disk 4 Execute the lm3286 exe file included in the copied files 5 Refer to the help file if you need help with the operating procedures ...

Страница 17: ...he 3286 20 enable its OPTION mode 1 OPTION Types 2 To activate the OPTION mode hold the U key while pressing POWER to turn the 3286 20 on 3 The digit selected for changing the OPTION mode blinks Pressing the MODE key moves the blinking selection to the right and pressing the MAX MIN key moves it the left 4 Set the numerical value to by pressing the U or I keys to change the blinking digit 5 After ...

Страница 18: ...ing the output type output items and communications parameters The RS 232C communications speed item 2 04 RS 232C data length item 2 05 RS 232C stop bits item 2 06 and RS 232C parity bit item 2 07 must be set to be the same as the RS 232C PACKAGE 1 To activate the DATA OUTPUT SETUP mode hold the SET2 key while pressing the POWER key to turn the 3286 20 on 2 Select the appropriate settings Use the ...

Страница 19: ... power off SAVE END is displayed as the settings are saved Items 2 04 and later are not displayed unless item 2 03 is set to 6 Setting Details 1 DATA OUTPUT Function Item 2 01 off DATA OUTPUT Function disabled PC Select the RS 232C PACKAGE for output 2 Output Format Item 2 02 FORM ALL Select all items for output DISP Select display items for output 3 RS 232C Communications Display Item 2 03 RS IF ...

Страница 20: ...bits 7 RS 232C Parity Bit Item 2 07 PARI none Select no parity bit EVEN Select even parity bit ODD Select odd parity bit This procedure returns the RS 232C settings to their factory defaults 1 Hold the SET2 key while turning the power on 2 Press the HOLD key until is displayed 3 Press the HOLD key again to initialize the settings to their default values Default Values DATA OUTPUT Function OFF Outp...

Страница 21: ...n and measurement status saving function The 3286 20 outputs measurement data at each interval of about six seconds The end of each measurement data has by a CR LF Details of the output data and examples are shown below When creating receiving software make sure the receiving software must recognize the first data The data after an interval become the first data For measurements of the 1φP meter S...

Страница 22: ... I19 or U19 24 I20 or U20 25 I1 or U1 harmonic percentage 26 I2 or U2 harmonic percentage 27 I3 or U3 harmonic percentage 28 I4 or U4 harmonic percentage 29 I5 or U5 harmonic percentage 30 I6 or U6 harmonic percentage 31 I7 or U7 harmonic percentage 32 I8 or U8 harmonic percentage 33 I9 or U9 harmonic percentage 34 I10 or U10 harmonic percentage 35 I11 or U11 harmonic percentage 36 I12 or U12 harm...

Страница 23: ...urement 41 I17 or U17 harmonic percentage 42 I18 or U18 harmonic percentage 43 I19 or U19 harmonic percentage 44 I20 or U20 harmonic percentage 45 Display order 46 Battery capacity Line Line Number 1φP Meter 0 1φPF Meter 1 3φPF Meter 2 Current hermonics 3 Voltage hermonics 4 ...

Страница 24: ...S maximum value S minimum value 10 I instantaneous value I maximum value I minimum value 11 Ipeak instantaneous value Ipeak maximum value Ipeak minimum value 12 U instantaneous value U maximum value U minimum value 13 Upeak instantaneous value Upeak maximum value Upeak minimum value 14 Ik k THD R 15 Ik k THD F 16 Ik k harmonic percentage 17 18 Uk k THD R 19 Uk k THD F 20 Uk k harmonic percentage 2...

Страница 25: ...detection Number Missing phase 0 Normal phase 1 Reverse phase 1 None 9 LEAD LAG LEAD LAG Number LEAD 0 LAG 1 None 9 Format of easurement values Format of easurement values Normal E Mantissa Max 4 digit numerial value decimal point Exponent 1 digit numerial value Range over 9999 9 Frequency less than 30 Hz When there is not data 8888 9 ...

Страница 26: ...55 0E 0 UHz 098 8E 0 I 145 6E 0 Ipeak 055 0E 0 IHz 03 55E 3 P 10 51E 3 S 09 90E 3 Q 0 338E 0 COSφ 0 941E 0 SINφ 070 3E 0 φ 0 LEAD LAG 9 Phase detection 100 Battery capacity Harmonic measurement 3 Line 15 Display data 10 Range 002 6E 0 THD R 002 6E 0 THD F 102 4E 0 I1 002 5E 0 I2 001 0E 0 I3 000 1E 0 I4 000 0E 0 I5 000 1E 0 I6 000 1E 0 I7 ...

Страница 27: ...onic percentage 000 1E 0 I6 harmonic percentage 000 1E 0 I7 harmonic percentage 000 0E 0 I8 harmonic percentage 000 0E 0 I9 harmonic percentage 000 0E 0 I10 harmonic percentage 000 0E 0 I11 harmonic percentage 000 0E 0 I12 harmonic percentage 000 1E 0 I13 harmonic percentage 000 0E 0 I14 harmonic percentage 000 0E 0 I15 harmonic percentage 000 0E 0 I16 harmonic percentage 000 0E 0 I17 harmonic per...

Страница 28: ... PC software program match each other If the problem is not solved after the troubleshooting initialize the settings To initialize hold down the RANGE key as powering on The entire LCD will go on and will appear This will reset all the saved contents to their initial values Chapter 6 Troubleshooting Although the following problems might seem to be program malfunctions they can result from other ca...

Страница 29: ...ud Rate Data Length Stop Bit Parity 3286 20 Settings 9800 8bit 1bit None lm3286 exe Set up Com Port COM1 9800 8bit 1bit None Check the following setup when the connection is not established Lower both Band Rates when RS 232C indication goes on and off ...

Страница 30: ...21 Chapter 6 Troubleshooting ...

Страница 31: ...ki com Printed in Japan 9636B980 02 All reasonable care has been taken in the production of this manual but if you find any points which are unclear or in error please contact your supplier or the International Sales and Marketing Department at HIOKI headquarters In the interests of product development the contents of this manual are subject to revision without prior notice The content of this man...

Страница 32: ...192 Japan TEL 81 268 28 0562 FAX 81 268 28 0568 E mail os com hioki co jp URL http www hioki com HIOKI USA CORPORATION 6 Corporate Drive Cranbury NJ 08512 USA TEL 1 609 409 9109 FAX 1 609 409 9108 9636B980 02 07 12H Printed on recycled paper ...

Отзывы: