


User Manual of LV-N9600 Series NVR
153
2.
Select the SNMP tab to enter the SNMP Settings interface, as shown in Figure 11. 8.
Figure 11. 8
SNMP Settings Interface
3.
Check the SNMP checkbox to enable this feature.
4.
The enabling of SNMP may cause security problems. Click Yes to continue or No to cancel the operation.
5.
When you choose the Yes option in step4, configure the following SNMP settings:
•
Trap Address: IP Address of SNMP host.
•
Trap Port: Port of SNMP host.
6.
Click the Apply button to save and exit the interface.
Before setting the SNMP, please download the SNMP software and manage to receive the device information via
SNMP port. By setting the Trap Address, the NVR is allowed to send the alarm event and exception message to
the surveillance center.
11.2.5
Configuring More Settings
Steps:
1.
Enter the Network Settings interface.
Menu > Configuration > Network
2.
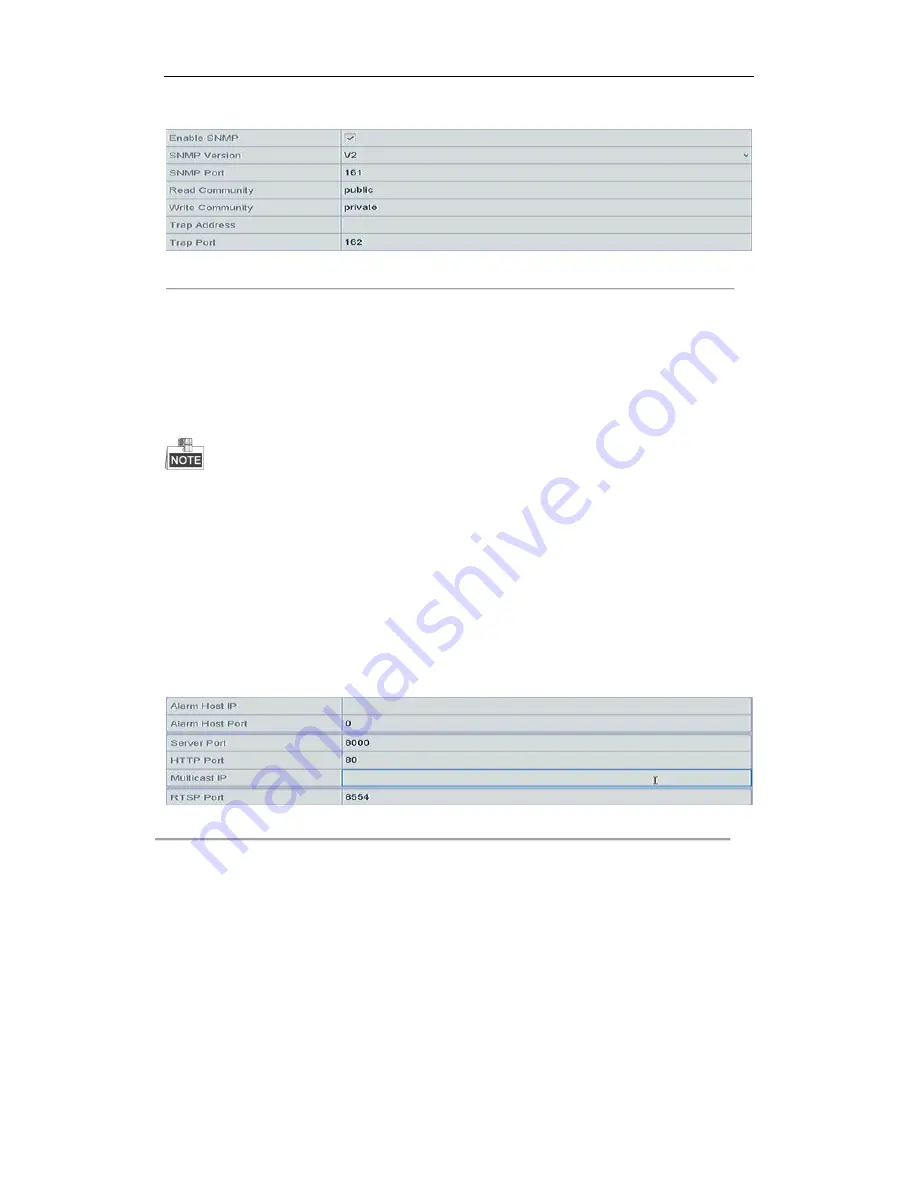
Select the More Settings tab to enter the More Settings interface.
Figure 11. 9
More Settings Interface
3.
Configure the remote alarm host, server port, HTTP port, multicast, RTSP port.
l
Alarm Host IP/Port: With a remote alarm host configured, the device will send the alarm event or
exception message to the host when an alarm is triggered. The remote alarm host must have the CMS
(Client Management System) software installed.
The Alarm Host IP refers to the IP address of the remote PC on which the CMS (Client Management
System) software (e.g., iVMS-4200) is installed, and the Alarm Host Port must be the same as the
alarm monitoring port configured in the software (default port is 7200).
l
Multicast IP: The multicast can be configured to realize live view for more than the maximum number
of cameras through network. A multicast address spans the Class-D IP range of 224.0.0.0 to
239.255.255.255. It is recommended to use the IP address ranging from 239.252.0.0 to
239.255.255.255.
When adding a device to the CMS (Client Management System) software, the multicast address must
Содержание LV-N9600 Series
Страница 1: ...Network Video Recorder User Manual ...
Страница 14: ...User Manual of LV N9600 Series NVR 13 Chapter 1 Introduction ...
Страница 23: ...User Manual of LV N9600 Series NVR 22 Chapter 2 Getting Started ...
Страница 45: ...User Manual of LV N9600 Series NVR 44 Chapter 3 Live View ...
Страница 54: ...User Manual of LV N9600 Series NVR 53 Chapter 4 PTZ Controls ...
Страница 67: ...User Manual of LV N9600 Series NVR 66 Chapter 5 Recording Settings ...
Страница 89: ...User Manual of LV N9600 Series NVR 88 Chapter 6 Playback ...
Страница 106: ...User Manual of LV N9600 Series NVR 105 Chapter 7 Backup ...
Страница 116: ...User Manual of LV N9600 Series NVR 115 Chapter 8 Alarm Settings ...
Страница 131: ...User Manual of LV N9600 Series NVR 130 Chapter 9 VCA Alarm ...
Страница 135: ...User Manual of LV N9600 Series NVR 134 8 Click Apply to activate the settings ...
Страница 137: ...User Manual of LV N9600 Series NVR 136 Figure 9 5 Draw Area for Intrusion Detection 8 Click Apply to save the settings ...
Страница 143: ...User Manual of LV N9600 Series NVR 142 Chapter 10 VCA Search ...
Страница 149: ...User Manual of LV N9600 Series NVR 148 Chapter 11 Network Settings ...
Страница 174: ...User Manual of LV N9600 Series NVR 173 Figure 12 14 View HDD Status 2 ...
Страница 178: ...User Manual of LV N9600 Series NVR 177 Chapter 13 Camera Settings ...
Страница 181: ...User Manual of LV N9600 Series NVR 180 Figure 13 3 Set Privacy Mask Area 6 Click the Apply button to save the settings ...
Страница 183: ...User Manual of LV N9600 Series NVR 182 Chapter 14 NVR Management and Maintenance ...
Страница 192: ...User Manual of LV N9600 Series NVR 191 Chapter 15 Others ...
Страница 202: ...User Manual of LV N9600 Series NVR 201 Chapter 16 Appendix ...


