


Mobile Network Video Recorder User Manual
42
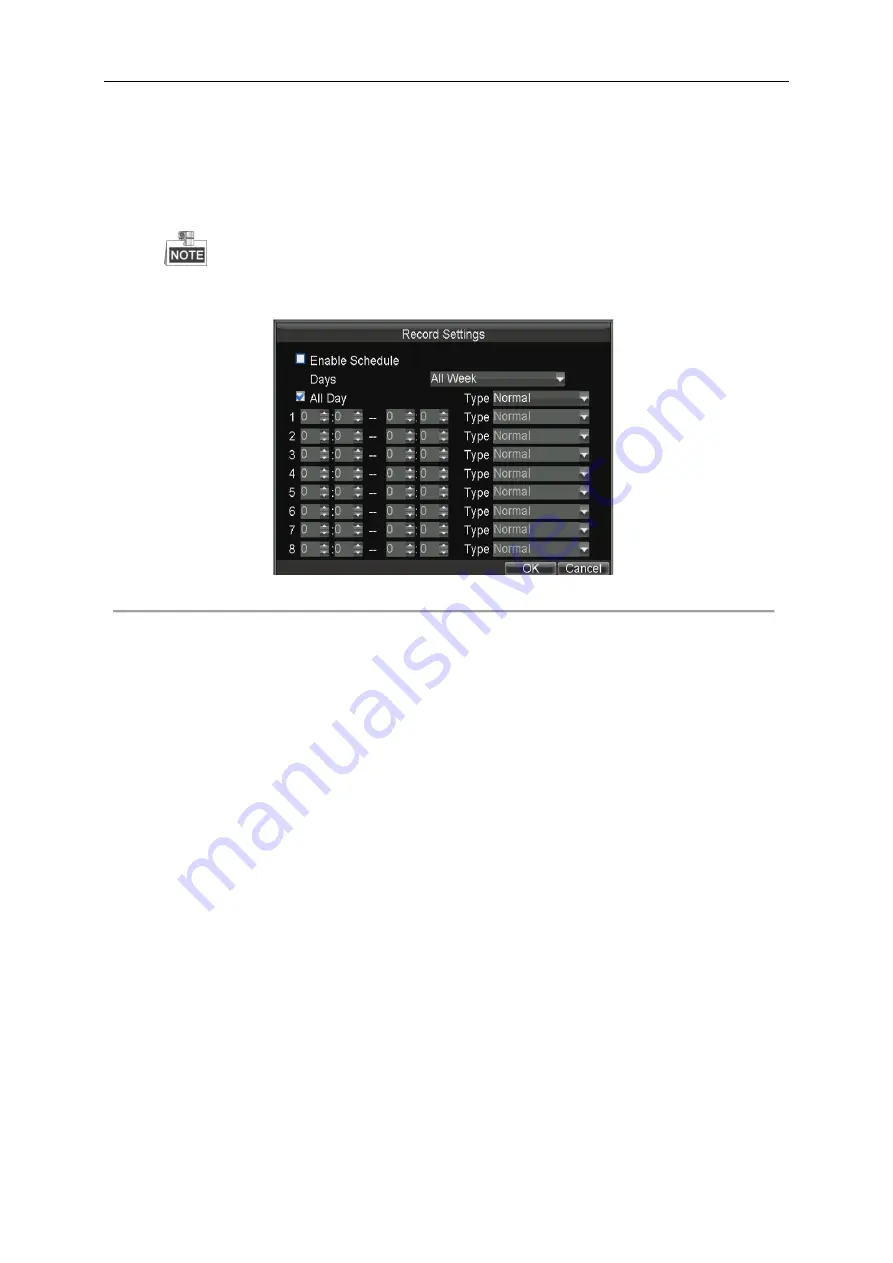
drop-down list.
You can also uncheck the checkbox of
All Day
, customize the time period for recording, and select the recording
type for each time period.
4)
Click
OK
to save the new settings and exit.
You can view the recording status on the Record Status interface (Menu>Status>Record).
5 recording types are selectable: Normal, Motion Detection, Alarm, Motion | Alarm and Motion & Alarm.
Up to 8 time periods can be set for each day and each of the time periods cannot be overlapped.
Figure 4. 3
Record Schedule Settings
5.
Click the
Set
button of More Settings to configure the pre-record and post-record time.
Pre-record:
Normally used for the event (motion or alarm) triggered record, when you want to record before the
event happens. For example, when an alarm occurs at 10:00, if the pre-record time is set as 5 seconds, the camera
records the alarm at 9:59:55.
Post-record:
After the event finished, the video can also be recorded for a certain time. For example, when an
alarm ends at 11:00, if the post-record time is set as 5 seconds, the camera records till 11:00:05.
6.
Optionally, you can select the camera and click
Copy
to copy the current settings to the selected camera.
7.
Click
Apply
to save the settings and click
OK
to exit.
4.2
Configuring Motion Detection Record
Purpose:
In the motion detection record, once a motion event occurs, the device starts to record and multiple linkage actions will be
triggered.
Steps:
1.
Enter the Advanced Camera Settings interface.
Menu>Other Settings>Camera>Set (More Setting)
Содержание DS-M5504HNI Series
Страница 1: ...User Manual UD 6L0204D1120A01 Mobile Network Video Recorder...
Страница 47: ...Mobile Network Video Recorder User Manual 46 Figure 4 9 Search Result Interface...
Страница 51: ...Mobile Network Video Recorder User Manual 50 Figure 5 6 Wi Fi Status Interface...
Страница 53: ...Mobile Network Video Recorder User Manual 52 Figure 6 2 Push Mode Platform...
Страница 78: ...User Manual of Mobile Digital Video Recorder 77...


