Education Sharing System
21
Table 4-1
View Mode Description
Mode
Icon
Description
Movie
Single screen
Picture-in-Picture
PIP 1, overlay the picture at the lower right corner
PIP 1, overlay the picture at the lower left corner
Multi-Screen
Multi-Screen 1, split screen in half
Multi-Screen 2, split screen in three blocks with the
larger one at left side
Multi-Screen 3, split screen in three blocks with the
larger one at right side
Multi-Screen 4, split screen in four blocks with the
larger one at left side
Multi-Screen 5, split screen in four blocks with the
larger one at right side
Step 3
Optionally, when you are in single screen, you can double-click the windows at the bottom
to switch live view camera.
Step 4
Optionally, click
or
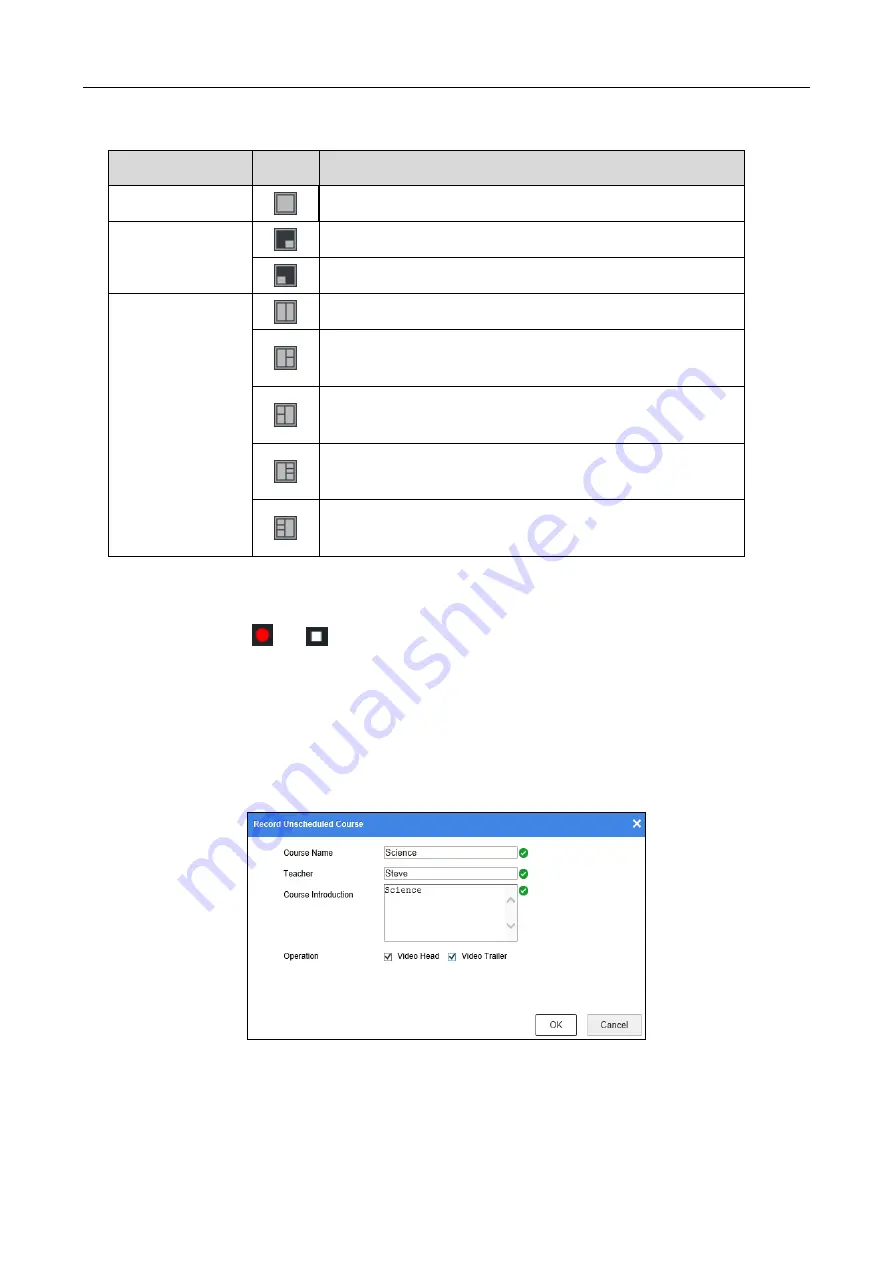
to start/stop course recording. You shall enter the course
informaiton when you start course recording.
1)
Enter course information including Course Name, Teacher, and Course Introduction.
2)
You can check Video Head or Video Trailer to add video head or tail to the recording
video. You can edit the head or tail in Configuration > Recording Settings > Video
Head/Tail Configuration.
3)
Click OK.
Figure 4-12
Course Information
Step 5
Optionally, select the live mode as Manual, SimiAuto, or Auto.


