background image

DS-6600 Series DVS Quick Operation Guide


19 

Time

 and 

End Time.


Note: 

The time of each segment can’t be overlapped. Up to 8 segments can be configured.   

2)


Select a 

Record Type

. The record type can be Normal, Motion, Alarm, Motion & Alarm,  and Motion | 

Alarm. 

3)


Check the checkbox of 

Select All

 and click

 Cop

y to copy settings of this day to the whole week. You can 

also check any of the checkboxes before the date and click 

Copy

4)


Click 

OK

 to save the settings and exit the 

Edit Schedule 

interface. 

6.


Click 

Advanced

 to configure advanced record parameters

.


7.


Click 

Save 

to validate the above settings. 
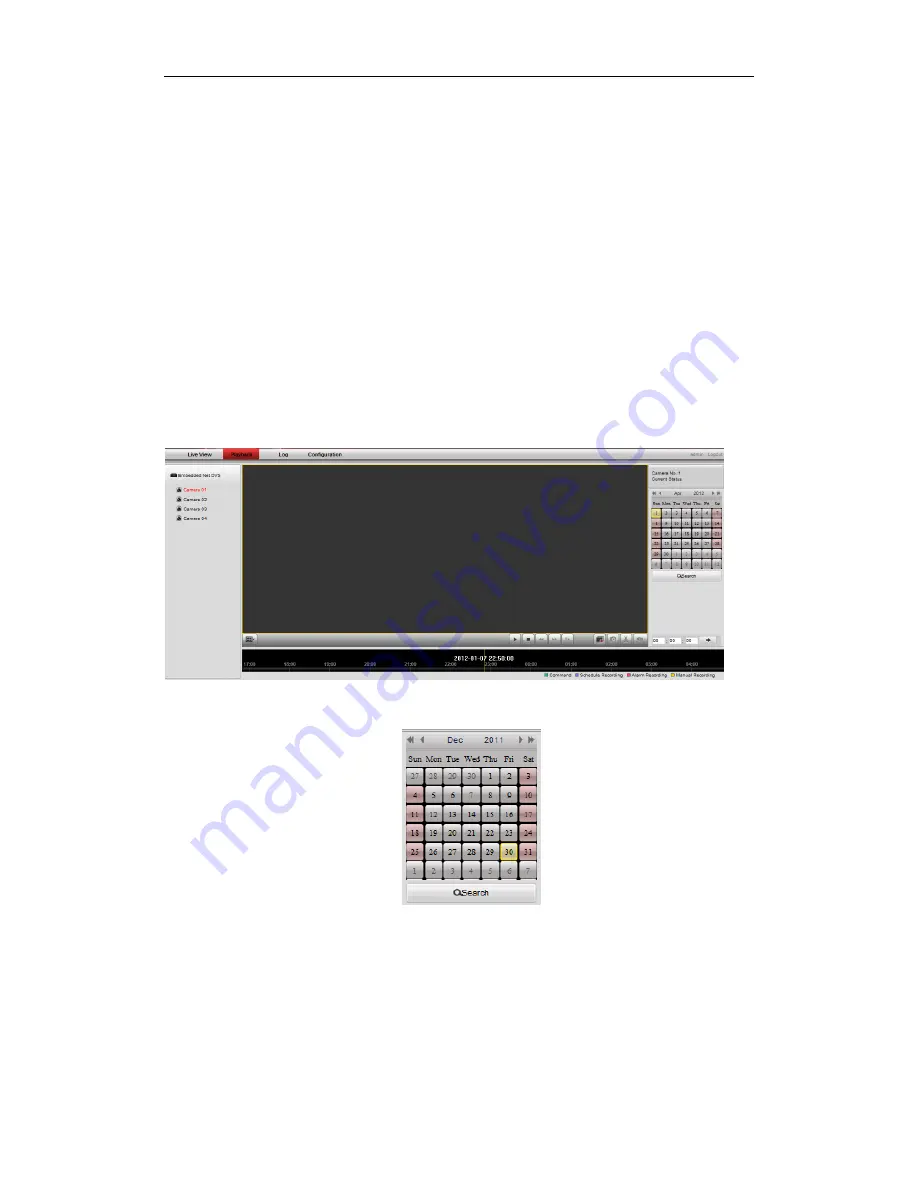
 

Playback 

Purpose: 

The recorded video files can be remotely played back through the WEB browser.   

Steps: 

1.


Click 

Playback

 on the menu bar to enter playback interface:   


2.


Click the camera from the device list for playback. 

3.


Select the date from the calendar and click 

Search

.     


4.


Click the 

Play

 button to play the video file searched on the current date. 

Содержание DS-6600HCI

Страница 1: ...DS 6600 Series Audio Video Encoder Server Quick Operation Guide V1 2 0...

Страница 2: ...User Manual of DS 6600 Audio Video Encoder Server 1 Installation Verify Contents Verify that the package contents are correct by checking the items against the packing list...

Страница 3: ...ta line from the accessories box Plug one end of the data line to the circuit board and the other end to the data line port of HDD Step4 Connect the power cord to HDD Step7 Replace the cover of the ch...

Страница 4: ...mounting pins of the modules being bent or damaged Step1 Secure the rear interface panel to the chassis and then tighten the mounting screws Step2 Insert the functional module along the slot till it h...

Страница 5: ...Tx Rx LED indicator 1 Does not light when the network is not connected 2 Blinks in green when the data is transmitting receiving 3 Blinks at higher frequency when the data for transmitting receiving i...

Страница 6: ...nnection is functioning properly 2 Does not light when the network connection is abnormal Tx Rx LED indicator 1 Does not light when the network is not connected 2 Blinks in green when the data is tran...

Страница 7: ...holding the RESET button for 15 seconds after power is turned on 6 LAN 10M 100Mbps self adaptive UTP Ethernet interface 7 RS 232 Serial interface for configuration of device s parameters or used as tr...

Страница 8: ...ngs by holding the RESET button for 15 seconds after power is turned on 7 LAN 10M 100Mbps self adaptive UTP Ethernet interface 8 RS 232 Serial interface for configuration of device s parameters or use...

Страница 9: ...UTP Ethernet interface 3 ALARM IN Relay alarm input ALARM OUT Relay alarm output RS 485 RS 485 half duplex interface 4 LINE IN 3 5mm two way audio input interface for connection to active pick up micr...

Страница 10: ...m audio interface 2 0 Vp p 600 Recording resolution 4CIF 2CIF CIF QCIF Frame rate Main stream 4CIF 2CIF 12fps CIF QCIF 25 fps P 30 fps N Sub stream CIF QCIF 25 fps P 30 fps N Video bit rate 32 Kbps 20...

Страница 11: ...ing resolution 4CIF 2CIF CIF QCIF Frame rate Main stream 4CIF 2CIF 12fps CIF QCIF 25 fps P 30 fps N Sub stream CIF QCIF 25 fps P 30 fps N Video bit rate 32 Kbps 2048 Kbps or user defined Max 3072 Kbps...

Страница 12: ...m audio interface 2 0 Vp p 600 Recording resolution 4CIF 2CIF CIF QCIF Frame rate Main Stream 4CIF 2CIF CIF QCIF 25 fps P 30 fps N Sub stream CIF QCIF 25 fps P 30 fps N Video bit rate 32 Kbps 2048 Kbp...

Страница 13: ...lution 4CIF 2CIF CIF QCIF Frame rate Main Stream 4CIF 2CIF CIF QCIF 25 fps P 30 fps N Sub stream CIF QCIF 25 fps P 30 fps N Video bit rate 32 Kbps 2048 Kbps or user defined Max 3072 Kbps Audio bit rat...

Страница 14: ...interface Linear 600 Recording resolution 4CIF 2CIF CIF QCIF Frame rate Main Stream 4CIF 2CIF CIF QCIF 25 fps P 30 fps N Sub stream CIF QCIF 25 fps P 30 fps N Video bit rate 32 Kbps 2048 Kbps or user...

Страница 15: ...Management to enter the Device Management page 2 Click the Add button to enter the Add Device interface 3 Edit a nickname for the device and input the IP address port number default 8000 login user n...

Страница 16: ...n click the buttons on the toolbar to operate in the live view mode e g capture picture start stop recording two way audio PTZ control with PTZ camera connected to the encoder digital zoom open close...

Страница 17: ...first time to use Starting Live View 1 In the live view window select a playing window by clicking the mouse 2 Double click a camera from the device list to start the live view 3 You can click the bu...

Страница 18: ...rol and address configured in the RS 485 Settings interface Remote Configuration Serial Port Settings 485 Serial Port must be the same with the parameters of the connected pan tilt unit or speed dome...

Страница 19: ...ecording Steps 1 Click Remote Configuration Camera Settings Record Schedule to enter Record Schedule settings interface 2 Select the camera to configure the record schedule 3 Check the checkbox of Ena...

Страница 20: ...of the checkboxes before the date and click Copy 4 Click OK to save the settings and exit the Edit Schedule interface 6 Click Advanced to configure advanced record parameters 7 Click Save to validate...

Страница 21: ...color of the video on the progress bar stands for the different video types Log Purpose The operation alarm exception and information of the device can be stored in log files which can be viewed and...

Страница 22: ...Quick Operation Guide 21 4 The matched log files will be displayed on the list shown below Note Up to 100 log files can be displayed each time You can click the button to save the searched log files...

Отзывы: