


2
3
2.2
processing a hicaps claim
2.2.1 processing a hicaps claim transaction
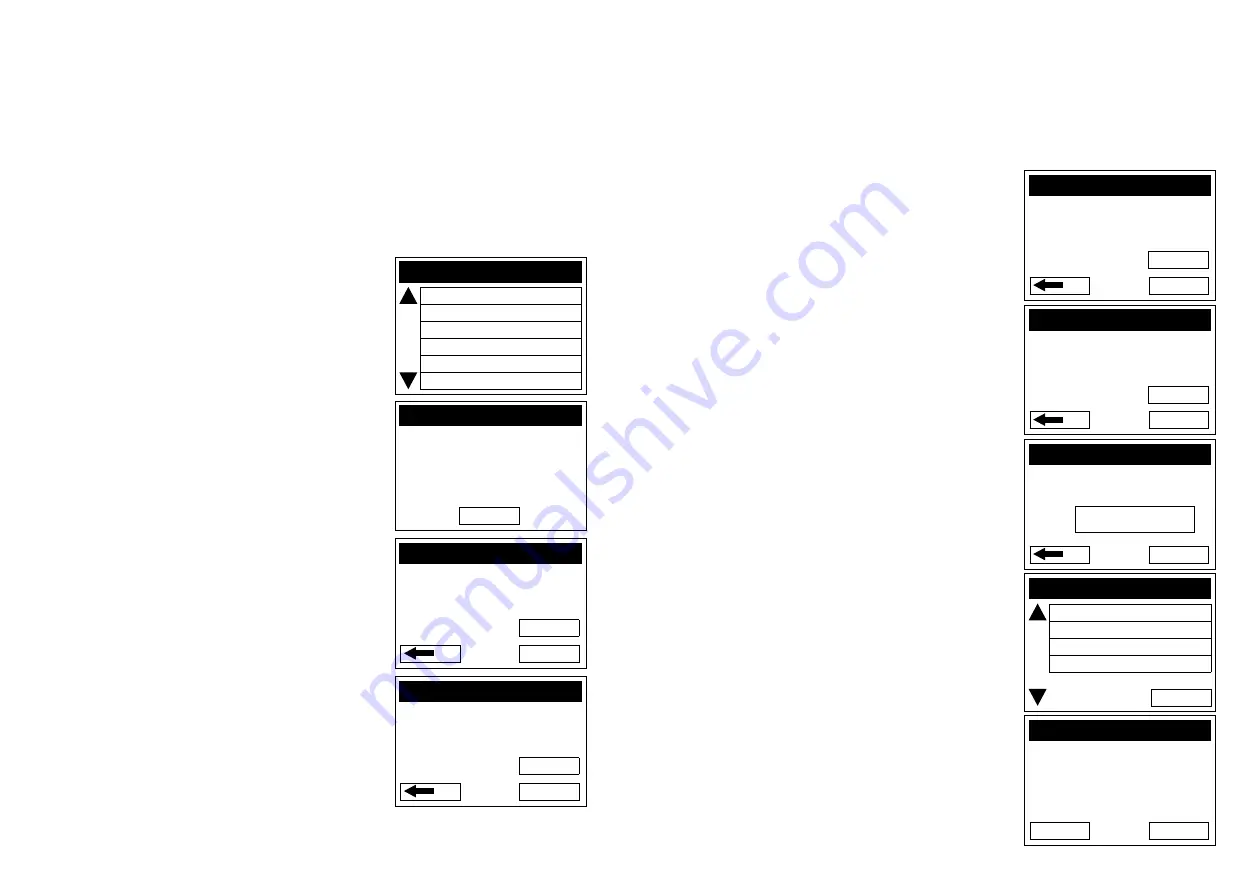
(hicaps terminal)
step 1
To start a HICAPS Claim transaction, simply swipe the
patient’s Health Fund card through the terminal.
step 2
When prompted to SELECT PROVIDER simply select the
appropriate screen button for the provider claiming for
the services provided, or press the relevant number on
the keypad that is displayed beside the provider’s name.
Note:
This prompt will only be displayed if more than
one provider is loaded into the terminal.
step 3
The screen will display the number of items you
are able to process in one transaction, e.g. 6.
Press
[ENTER]
to continue.
step 4
The terminal will then ask for the PATIENT ID. This is
the 2-digit number printed on the card relating to the
specific patient receiving treatment then press
[ENTER]
.
Note:
This value will default to
[01]
if nothing is
entered.
step 5
Key the item number associated with the treatment
supplied then press
[ENTER]
.
step 6
Key the clinical code or tooth number on which the
treatment supplied was performed then press
[ENTER]
or just press
[ENTER]
to use the default of
[00]
.
Note:
Terminal Provider Setup prompt for Clinical code
or Tooth Number may be changed through Provider
Setup (Refer 2.) and will only be displayed if setup
(Refer to Step 5).
step 7
The date this part of the service was performed.
dd, mmm = current date. To change the date enter
DD = day, e.g. 26 and MM = 2, e.g. DEC.
To accept the default of the current date just press
[ENTER]
.
step 8
Enter the cost to be charged for this item.
Note:
This field will default to the last cost charged for
the same item if item amount memory is enabled.
step 9a
You will be presented with a summary of the item(s)
entered. By pressing the middle left screen button
[Mod]
you are able to modify the item that has been
entered by repeating the steps above.
step 9b
To add another item, simply press
[add]
and enter the
options as above. Once all items have been added to
the claim, press
[ENTER]
.
step 10
If the summary presented is correct, simply press
[ENTER]
and the claim will be sent to the Health Fund
for approval.
Note:
To scroll through the items use top and bottom
buttons beside the arrows at the left of the screen.
SELECT PROVIDER
. A – Smith St Practice
2. B – Dr Smith
3. C – Dr Jones
4. D – Dr Brown
5. E – Dr White
6. F – Dr A. Smith
CLAIM
ENTER
MaXiMUM aLLOWED
iTEM ENTRiEs aRE XX
CLAIM
cLEaR
paTiENT iD
01
CLAIM
cLEaR
iTEM NUMBER
CLAIM
cLEaR
TOOTh NUMBER 01
CLAIM
cLEaR
DaTE sERVicE
dd, mmm
DDMM
CLAIM – PATIENT ID 0
<01/01> iTEM # 0001
DaTE sERVicE 26.MaR
iTEM cOsT $52.52
aDD
Press REPORTS to Print
CLAIM
ENTER
$0.00
iTEM cOsT
CLAIM
NO
YEs
sEND TO hEaLTh FUND?
01 REcORD(s)
TOTaL $52.52
Dr smith
01
Содержание T4200
Страница 1: ...hicaps terminal user guide...
Страница 33: ...HICAPS Pty Ltd ABN 11 080 688 866 67197A1008...


