3
– MOUNTING THE STOVE
We strongly recommend professionals install the stove for you.
To unpack your stove, remove the screws and staples that fasten it to the pallet. Your stove will
weigh more than 100 Kg. Take your stove out of the pallet carefully and with the necessary help
and place it where you intend to install it.
Once it has been installed, ensure that it is stable. If necessary, the stove can be regulated
levelling screws.
Connect the stove to the chimney ensuring the union is perfectly sealed. Please read the chimney
installation chapter in the installation manual for the engineer.
Keep the packaging elements of your stove until you have ensured it works properly.
Recycle packaging materials, such as cardboard
, wood, plastic…
Do not use the packaging materials to light your stove.
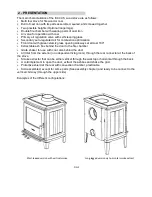
CHANGING THE SMOKE OUTLET TO THE REAR ONE
To change the smoke extract to the rear one, please follow the
following steps:
Note that the rear protector panel of your stove has a round cut out
piece held in place at three points.
Push and pull the top of the circle several times, gently, outwards
and inwards. The piece will come off easily, leaving a smoke outlet
on the rear side. There is no need to dismantle this piece. If
necessary, file down the burr remaining in the open hole.
Open the stove door and dismantle the deflector dolly and the
deflector itself, and remove them from the stove. The two smoke
outlets shall be in full view.
Dismantle the smoke cover from the rear by
unscrewing the two screws and the washers that fasten it.
Then, remove the screws and washers that fasten the flue collar of
the smoke outlet from the upper side.
Place the flue collar of the smoke outlet on the rear side, ensuring
the seal is in its correct position and fasten it with the corresponding
screws and washers.
Place the cover on the upper part of the stove ensuring the seal is
in its correct position and fasten it with the screws and washers.
Note that the top only has one possible position according to the
form of the upper part of the stove.
FIG.3
Содержание E-30 XS
Страница 2: ......
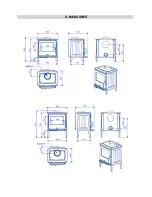
Страница 12: ...9 MEASURES...
Страница 14: ...11 EXPLODED VIEW...
Страница 16: ...DATA PLATE...
Страница 17: ......
Страница 18: ...NOTES...
Страница 19: ......

