background image

2

Luggage ideas.

Micro Flooter accessory
spotlight for engine guard
Honda XL 700 V Transalp

from year of manufacture 2008

Item-No. 730.952

1

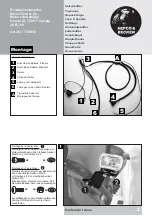
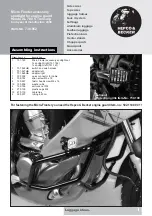
Fastening of the adapter left:
with allen screws M6x18 and washers ø6,4.

Fastening of the driving lights:
with filister head screws M6x16, washers
ø6,4  and self-lock nuts M6.
Notice correct position:
cable at the inner side

3

5

4

6

2

1

Übersicht Kabelbaum:

3

5

4

6

2

1

to the positive battery lead

to the negative battery lead

relay

switch

cable to the parking light

cable to the micro-flooters

A

A

connection point

2x

2x

2x

2x

4x

Assembling instructions

Side cases

Top cases

luggage frames

Lock it system

Softbags

Aluminium luggage

Leather luggage

Protection bars

Center stands

Chopper parts

Quad parts

Accessories

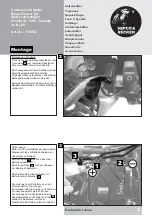
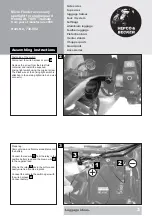
Mount plastic caps on tne nuts.
Same procedure at the right side.

Содержание 730.952

Страница 1: ...151 162 1x Scheinwerfer links 151 161 1 701 526HB Kabelbaum 1 701 527HB Adapterhalter links 1 701 528HB Adapterhalter rechts 1 300 308 Kabelschnellverbinder Abzweigverbinder 4 150 762 Inbusschrauben M6 x 18 4 150 937 Linsenkopfschrauben M6 x 16 12 150 809 U Scheibe ø6 4 4 150 799 selbstsichernde Mutter M6 4 270 105 Kunststoffkappen M6 10 270 115 Kabelbinder 2 300 307 Isolierschlauch 60 cm Die Mont...

Страница 2: ...ichernden Muttern M6 Bitte beachten Flooter so montieren daß die Anschlußkabel nach innen herausragen Kunstoffkappen auf die Muttern aufstecken Gleiche Schritte auf der rechten Seite wiederholen 3 5 4 6 2 1 Übersicht Kabelbaum 3 5 4 6 2 1 Anschluß an Batterie Pluspol Anschluß an Batterie Minuspol Relais An Aus Schalter Leitung zum Standlicht Leitungen zu den Micro Flootern A A Trennstelle Kabel zu...

Страница 3: ... an Batterie Das rote Kabel wird am Pluspol der Batterie angeklemmt Das braune Kabel wird am Minuspol der Batterie angeklemmt Das Relais wird mit Kabelbindern im Batteriebereich befestigt Die Leitungen zum Schalter und zu den Flootern nach vorne verlegen So verlegen daß die Leitungen nicht scheu ern oder gequetscht werden können Die Leitungen mit Kabelbindern fixieren Kabelbaumstück mit Schalter a...

Страница 4: ...Anschluß der Micro Flooter Montieren Sie die Seiten und Frontverkleidung wieder Zuleitung im Bereich der Flooter unter der Verkleidung herausführen Schieben Sie ein passendes Stück Isolierschlauch über die beiden Kabel des Scheinwerfers und über die Zuleitung und verbinden Sie die Steckanschlüsse im Bild nicht dargestellt Die Leitungen mit Kabelbindern fixieren Hepco Becker GmbH An der Steinmauer ...

Страница 5: ... 1 300 308 quick connector for cable 4 150 762 allen screw M6 x 18 4 150 937 filister head screw M6 x 16 12 150 809 washer ø6 4 4 150 799 self lock nut M6 4 270 105 plastic caps M6 10 270 115 cable ties 2 300 307 tubing á 60 cm Quant item no description For fastening the Micro Flooter you need the Hepco Becker engine guard item no 502 114 00 01 Side cases Top cases luggage frames Lock it system So...

Страница 6: ... M6 Notice correct position cable at the inner side 3 5 4 6 2 1 Übersicht Kabelbaum 3 5 4 6 2 1 to the positive battery lead to the negative battery lead relay switch cable to the parking light cable to the micro flooters A A connection point 2x 2x 2x 2x 4x Assembling instructions Side cases Top cases luggage frames Lock it system Softbags Aluminium luggage Leather luggage Protection bars Center s...

Страница 7: ...harness Connect battery Assembling instructions Side cases Top cases luggage frames Lock it system Softbags Aluminium luggage Leather luggage Protection bars Center stands Chopper parts Quad parts Accessories 2 3 Fastening of the switch Disconnect the wire harness at point Remove the screw from the brak fluid container and install the supplied driving light switch using the original screw The blac...

Страница 8: ...ck it System removable 650 952 01 01 Rear rack black 505 952 00 01 Centre stand Side cases Top cases luggage frames Lock it system Softbags Aluminium luggage Leather luggage Protection bars Center stands Chopper parts Quad parts Accessories Assembling instructions 4 Connection of the Micro Flooter Mount side and frontcover When attaching the wire use tubing not shown in the picture Neatly wire tie...

Отзывы: