background image

Cleaning

Electric 

Space$aver

™ 

63

Space$aver

Manual cleaning

Preparation

of the oven chamber

Remove baking trays, grids and containers from the unit 
before starting manual cleaning. These extra pieces will 
deflect the water and the cleaning process will be disrupted. 
Clean the trays, grids and pans separately, e.g. in a 
dishwasher.

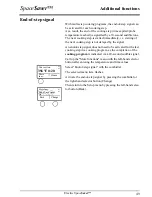
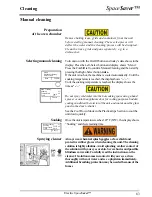
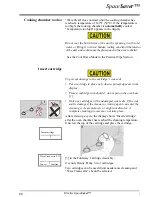
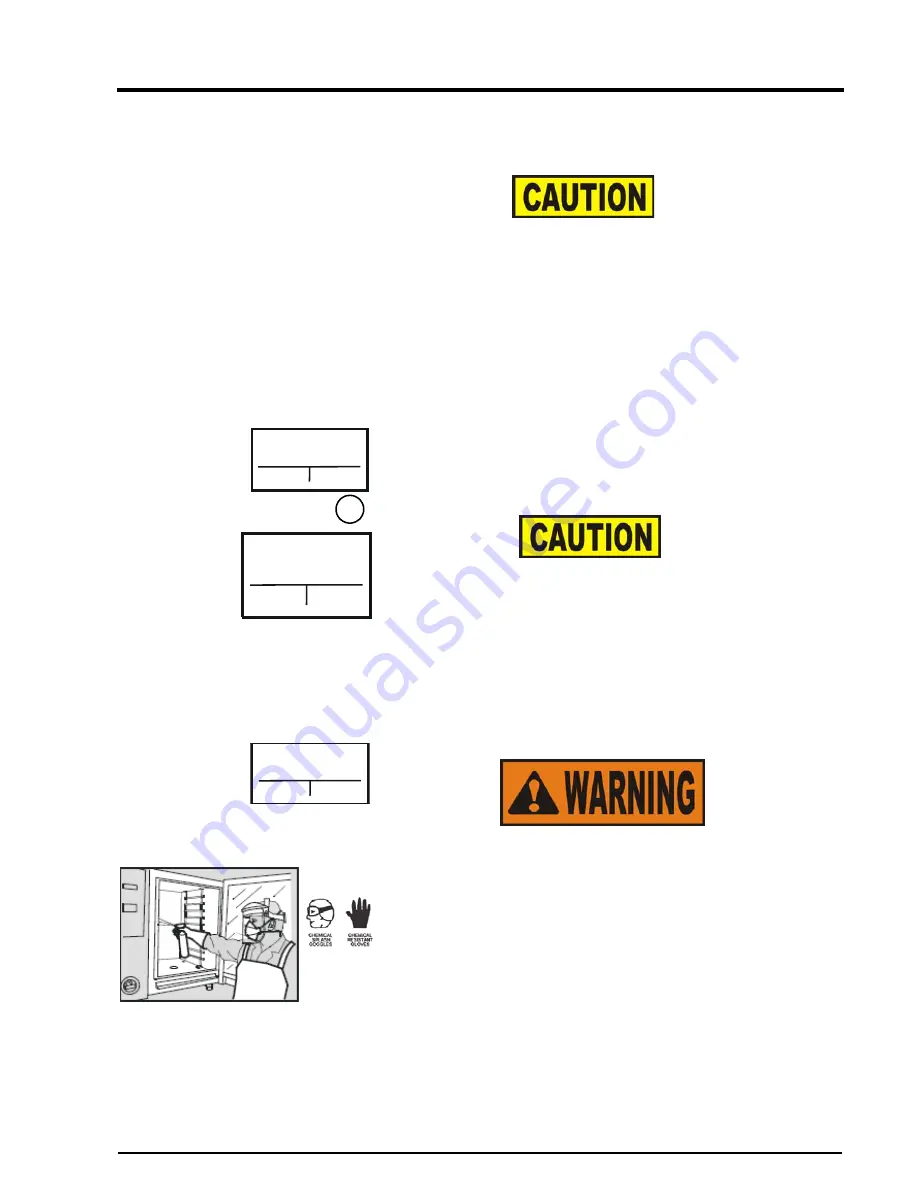
Selecting manual cleaning

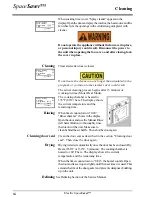
Turn unit on with the On/Off button and today’s date shows in the 
display. Press the Left-Select button and display shows “Menu”. 
Press the CombiDial to confirm Manual Cleaning and then start by 
pressing the Right-Select button

 twice.

If the unit is too hot, the machine is cooled automatically. Until the 
soaking temperature is reached, the displayshows “--:--”.
Until the soaking temperature is reached, the display shows the 
time as"--:--”. 

Do not spray cold water into the hot cooking space using a hand 
sprayer or onto the appliance door for cooling purposes. Sudden 
cooling can distort the interior of the unit  and could cause the glass 
panel in the door to shatter.

See the Cool Down Mode in the Practical tips Section to cool the 
unit down quickly.  

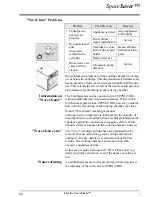
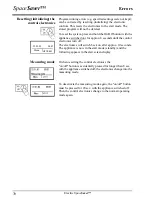
Soaking

Once the unit temperature reaches 122°F (50°C), the display shows 
“Soaking” and the remaining time.

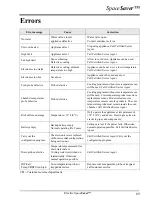
Spraying cleaner

Always wear chemical splash goggles or face shield and 
protective rubber gloves when cleaning the unit. The cleaning 
solution is highly alkaline. Avoid splashing orother contact of 
the solution with your eyes or skin. Severe burns and possible 
blindness can result. Carefully read the instructions on the 
cleaner. If solution comes in contact with your eyes, rinse 
thoroughly with cool water and see a physician immediately. 
Additional breathing protection may be needed becauseof the 
fumes

2

 WaveClean

1

 Manual cleaning

Menu

Back

Confirm

--:--

01/

109°F

06

Cancel

Man. Cleaning
Soaking

Temperature
Time

Soaking

00:10

Man. Cleaning

Temperature

Time

01/

122°F

06

Cancel

Содержание ECS-605

Страница 1: ...Model Model No Electric Space aver 605 ECS 605 Electric Space aver Plus 610 ESC 610 Operating Manual Electric Space aver Electric Space aver Plus ...

Страница 2: ......

Страница 3: ...ntal to the repair or replacement of a part EXTENDED FRYPOT WARRANTY Henny Penny will replace any frypot that fails due to manufacturing or workmanship issues for a period of up to seven 7 years from date of manufacture This warranty shall not cover any frypot that fails due to any misuse or abuse such as heating of the frypot without shortening 0 TO 3 YEARS During this time any frypot that fails ...

Страница 4: ......

Страница 5: ...Modes 19 Additional functions 19 Smart Menu 20 Prior Programs 21 Preheating 21 Different programs 21 Location of the selection frame 21 Moist Heat Mode 22 Setting the Temperature 22 Setting the Time 22 Probe temperature Setting 22 Starting Moist Heat 22 Displaying actual temperatures 22 Changes while in cooking cycle 22 End of Moist Heat Mode 22 Combisteaming 23 Setting the Temperature 23 Setting ...

Страница 6: ...rm Mode 25 Displaying actual temperatures 25 Changing the setting 25 End of Retherm Mode 25 Probe Cooking 26 Positioning the Probe 27 Do not overheat core temperature probe 28 Drill an insertion channel 28 Delta T cooking 29 Delta T cooking 29 Starting Delta T cooking 30 Current Temperature Display 30 End of Delta T cook cycle 30 Hints on Delta T cooking 30 SLow Roast Hold Over night Cooking 31 SR...

Страница 7: ...ng the program cycle 42 History function 42 Additional functions 43 Delayed Start Time 43 Setting the time delay 43 Cancel the delayed start 43 Note 43 Preheating 44 Starting preheat 44 Steam Injection 44 More functions 45 Dehumidifying the oven chamber 45 Fan Cycle 45 RackControl 46 Activating RackControl 47 Termintating RackControl 48 End of step signal 49 Practical tips 53 Cool down mode 53 Moi...

Страница 8: ...ages of dry heat only 56 The following should be taken into consideration 56 Dry heat cooking tips 56 Slow Roast Hold 57 Advantages of SRH 57 The following should be taken into consideration 57 SRH tips 57 Rethermalization 58 Advantages of Rethermalization 58 The following should be taken into consideration 58 Rethermalization tips 59 Rethermalization guidelines 59 Cleaning 61 Safety notes 61 Clea...

Страница 9: ... Preparing the unit 65 Select the cleaning level 65 Cooking chamber too hot 66 Insert cartridge 66 Start WaveClean 67 Cancel WaveClean 67 Completion of WaveClean 67 WaveClean problems 68 Information on WaveClean 68 WaveClean extra 68 Water softening 68 Errors 69 Resetting initializing control electronics 70 Measuring mode 70 HACCP 71 Printing reports 71 The HACCP report 72 ...

Страница 10: ...Operating Manual Contents 10 ...

Страница 11: ...flammable liquids for melting fats or salts for heating rooms for frying for heating sealed containers such as tins as a dish washer for cleaning air filters operation without insertion rails mobile oven racks Hazards when incorrectly used Improper use of appliance can cause property damage injury or death Read the installation operating and maintenance instructions thoroughly before using this ap...

Страница 12: ...Electric Space aver 12 Space aver Appliance description ...

Страница 13: ... peer into the steam exhaust vent or hold your hand over it Hot steam is vented periodically during a cooking operation Wear protective gloves when opening door after cooking The cooking container grills mobile oven rack door sides and the temperature sensor can still be very hot Remove the food probe from cooked product before removing it from the unit When pulling the load out ensure you do not ...

Страница 14: ...ts Severe burns and possible blindness could result Observe the manufacturer s instructions If solution comes in contact with your eyes rinse thoroughly with cool water and see a physician immediately To prevent damage appliances with WaveClean must always be connected to hard and soft water To prevent burns only carry out cleaning and maintenance tasks when the oven has cooled down below 140 F 60...

Страница 15: ...rly The combi steamer should only be operated with a correctly functioning magnetic door switch If faulty advise service personnel immediately Chemicals could spray into the eyes or onto the skin of the operator during automatic cleaning and cause irritation and burns Do not operate the appliance if the glass panel is damaged The appliance must not be operated if the glass is broken cooking space ...

Страница 16: ...ce description Door lock of Opening 1 Turn door handle to the right or left The door then opens 2 Open the door fully If the door handle is released it returns to the vertical position Closing Press the door closed with door handle vertical 16 ...

Страница 17: ...5 Cooking mode button with LED Combi steaming 6 Start Stop button 7 Adjusting toggle CombiDial 8 Selector button Ready2Cook 9 Cooking mode button with LED Rethermalization 10 Right Select button 11 Selector button probe temperature measurement 12 Selector button cooking time 13 Selector button cooking temperature 14 Left Select button 15 Cooking mode button with LED Dry heat CombiDial Turn right l...

Страница 18: ...ooking chamber 3 Combidial 4 Display 5 Film keypad with LEDs 6 On Off switch 7 Appliance door 8 Insulating glass pane 9 Condensate catch trough 10 Door handle 11 Cooking chamber illumination 12 Temperature sensor for cooking cham ber 13 Core temperature probe 14 Fan 15 Fan cover 16 Cartridge holder 17 Bottom drain 18 Insert rack 19 Data socket RS232 18 19 1 2 3 4 5 6 7 8 9 10 ...

Страница 19: ...st Heat Combination of Moist and Dry heat Dry Heat Rethermalization Delta T cooking Slow Roast Holding SRH Steam Injection Rest Period Rack Control Additional functions Cooking processes can be adjusted individually using functions such as Start time pre selection Preheating Humidity control Manual steam injection Auto reverse fan End of step signal ...

Страница 20: ...roll through the list with the CombiDial and push it to call up the program The display shows the following 1 Name of the cooking program 2 Number of program steps 3 The program step displayed 4 Cooking type of the current program step 5 Temperature setpoint of the program step 6 Time or core temperature in this case time of the pro gram step Baked potatoes Combisteaming 338 F Prior programs Delet...

Страница 21: ...ays the last pro gram used Preheating For optimum cooking results we recommend the Ready2Cook button Page 44 Different programs Different programs can be selected Page 20 Location of the selection frame The location of the selection frame after the Smart Menu but ton is pressed can be set Page 20 ...

Страница 22: ...g time is entered before entering the Probe temperature the cooking temperature is ignored as the Probe temperature always takes priority Start Moist Heat After setting the temperature and timer or Probe temperature press the Pre Heat button if preheating is needed Press the Start Stop button to start the cooking cycle Display shows the selected cooking temperature along with the time or probe set...

Страница 23: ...er setting the setpoint temperature to set the humidity Use the CombiDial to set the humidity from 0 100 in 10 steps and then press the CombiDial to confirm percentage of humidity Using the Combi mode After setting the temperature and timer or probe temperature press the Start Stop button The display shows the selected cooking temperature along with the time or probe setting It also shows the actu...

Страница 24: ...m is extracted from the cooking chamber condensed and blown out Press the CombiDial twice after setting the setpoint core temperature and set the steam quantity The steam quantity can be set from 0 100 in 10 steps with the CombiDial With a setting of 100 the cooking chamber humidity can rise to 100 depending on the product type and quantity Starting Dry Heat mode After setting temperature and time...

Страница 25: ...e press the Start Stop button The unit can be heated by pressing the Ready2Cook button The display now shows the selected cooking temperature along with the time or probe setting It also displays the actual cooking time and the actual probe temperature if in Continuous Run The temperature display shows the remaining cycle time in continuous mode or the actual core temperature Displaying actual tem...

Страница 26: ...he steamer are shut off The advantages of this are Lower energy and water consumption No overcooking of product Higher yields Lower weight loss It is recommended that probe cooking be used with all cooking processes if possible To ensure that the nominal probe temperature is reached and the product is cooked thoroughly the cooking temperature must be set at least 7 F 5 C higher The Food Probe come...

Страница 27: ...to be cooked When cooking items with bones e g cutlets push the probe in adjacent to the bones insolate the bones When cooking long items such as smoked pork loin push in the probe crossways If the probe is placed longitudinally a hole remains in the middle of the slice when the product is cut up When cooking poultry differing weight distribution such as chickens place the probe in the inside of t...

Страница 28: ... temperature probe can be inserted into frozen food DO Not heat probe with a lighter or another heat source Over heating can cause the temperature probe to explode Drill an insertion channel With frozen food first drill an insertion channel with a hand drill and then insert the temperature probe ...

Страница 29: ...Operation Electric Space aver 29 Space aver ...

Страница 30: ...Electric Space aver Operation 30 Space aver ...

Страница 31: ...tton Dry Heat Moist Heat or Combi The display shows the selected cooking mode the preselected DT temperature 68 F 20 C and the preselected target core temperature 140 F 60 C The DT temperature flashes Press the CombiDial to confirm the DT temperature Set the flashing target cooking temperature with the CombiDial and press it to comfirm T Temperature Core temperature Space aver cooking temperature ...

Страница 32: ...igher the temperature difference the greater the weight loss and the more intensive the browning To ensure that the cooking time is not too long the Delta T setting should be at least 50 F 10 C This type of cooking means that slow operation times can be made use of Use a pre selected start time with this method For further Delta T cooking suggestions see the Practical Tips section 176 C T 01 01 12...

Страница 33: ...re is sufficient for low temperature cooking If a crisp crust is wanted first sear at a higher temperature before completing cooking at the lower temperature SRH using the probe SRH program first sears browns the product then automatically goes to the cooking process When the core temperature reaches 80 of its final setpoint see the graph the unit goes into a holding and maturing process Note if t...

Страница 34: ... aver Food Final core temperature temp to be maintained Cooking temperature Program stages Roast beef 132 F 55 C 140 F 60 C 1 Dry Heat 2 SRH Roast pork 167 F 75 C 176 F 80 C Roast veal 158 F 70 C 167 F 75 C Roast lamb 167 F 75 C 176 F 80 C ...

Страница 35: ...ore temperature 104 210 F 40 99 C with the CombiDial Note If a cooking time is entered before entering the final core temperature the control system will ignore this as the core temperature always takes priority Once the core temperature is entered press the CombiDial to enter another program step Pressing the CombiDial twice the display reverts to the first program step Starting SRH Start the pro...

Страница 36: ... 86 266 F 30 130 C and the water quantity 0 5 000 ml To enter another program step press the CombiDial or start the program with the Start Stop or Ready2Cook button The display shows the following while the program is running 1 Remaining time of all program steps 2 Cooking type B steam 3 The number of the active program step 4 Remaining water quantity ml Rest peri Steam 02 02 Confirm Back Steam 02...

Страница 37: ...sing the right hand selector button or the combidial Set the rest period in minutes with the CombiDial Press the CombiDial to enter an additional program step Press the start stop button to start the program The display shows the following while the Rest period pro gram step is running 1 Remaining time of all program steps 2 NOP No Operation Rest period 3 The number of the active program step 4 Re...

Страница 38: ...e password 111 using the CombiDial and confirm using the Start Stop button The display shows Time Date and the setting number 000 Press the CombiDial to set the next flashing time date setting Turn the CombiDial to set the new value and confirm by pressing the Right Hand Select button Press the CombiDial to select the next setting or press the Left Hand Select button to return to the start up disp...

Страница 39: ...ressed Date format 144 DD MM YY YY DD MM YYYY YYYY MM DD MM DD YYYY TT Day MM Month JJJJ Year 12 or 24 hour clock Temperature display 006 in C C F The temperature display in F is not linked to the English display text Cookbook 097 Free Free Programs in the Cookbook can be changed deleted or saved Locked Programs in the Cookbook cannot be changed deleted or saved However changes can be made during ...

Страница 40: ...ndividually set up for the cooking process within the limits shown here Combi steaming temp 236 266 F 130 C 86 482 F 30 250 C Dry Heat temp 237 356 F 180 C 86 482 F 30 250 C Retherm temperature 238 248 F 120 C 86 356 F 30 180 C SRH temp 239 140 F 60 C 140 212 F 60 100 C DT cooking temperature 240 68 F 20 C 34 F 212 F 1 100 C DT probe temperature 241 140 F 60 C 86 210 F 30 99 C Smart Menu history 2...

Страница 41: ...an 19 Hungarian 21 Swedish 22 Turkish 23 Slovakian 24 Serbian 25 Greek 26 Portuguese 100 US English Different country specific cookbooks can be loaded via cookbook switching Deleted AutoChef cooking programs can also be restored here For this purpose select cookbook number and then save Press Save after switching the cookbook analysis appears for up to 5 minutes Cooking programs created on the app...

Страница 42: ...m the list with the Combi Dial After the CombiDial is pressed the display shows the name of the cooking program the number of program steps and the accompanying temperature and time values Set the temperature and time values with the CombiDial and add program steps if necessary The asterisk next to the program name indicates that the original program was changed Pressing and holding the SmartMenu ...

Страница 43: ...hing Starts at 00 01 Use the CombiDial to enter the time After the countdown if a cooking program is using cooking time and not probe core temperaure the finishing time is calculated and displayed in the Finishes at field If the cooking program uses probe temperature only the highest nominal probe temperature is displayed 3 Start the program with the Start Stop button or the CombiDial countdown Th...

Страница 44: ...econds and the Space aver automatically goes to 527 F 275 C regardless of the set temperature When preheat temperature is reached buzzer will sound and the display shows the holding temperature Standby Mode Open door insert product close door and start cooking cycle Ready2Cook cannot be permanently programmed in cooking programs The function must always be started manually This function cannot be ...

Страница 45: ... the oven chamber Space aver and Space aver Plus are equipped with the SES1 steam extraction system The SES extracts steam from the cooking chamber and condenses it when cooking is com plete This prevents larger amounts of steam escaping when the door is opened The SES is activated for the last program step by default With cooking programs shorter than 6 minutes the SES is not acti vated This func...

Страница 46: ...dishes are to be cooked at different times we rec ommend using the RackControl function RackControl indicates the completion of cooking times start ed at different intervals with a 10 second audible signal The cooked food can be removed The cooking process is not interrupted here continuous oper ation RackControl is especially helpful when regenerating plated meals While the Combisteamer is workin...

Страница 47: ... The pre selected temperature can be changed with the combidial Accept the temperature by pressing the combidial and switch to the time setting Enter the default cooking time for the batch by turning the combidial to the right left Do not press the combidial after entering the time Press the start stop button The button LED flashes and the cooking process now runs in continuous operation Place con...

Страница 48: ...ime The signal sounds once the time has expired The clock symbol next to the area number disappears from the display The checkmark in the field below this reminds you that the cooking time has expired but the food has not yet been removed 0 is displayed instead of the checkmark when the food container is removed New dishes example can be placed in the areas that have become available Start the coo...

Страница 49: ...l does not need to be activated for the last cooking step in a cooking program as the completion of the cooking program is indicated via a 20 second audible signal Call up the More functions menu with the left hand selector button after entering the temperature and time values Select End of step signal with the combidial The selected menu item flashes Activate the end of step signal by pressing th...

Страница 50: ...Electric Space aver 50 Additional functions Space aver 50 ...

Страница 51: ...Electric Space aver 51 Additional functions Space aver ...

Страница 52: ...Electric Space aver More functions 52 Space aver ...

Страница 53: ...m is produced very quickly The following should be taken into consideration Perforated pan with a depth of 1 1 2 to 2 1 2 40 65 mm are particularly suited to steaming These allow short cooking times and prevent food at the bottom of the pan from overcooking It is essential to break up lumps in frozen food to ensure that everything cooks through evenly If you are steaming different foods in a singl...

Страница 54: ... reduce the weight loss in meat and sausages and achieve optimum flavor aroma and color You avoid burst skins when boiling or warming sausage products You achieve optimum food quality with sensitive foods such as terrines galantines flans stuffing crème caramel and diet foods Well suited to the use of vacuum bags following the vacuum sealing process Precise cooking sets egg whites optimally i e th...

Страница 55: ...times for preportioned foods use covered pans Combination Mode moist and dry heat Controlled cooking of large pieces of meat and baking casseroles etc using a combination of moisture and heat Advantages of Combination Mode Oven conditions are always optimum with moist dry heat Food does not dry out weight loss is reduced The flavour and aroma of the food is retained as much as possible Food cooks ...

Страница 56: ...e bones mirepoix roasted vegetables herbs and spices in this bowl and gradually add water or stock Dry Heat The Dry Heat Mode is suitable for all roasts and cakes and pastries that do not require additional humidity Advantages of dry heat only You have a higher capacity than standard oven You will achieve even cooking results thanks to the auto reverse fan You can reduce the fat requirement by up ...

Страница 57: ... surface of the food does not dry out and the fan will only run when it is cycled The following should be taken into consideration The oven chamber temperature should be just above the required temperature of the food to be cooked e g at least 7 F 5 C The higher the oven chamber s temperature the higher is the roasting shrinkage This cooking method does not produce a crust SRH tips You can keep pr...

Страница 58: ...ermalize any number of dishes as required You can load the oven plate racks effortlessly from all sides The following should be taken into consideration Always preheat the Space aver using the preheating function For regeneration times and temperatures please refer to the following table After preheating load the Space aver with the prepared plates or trays quickly This procedure ensures that the ...

Страница 59: ...or prewarming At large banquets operate with a number of oven plate racks Plates can be kept warm up to a maximum of 20 minutes using thermal covers ideal is 15 minutes You can rethermalize further batches during this period This allows you to serve your guests with food all at the same time Save your favorite rethermalization programs for standard plates in the rethermalization recipe book This g...

Страница 60: ...Electric Space aver Practical tips 60 Space aver ...

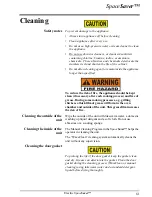
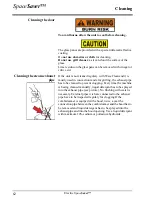
Страница 61: ...rease During some cooking processes e g grilling chicken a thick film of grease will form in the oven chamber and outside of the unit This grease film increases the risk of fire Cleaning the outside of the unit Wipe the outside of the unit with lukewarm water a domestic washing up liquid detrgent and a soft cloth Do not use abrasives or a scouring sponge Cleaning the inside of the unit The Manual ...

Страница 62: ...an and it is mostly used in convection mode for grilling the exhaust pipe has to be cleaned to prevent clogging Every time the machine is beeing cleaned manually liquid detergent has to be sprayed into the exhaust pipe see picture No flushing with water is necessary External pipes wich are connected to the exhaust pipe have to be inspected regulary for clogging If the combisteamer is equiped with ...

Страница 63: ...ce using a hand sprayer or onto the appliance door for cooling purposes Sudden coolingcandistorttheinterioroftheunit andcouldcausetheglass panel in the door to shatter See the Cool Down Mode in the Practical tips Section to cool the unit down quickly Soaking Once theunit temperature reaches122 F 50 C thedisplay shows Soaking and the remaining time Spraying cleaner Always wear chemical splash goggl...

Страница 64: ...er counts down to 0 00 Rinse chamber shows in the display Open the door and use the Manual Rinse left Select Button to thoroughly rinse the interior of the unit Make sure to clean behind the air baffle Then shut the door again Cleaning door seal Clean the door seal as described in the section Cleaning door seal Then close the door again Drying Drying is started automatically once the door has been...

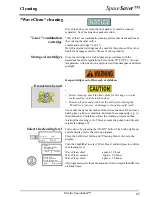
Страница 65: ...hen floor Remove all pans and grids from the unit before starting the WaveClean process or damage to the pump could result Leave only the pan racks in the unit and close the door Do not leave baking trays grids or containers but clean these separately e g in the dishwasher Containers collect the cleansing water and thus interrupt the cleaning cycle This may cause the pump to run dry and might also...

Страница 66: ... enter the cleaning cycle prematurely or might not dissolve A complete cleaning process may not take place After selecting a cycle the display shows Insert cartridge after the oven chamber has reached the cleaning temperature Unscrew the top of the cartridge and place the cartridge 3 in the Foldaway Cartridge Assembly Use only Henny Penny 2 in 1 cartridges Two cartridges can be used if unit needs ...

Страница 67: ...s a short time when the process cannot be interrupted while the cartridge is being emptied End WaveClean When cleaning is complete the appliance switches off automatically When restarted the Remove cartridge request appears in the display Open the door and remove the empty cartridge Thoroughly rinse out any residual cleaner or rinser with the hand shower Close the door again and confirm the remova...

Страница 68: ...nces no negative effects White deposits lime can appear in the cooking chamber however WaveClean extra The 2 in 1 cleaning cartridge has been optimised for the removal of especially strong grease soiling and burnt in soiling It can only dissolve a certain amount of the lime residue The cooking chamber can remain white with excessive quantities of lime In this case regular cleaning with WaveClean e...

Страница 69: ...ograms without core temperature can still be used Core temperature probe is used as a replacement sensor Do not introduce core temperature sensors into the products The core temperature probe must remain inside the oven chamber Call Certified Sevice Agent Risk of freeze damage Temperature 32 F 0 C Only operate the appliance at temperatures of 32 F 0 C and above Freezing may lead to cracks in pipes...

Страница 70: ...il the control electronics turn off The electronics will switch back on after approx 10 seconds The appliance is now in the start mode standby and the following appears in the start screen display Measuring mode If when resetting the control electronics the on off button is accidentally pressed for longer than 8 sec with the appliance switched off the electronics change into the measuring mode To ...

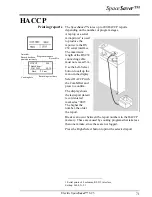
Страница 71: ...HACCP with the CombiDial and press to confirm The display shows thelastreport latest record entered marked as 000 The higher the number the older the report Breaks can occur between the report numbers in the HACCP memory These are caused by cooking programs that take less than one minute since these are not logged Press the Right Select button to print the selected report 1 Serial printer 40 colum...

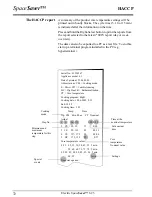
Страница 72: ...inal time Time at the nominal temperature Core temperature Nominal value Cooking mode Step No Minimum and maximum temperature forthis step Settings Special events Serial No 01234567 Appliance model 6 1 Date of printout 23 06 2003 Abbreviations CM Cooking mode S Moist CD Combi steaming HC Dry Heat R Rethermalization CT Core temperature Cooking program Right Cooking date 19 06 2003 8 59 End 10 38 Co...

Страница 73: ......
Страница 74: ...Eaton OH 45320 1 937 456 8400 1 937 456 8402 Fax Toll free in USA 1 800 417 8417 1 800 417 8434 Fax www hennypenny com fm05 046 B Henny Penny Corp Eaton Ohio 45320 Revised 08 01 08 Manufactured by MKN Maschinenfabrik Wolfenbüttel Germany ...

Отзывы: