background image

Assembly Instructions

12

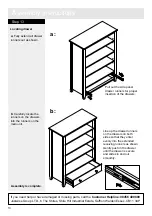
Step 12

Assembling drawer

a

: Assemble drawer

side panels      and

and drawer back

together using screws    .

Note

Ensure the

grooves in all 3 panels

are aligned at the bottom.

b

: Slide drawer base

into the grooves as

shown.

c: 

Assemble drawer

front       using screws

     .

Attach drawer handles

     using screws     .

a:

b:

c:

10

8

D

9

D

7

F

E

D

D

8

11

9

7

10

11

Align grooves

D

D

E

F

E

F

Содержание 614/3222

Страница 1: ...arting assembly Dimensions Issue 1 18 10 11 Width 90cm Depth 40cm Height 120cm Henley Bookshelf Assembly Instructions Please keep for future reference 614 3222 If you need help or have damaged or missing parts call the Customer Helpline 08456 400800 614 3239 ...

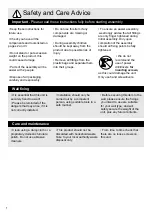
Страница 2: ...not use this item if any components are missing or damaged During assembly children should be kept away from the product due to possible risk of injury Remove all fittings from the plastic bags and separate them into their groups From time to time check that there are no loose screws on this unit Important Please read these instructions fully before starting assembly Wall fixing It is essential th...

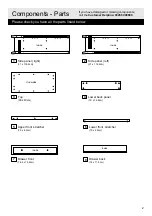
Страница 3: ...l the Customer Helpline 08456 400800 2 1 Side panel right 37 x 118 2cm 2 5 Side panel left 37 x 118 2cm 3 6 7 8 Lower back panel 79 x 16 8cm 4 Top 90 x 40cm Inside Inside Underside Upper front stretcher 79 x 4 5cm Lower front stretcher 79 x 4 5cm Drawer front 78 4 x 14 8cm Drawer back 74 x 11 8 cm Inside Inside ...

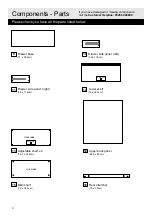
Страница 4: ...Customer Helpline 08456 400800 3 9 10 13 11 14 15 16 12 Drawer base 75 x 28 6cm Drawer side panel right 30 x 11 8cm Drawer side panel left 30 x 11 8cm Upper back panel 88 8 x 80cm Main shelf 79 x 34 6cm Adjustable shelf x 2 78 7 x 34 2cm Underside Underside FRONT Rear stretcher 79 x 5 5cm Lower shelf 79x 36 9cm FRONT ...

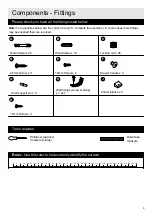
Страница 5: ...35 40 45 50 55 60 65 70 75 80 85 90 95 100 105 110 115 120 125 130 135 140 145 150 155 160 165 170 Tools required A B C Metal dowel x 26 D E F 0 0 5 10 15 20 25 30 35 40 45 50 55 60 65 70 75 80 85 90 95 100 105 110 115 120 125 130 135 140 145 150 1 2 3 4 5 6 Phillips screwdriver medium large Ruler tape measure Wood dowel x 18 Locking nut x 26 19mm Screw x 2 25mm Screw x 11 Drawer handle x 2 G Shel...

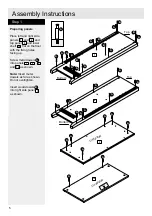
Страница 6: ...facing up Screw metal dowels into panels and as shown Note Insert metal dowels as far as shown Do not overtighten Insert wood dowels into right side panel as shown A Assembly Instructions 1 2 3 1 2 12 B 1 A 3 1 A A A A A A A B A A A A A A A B A B B B B B 12 A A 3 12 A A A A A A A A A 2 Top Bottom Top Bottom Underside Underside FRONT ...

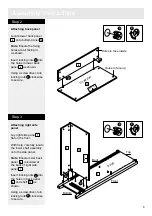
Страница 7: ...o secure 4 12 C 4 C 4 12 C C Holes to face inside 4 12 1 C C Underside Holes to face up Inside Bottom Top Back Front Attaching right side panel Lay right side panel flat on the floor With help carefully locate the lower shelf assembly onto the side panel Note Ensure lower back panel is located at the back of right side panel Insert locking nuts into the holes in back panel and shelf as shown Using...

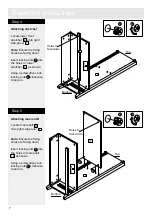
Страница 8: ...stretcher as shown Using a screwdriver turn locking nuts clockwise to secure Attaching main shelf Locate main shelf onto right side panel Note Ensure the fixing holes are facing down Insert locking nuts into the holes in main shelf as shown Using a screwdriver turn locking nuts clockwise to secure 6 1 C 6 C 15 1 C C 15 15 6 1 1 C C C Holes to face down Holes to face down Bottom Top Bottom Top FRON...

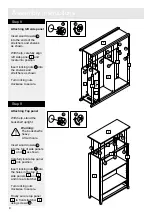
Страница 9: ...t side panel Note Ensure the fixing holes are facing down Insert locking nuts into the holes in stretchers and as shown Using a screwdriver turn locking nuts clockwise to secure Attaching back panel Carefully slide back panel into the grooves in each side of the unit 16 1 C 5 C Note Groove to face down Front Back C 16 5 14 C Holes to face down Holes inside 5 1 16 14 Bottom FRONT FRONT ...

Страница 10: ...o secure B 2 C Attaching Top panel With help stand the bookshelf upright Insert wood dowels into the top of side panels and as shown Carefully locate top panel into position Insert locking nuts into the holes in the top of side panels and and in rear stretcher Turn locking nuts clockwise to secure Finally secure top panel to front stretcher using screws 3 C 1 2 16 5 D B B B B B B 2 B C C C C C C W...

Страница 11: ... help move the unit into position Warning The unit is heavy Lift with care Mark fixing hole locations on the wall and remove unit Drill hole and insert suitable wall plugs for your wall type Note Wall plugs are not supplied Warning Before drilling check wall for hidden pipes and cables Reposition unit and fix wall strap Note Screws are not supplied H The correct type of fixing must be used for you...

Страница 12: ...stable shelves a Fit shelf support pins at the desired height b Carefully locate adjustable shelves onto the support pins Note The front edges of shelves have been labelled for easier identification a b G 13 13 G 13 13 Labelled underneath Front G ...

Страница 13: ...nd drawer back together using screws Note Ensure the grooves in all 3 panels are aligned at the bottom b Slide drawer base into the grooves as shown c Assemble drawer front using screws Attach drawer handles using screws a b c 10 8 D 9 D 7 F E D D 8 11 9 7 10 11 Align grooves D D E F E F ...

Страница 14: ...ertion of the drawers Line up the drawer runners on the drawers on both sides so that they enter evenly into the extended receiving runners as shown Gently push in the drawer until the drawer is secure and slides in and out smoothly If you need help or have damaged or missing parts call the Customer Helpline 08456 400800 Justwise Group LTD 6 The Shires Shire Hill Industrial Estate Saffron Walden E...

Отзывы: