


3
PROTECT YOUR FURNITURE!!
This system is equipped with non-skid rubber ‘feet’ to prevent the product from moving when you
operate the controls. These ‘feet’ are made from non-migrating rubber material specially
formulated to avoid leaving any marks or stains on your furniture. However certain types of oil
based furniture polishes, wood preservatives, or cleaning sprays may cause the rubber ‘feet’ to
soften, and leave marks or a rubber residue on the furniture.
To prevent any damage to your furniture we strongly recommend that you purchase small self-
adhesive felt pads, available at hardware stores and home improvement centers everywhere, and
apply these pads to the bottom of the rubber ‘feet’ before you place the product on fine wooden
furniture.
IMPORTANT NOTES
Avoid installing the unit in locations described below:
♦
Places exposed to direct sunlight or close to heat radiating appliances such as electric
heaters.
♦
Dusty, humid or moist places.
♦
Places subject to constant vibration.
POWER SOURCE
This unit is designed to operate on 230V~ 50Hz AC house current. Operating this unit on any
other power source may cause damage to the unit, and such damage is not covered by your
warranty.
It is also equipped with a battery backup system for the clock that is powered by an optional 9V
battery (type 6LR61, 6F22 or equivalent) – not included.
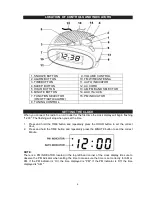
BATTERY BACKUP SYSTEM
The Battery Backup System ensures the clock and alarm settings are retained during a power
interruption or power outage (in order to preserve the battery life the Display will not light). All clock
settings will be kept in memory, however, the clock time may require adjustment for exact accuracy
once the power resumes. If a battery is not installed, the Display will be flashing “12:00” when the
power is restored. This indicates that you have to set up the time and alarm settings again.
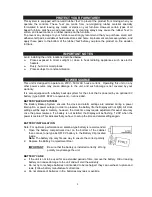
BATTERY INSTALLATION
Note: For optimum performance an alkaline-type battery is recommended.
1. Open the battery compartment door on the bottom of the cabinet
then connect one type 6LR61 9V battery to the Battery Clip located
inside.
Note:
The battery clip only fits one way to ensure the correct polarity.
2. Replace the Battery Compartment Door.
IMPORTANT
:
Be sure that the battery is installed correctly. Wrong
polarity may damage the unit.
BATTERY CARE
♦
If the unit is not to be used for an extended period of time, remove the battery. Old or leaking
battery can cause damage to the unit and will void the warranty.
♦
Do not try to recharge batteries not intended to be recharged; they can overheat, rupture and
leak. (Follow battery manufacturer’s directions.
♦
Do not dispose of batteries in fire, batteries may leak or explode.
Содержание KT2051
Страница 8: ......


