background image

7

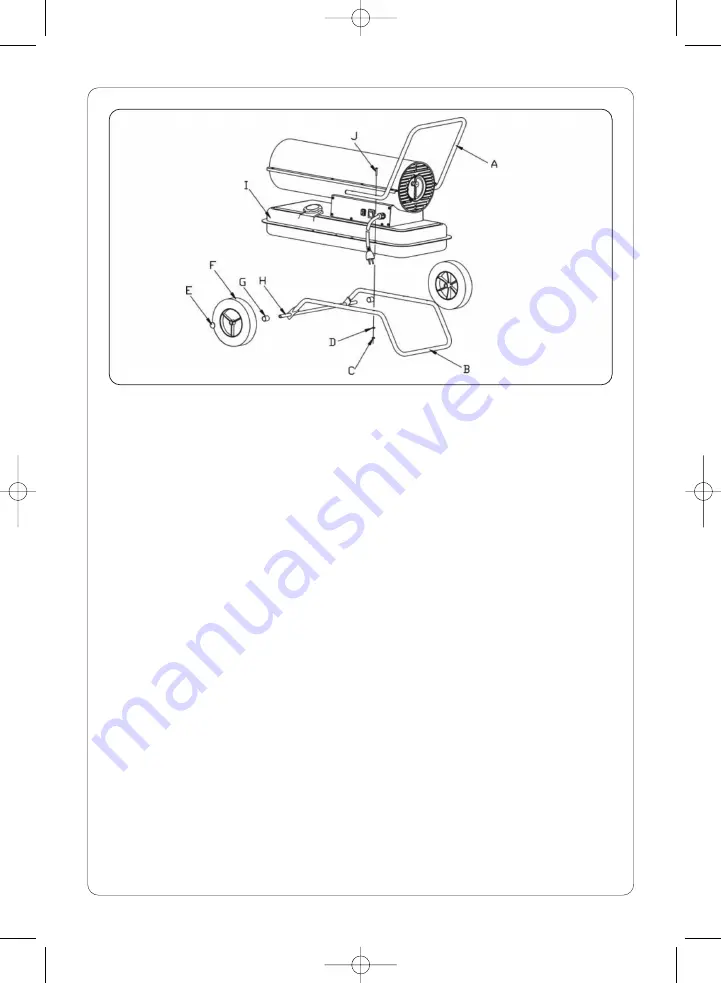
Figure 3 Frame Assembly

Assembling wheels and tube frame

Insert the wheel axle to the corresponding hole of lower tube frame, set bush
G at the two ends of wheel axle H. Then slide the wheel F over the wheel
axle H, put on the wheel cap E.

Put the heater body on the lower tube frame B, make sure the 4 holes of the
handle frame point towards the corresponding 4 holes on the lower tube
frame respectively.

Insert screws J in the holes place flat washers D under the lower frame B and
tighten the hexagonal screw C.

Insert other screws in the holes respectively and use a screw driver to tighten
them by the same way.

Before operation

Never use high volatile fuel such as petrol. ONLY diesel or kerosene.

Only fill the fuel tank when the heater stops running and the flame goes out.

Please use diesel or No JIS1 kerosene. Never use degenerative, impure
diesel or kerosene.

When you fill the fuel tank, the tank filter must be installed.

If diesel or kerosene comes into contact with human skin please wash with
soap immediately, to prevent potential inflammation.

The burner surface is very hot just after flameout, so never touch it with your
hands. To prevent scalding or other injury, do not let fuel come in contact
with the burner.

HSFAH30_instructions  13/7/15  12:55  Page 7

Содержание HSFAH30

Страница 1: ...ALWAYS BE FOLLOWED PLEASE READ ALL INSTRUCTIONS CAREFULLY AND RETAIN FOR FUTURE REFERENCE IF IN ANY DOUBT ABOUT THE INSTALLATION OR USE OF THIS PRODUCT CONSULT A COMPETENT ELECTRICIAN HSFAH30 Forced Air Heater Installation and Operating Instructions HSFAH30_instructions 13 7 15 12 55 Page 1 ...

Страница 2: ...ted area the volume of air to be heated m3 heat output kW ratio must be at least 10 1 and people must be advised not to remain in the heated area for prolonged periods If people are required to be present in the heated area the volume of air to be heated m3 heat output kW ratio must be at least 30 1 Ventilation must be to the outside of the premises in which the heater is to be operated Minimum Ve...

Страница 3: ...r inlet rear and air outlet front of the heater and DO NOT use duct work in front or at the rear of the heater DO NOT allow children or animals near the heater when in use or whilst still hot WARNING RISK OF ELECTRIC SHOCK DO NOT expose the heater to water spray rain dripping water or wind DO NOT operate the heater when you are tired or under the influence of alcohol drugs or intoxicating medicati...

Страница 4: ... and the operator to read understand and comply with the following You must check all electrical products before use to ensure that they are safe You must inspect power cables plugs sockets and any other connectors for wear or damage You must ensure that the risk of electric shock is minimised by the installation of appropriate safety devices A Residual Current Circuit Breaker RCCB should be incor...

Страница 5: ...and check all connections to ensure that none is loose DO NOT pull or carry the appliance by the power cable DO NOT pull the plug from the socket by the cable DO NOT use worn or damaged cables plugs or connectors Immediately have any faulty item repaired or replaced by a qualified electrician When a BS 1363 A UK 3 pin plug is damaged cut the cable just above the plug and dispose of the plug safely...

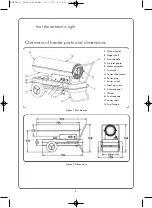
Страница 6: ... guard E Motor assembly F Fuel tank G Lower tube frame H Power plug I Power switch J Start up switch K Control panel L Wheel M Fuel tank cap N Lower shell Q Fuel Gauge Overview of heater parts and dimensions Figure 1 Part Names Figure 2 Dimensions HSFAH30_instructions 13 7 15 12 55 Page 6 ...

Страница 7: ...ws in the holes respectively and use a screw driver to tighten them by the same way Before operation Never use high volatile fuel such as petrol ONLY diesel or kerosene Only fill the fuel tank when the heater stops running and the flame goes out Please use diesel or No JIS1 kerosene Never use degenerative impure diesel or kerosene When you fill the fuel tank the tank filter must be installed If di...

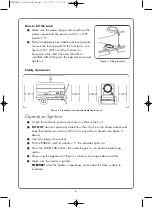
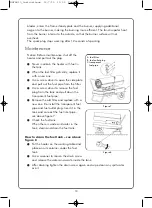
Страница 8: ... Filling the tank Operation Ignition Check the fuel tank and ensure there is sufficient fuel in it DO NOT stand or place any object less than 3m from the heater output and keep the heater a minimum of 2m from any walls or objects see figure 5 above Insert the plug in the socket Put the POWER switch to position 1 the indicator lights up Press the IGNITION button the motor begins to run and the spar...

Страница 9: ... is restored the indicator will light but the heater will not work Please press the START switch to start up the heater How the heater works 9 Figure 6 A Combustion chamber B Spark plug C Fan blade D Motor E Pump F Air intake filter G Air output filter H Fuel tank I Controller J Air inlet pipe K Electrovalve assembly L Flame steady plate M Oil nozzle Description of working principles Press the STA...

Страница 10: ... driver to remove the fuel plug from the tank and pull down the transparent fuel pipe Remove the old filter and replace with a new one Re install the transparent fuel pipe and fuel outlet plug Insert it in the tank and connect the fuel inlet pipe see above figure 7 Check the fuel tank When there is waste and water in the tank clean and drain the fuel tank How to drain the fuel tank see above figur...

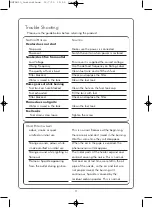
Страница 11: ...powder This is normal 11 Trouble Shooting Please use the guide below before returning the product SYMPTOM PROBLEM Heater does not start No power Power cut Smoke dust fire from outlet Low Voltage Wrong Frequency The quality of fuel is bad Filter blocked Water is mixed in the tank Flame goes out while burning Fuel tank air hole blocked Fuel exhausted Filter blocked Flame does not ignite Water is mix...

Страница 12: ...23 5375 Fax 0117 923 5374 Victoria Road Avonmouth Bristol BS11 9DB www heatstore co uk Specification HSFAH30 RATING 30kW 10500BTU 25 800 Kcal h MOTOR POWER 180W OPERATING PRESSURE 30kW output 0 75 Bar AIR OUTPUT 752m3 h continuous usage 9 hours FUEL TYPE Diesel Oil Kerosene FUEL CONSUMPTION 2 5 litre h FUEL TANK CAPACITY 24 litres DIMENSIONS 870L x 470W x 520H mm WEIGHT 19 62kG HSFAH30_instruction...

Отзывы: