background image

5.

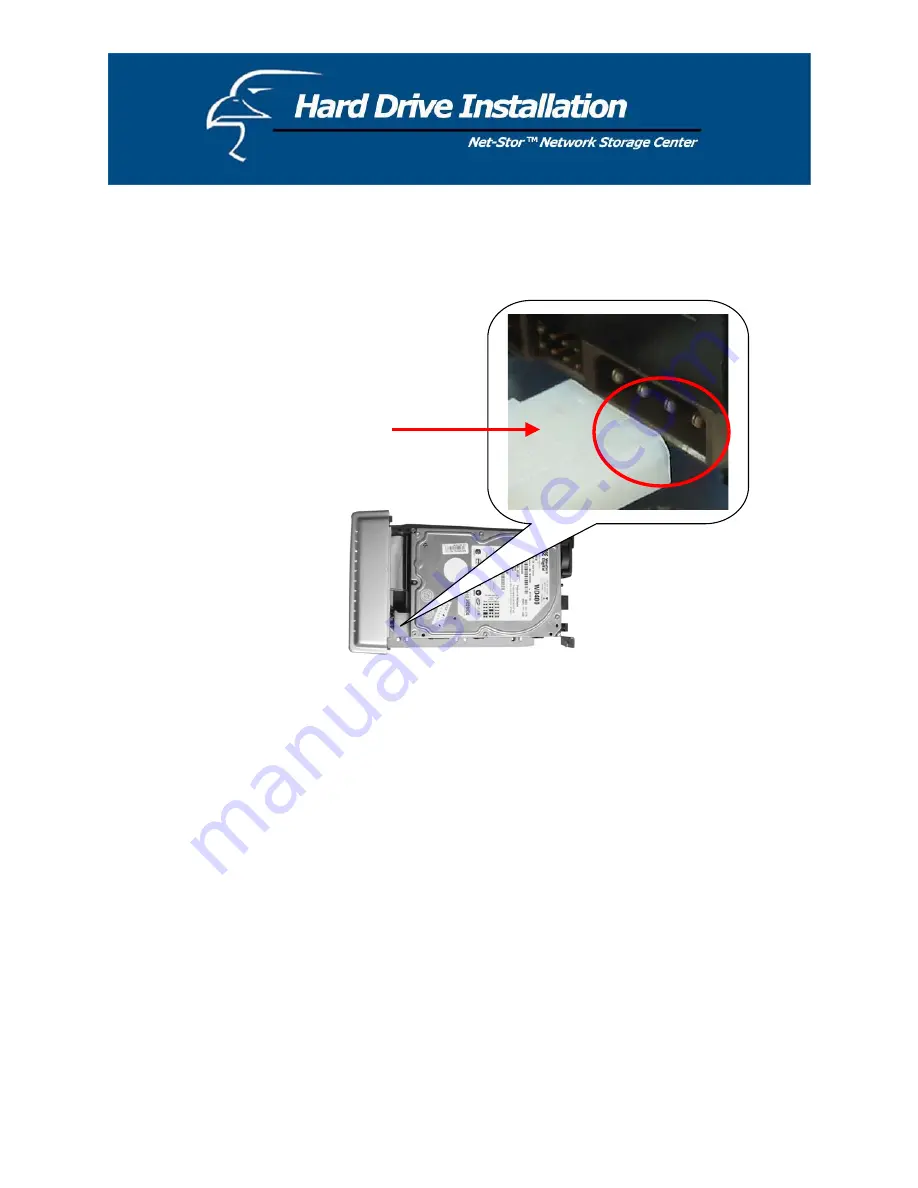
Push the power connector into the power socket of the hard drive, as shown. The power cable is 
designed to go in one way, to avoid any potential errors. 

Power Connector 

6.

Secure the hard drive using the provided screws. 

7.

Push the hard drive and its holder back into the box and secure it with the two screws provided. 

18

Содержание Net-Stor HNAS1

Страница 1: ...1 ...

Страница 2: ...t 15 of the FCC rules Operation is subject to the following two conditions 1 This device may not cause harmful interference and 2 This device must accept any interference received including interference that may cause undesired operation CE Mark Warning This is a Class B product In a domestic environment this product may cause radio interference in which case the user may be required to take adequ...

Страница 3: ...Center 28 Homepage 29 Status Details 30 Network Settings 31 Host Name 31 IP Address 32 Superuser Password 33 Administration 34 Restart System 34 HD Format 35 Factory Default Reset 36 System Time 37 Character Set 37 Share 38 User Configuration 41 Folder Configuration 41 FTP 44 FTP Configuration 44 FTP Password 45 Setup Tip 46 Applications for the Device 49 Troubleshooting 51 Specifications 53 3 ...

Страница 4: ...the device and turn it on utilize the Setup Wizard and the Network Storage Center is ready for use Key Features x Supports one 10 100Mbps Ethernet port Auto MDI MDIX for network connection x Web based user interface for easy configuration and management x Supports one user selectable high speed ATA ATAPI 6 hard drive x Supports all standard 3 5 IDE hard drives up to 250GB hard drive not included x...

Страница 5: ... installation guide x One quick installation guide x One power adapter 12V 3A x Four rubber feet x Four screws for fastening securing the hard drive Please check to make sure that the unit was not damaged during shipping and that no items are missing If you encounter a problem please contact your dealer Please read this manual thoroughly and follow the installation and operation procedures contain...

Страница 6: ...Green Dark Power Boot Shutdown Blinking Ethernet Connected Green Ethernet Not Connected Dark Link ACT Ethernet Data Transfer Blinking HD Hard Drive Data Transfer Amber Blinking Reset Button To restore the default settings use the tip of a ballpoint pen or paper clip to hold this button down for at least five seconds This will cause the default reset to begin Ethernet Port Use an RJ 45 Ethernet cab...

Страница 7: ...Please Note if it is already installed you can proceed directly to the Hard Drive Installation section and Quick Setup Wizard section that follows it You need to configure a unique IP address for each PC on the network in order to complete the setup process successfully To do this follow the instructions below An IP address is a set of numbers consisting of four segments or octets with each segmen...

Страница 8: ...How to Configure the TCP IP Network Protocol Windows 98 Me 1 Click on Start Settings Control Panel Network 2 Click TCP IP Ethernet Adaptor and click Properties 8 ...

Страница 9: ...ck on Specify IP Address 4 Type in the IP Address Make sure you set the Subnet Mask to 255 255 255 0 5 Click OK At this point you may be asked for your Windows disk Follow the on screen displays and then restart your computer 9 ...

Страница 10: ...How to Configure the TCP IP Network Protocol Windows 2000 1 Click on Start Settings Network and Dial up Connections 2 Choose Local Area Connection and click on Properties 10 ...

Страница 11: ...Click on Internet Protocol TCP IP and then click on Properties 4 Click on Use the following IP address Make sure you set the Subnet mask to 255 255 255 0 Click OK and then OK and restart your computer 11 ...

Страница 12: ...iew click on Start Settings Control Panel Network Connections If you are in standard Start menu view click on Start Control Panel Network Connections 2 Double click on Local Area Connection 3 Choose Internet Protocol TCP IP and then click on Properties Click on Use the following IP Address 12 ...

Страница 13: ...se earlier The subnet mask is entered automatically in Windows XP Click OK Now the configuration of your PC s IP settings is complete Please review the sections that follow to complete the hard drive installation and Quick Setup Wizard 13 ...

Страница 14: ...l area network the following steps will allow you to determine the three common segments that the IP addresses of all devices on the network share a a Click on Start in the bottom left corner of your screen Then click on My Network Places 14 ...

Страница 15: ...ork Connections window you should see an icon titled Local Area Connection or something similar You can access this icon in two ways a by clicking or double clicking on it or b by right clicking on it and then clicking on Status from the resulting menu 15 ...

Страница 16: ...find an IP Address line and a Default Gateway line These two lines will have IP addresses with the first three octets in common Use this information to set the IP address for your network camera You will use these same three octets as the first three octets for the IP address of your network camera The final octet will be a number between 0 and 254 d 16 ...

Страница 17: ...ould be set to Master Different hard drives have different jumper settings Please refer to your hard drive s user s manual for more information 4 Insert the IDE connector into the IDE socket of the hard drive Make sure Pin 1 on the cable is connected to Pin 1 on the hard drive socket Pin 1 is the red or pink strip on the edge of an IDE cable The IDE cables are designed to fit in only one direction...

Страница 18: ...rd drive as shown The power cable is designed to go in one way to avoid any potential errors Power Connector 6 Secure the hard drive using the provided screws 7 Push the hard drive and its holder back into the box and secure it with the two screws provided 18 ...

Страница 19: ... hard drive is used to describe a basic 3 5 IDE hard drive not the Network Storage Center Please follow the steps outlined below 1 Activate The Utility Software Place the utility CD included with the HNAS1 package into your CD ROM drive and wait for the Auto run menu to appear on your screen Then click on Quick Setup Wizard If the utility does not activate automatically click the Start button in t...

Страница 20: ...the power cord and press the Power button on the front panel of the Network Storage Center Ensure that the Power LED is lit green Note To power off the device hold down the Power button for at least five seconds until the Power LED starts blinking and then turns off 20 ...

Страница 21: ... LAN Connection Connect the Network Storage Center and router switch or PC with an RJ 45 Ethernet cable Ensure that the Link Act LED is lit green 21 ...

Страница 22: ...3 Click Next to start the Scan Prepare to Scan Scan Hard Drives on the Network The Setup Wizard will scan your network to locate all available Network Storage Centers or Network HDs 22 ...

Страница 23: ...th your LAN Changes the network settings and creates two shortcuts to access and set up the Network HD YES The Network HD s network settings are compatible with your LAN Creates two shortcuts to access and set up the Network HD Hard Drive s Found The Setup Wizard should automatically assign to the device an IP address that is consistent with your existing network settings 23 ...

Страница 24: ...word Reminder When the box shown above appears please input admin in both fields as these are the default values for both the User Name and Password For more information please refer to the user s manual Settings 24 ...

Страница 25: ...rough the Setup Wizard again x Refer to the user s manual on the CD for help Please read this carefully If the Setup Wizard completes successfully the message shown above will appear Please read it carefully and click OK o The shortcut Setup My Network HD will connect you to the device s web user interface when you double click on it Again the default User Name and Password are both admin o The sh...

Страница 26: ...g the Network Storage Center or configure additional settings via the web based user interface Regarding the ettings please refer to the Management Guide in the user s manual s Note It is recommended but not necessary that you map the Network HD to your PC as a network drive The device will then automatically reconnect and always be available as a network drive whenever you re start your PC For mo...

Страница 27: ...tion levels are set as follows a ALL Read Write b Power Read Write c Guest Read Only The user can adjust the authorization levels of these accounts by clicking on Share in the Folder Configuration page within the Share section of the device s webpage 2 By default you can enter all power or guest for the Username and Password For example x Username all x Password all 27 ...

Страница 28: ...ps listed below 1 Double click the Setup my Network HD icon on your desktop screen 2 Type the device s new IP address into the URL web address location and press Enter The Username and Password window will appear x Enter admin in the User Name location default value x Enter admin in the Password location default value x Click the OK button 28 ...

Страница 29: ...TP v1 0 compliant browser The Network Storage Center s Homepage Home Status Host name the term used to identify the Network Storage Center in My Neighborhood IP address the Network Storage Center s IP address Version the current version of the firmware Configuration To link to the item you want click on the appropriate link 29 ...

Страница 30: ...entage of the total hard drive space that is currently in use Up time the amount of time your Network Storage Center has been in use Samba SMB Users the number of members using the Network Storage Center FTP Users the number of members using the Network Storage Center by FTP client Note The Network Storage Center allows up to a maximum of five online Samba SMB users and up to a maximum of five onl...

Страница 31: ...u finish configuring the settings the Network Storage Center will appear in My Neighborhood Host Name Item Configuration Host Name Network Storage Center s identification in Workgroup or My Neighborhood Work Group Shows name of the workgroup in which the Network Storage Center is located Description Brief description of the Network Storage Center i e IP address location etc 31 ...

Страница 32: ... Address Subnet Mask The Subnet Mask must be compatible with the other devices on your network Gateway Enter the Router s or Gateway s IP Address on your network DNS Server Please specify the domain name server IP address that your Internet Service Provider ISP gave you 32 ...

Страница 33: ...rk Storage Center Only the administrator or superuser has access rights to change the Network Storage Center s configuration Item Configuration SuperUser name Username of the Network HD administrator to access the Web based UI Old Password Enter your old password here New Password Enter the New Password here Confirm Password Enter the New Password again to confirm 33 ...

Страница 34: ...er using the following tools System Restart HD Format Factory Default Reset Firmware Upgrade System Time Character Set Restart System To Restart the Network Storage Center Click Yes see figure below Do not power off the device before the system restart is completed 34 ...

Страница 35: ...on Do you want to format the hard drive partitions if any on your hard drive will be formatted and all your data will be erased To format the hard drive click Yes see figure below Please wait during the formatting process Do not power off the system or close the browser During the formatting process a status bar will appear that displays what percentage of the formatting has been completed After t...

Страница 36: ... see figure below Do not power off the device before the system is ready Firmware Upgrade To upgrade the Firmware 1 Click Browse 2 Select the firmware file you want to you for the upgrade process 3 Click Apply Caution Do not power off the device during the upgrade process as this could damage it 36 ...

Страница 37: ...et you can use Time Server and select Time Zone to perform the time synchronization Please remember to click Save You will see the changes at the next system boot Character Set If you need to make changes to the character set you can choose the correct character set for your file system by scrolling down the menu selecting the appropriate set and the clicking Save 37 ...

Страница 38: ...ders User configuration On this page you can add and remove users and set up the user configuration You can add as many users as you need the restriction on the number of users only applies to five concurrently connected users The three default accounts cannot be removed Add User 38 ...

Страница 39: ...al User is for an end user or someone similar When FTP Access is enabled this user can access the FTP with his her user name and password 4 Choose the default folder for this user 5 Click Apply to save Note To change a user s configuration click on the User Name link in the User Configuration page see figure on previous page Then enter the new information in all the desired fields except for User ...

Страница 40: ...Delete User To remove the user s account to stop the right of using the Network HD 1 Select the User you want to remove by clicking the check box next to the user name 2 Click Delete to remove 40 ...

Страница 41: ...section you can add and delete folders as well as set up the authentication of users Add Folder To add a new folder for users to share 1 Click Add to add a new folder 2 Enter the Folder Name and Description 3 Click Apply to save 41 ...

Страница 42: ...Delete Folder To remove a folder and files inside 1 Select the folder you want to remove by clicking on the check box next to the folder s name 2 Click Delete to remove 42 ...

Страница 43: ...des what kinds of actions a user can take for example reading or re writing files and folders on the Network Storage Center There are three privilege mode options for each user Non access The User cannot access the folder Read only The User can only read files from this folder Read write The User is able to read and write files to and from this folder 43 ...

Страница 44: ...urrently connected FTP users from 1 to 5 Enter the member number Port Number Decide on the FTP Service port Number you need Enter the FTP Port number The default number is 21 if you do not make any changes to this field or leave it blank Timeout The length of time in minutes before the FTP connection times out Enter the length of time you want in minutes The default is 15 minutes if you do not mak...

Страница 45: ...me is ftpuser and the default password is abc123 Please note that there are three rules for setting the password 1 You cannot include the word FTP 2 You must use at least one number in the password string 3 The new password must be at least 6 characters up to a maximum of 16 characters 45 ...

Страница 46: ...twork drive The device will then automatically reconnect and always be available as a network drive whenever you re start your PC You can do this by following the steps below 1 From the Start menu click on My Computer When the window appears click on Tools in the menu at the top of the window 46 ...

Страница 47: ...e to connect to An example is shown below 3 Click Finish You will be prompted to enter a user name and password In these fields please enter the access information for one of the advanced users you added earlier Please refer to the Management Guide section of this user s manual This will complete the mapping process 47 ...

Страница 48: ...4 An icon similar to the one indicated by the red arrow in the figure below will appear You will now always be able to access the drive from My Computer 48 ...

Страница 49: ...witch to enjoy its easy and robust features File Sharing Remote Backup PC PC Server PC Multiple Users Backup For Windows 2000 XP users the OS provides an accessory system tool for data backup Backup Please follow the steps below as reference to complete data backup 1 Activate the program click Start Programs Accessory System Tools and click Backup 2 Click the Schedule Jobs tab and Select a date th...

Страница 50: ...fer video data from the IP camera back to the Network Storage Center for remote monitoring purposes the HNAS1 allows you to do so IP Camera Remote Backup FTP To use the FTP function please use the FTP supported by your browser for example Internet Explorer 6 0 Type ftp domain name or ftp Ipaddress in the brower s address field and press Enter The authentication windows will appear and you can inpu...

Страница 51: ...not find my hard drive and the homepage of web based UI displays the message HD unable to use Ans There could be several reasons for this The hard drive jumper is not set to Master Your hard drive jumper needs to be set to Master Different hard drives have different jumper settings Therefore you will need to refer to your hard drive s user s manual The hard drive is unformatted Please format it wi...

Страница 52: ...in your router s user s manual 6 I cannot access the Network Storage Center Ans Check the Network Storage Center s Link Act LED and make sure that it is lit green The system may be down Reboot the system with the web based UI or press the Reset button to restore the factory default settings and reboot When more than five users are concurrently connected to the system the system will block other us...

Страница 53: ... 10 100Mbps Support Hard Drive s One removable 3 5 IDE hard Drive ATA of up to 250GB Diagnostic LEDs Power On Boot or Shutdown Green Blinking Link ACT Ethernet Act Link Green HD Hard Drive Data Transfer Amber Blinking Dimensions 8 66 x 2 36 x 5 20 L x W x H 220mm x 60mm x 132mm L x W x H Operating Temperature 0q 50q C 320 1220 F Power Supply DC 12V 3A External power adapter Certifications FCC CISP...

Отзывы: