background image

11


10.


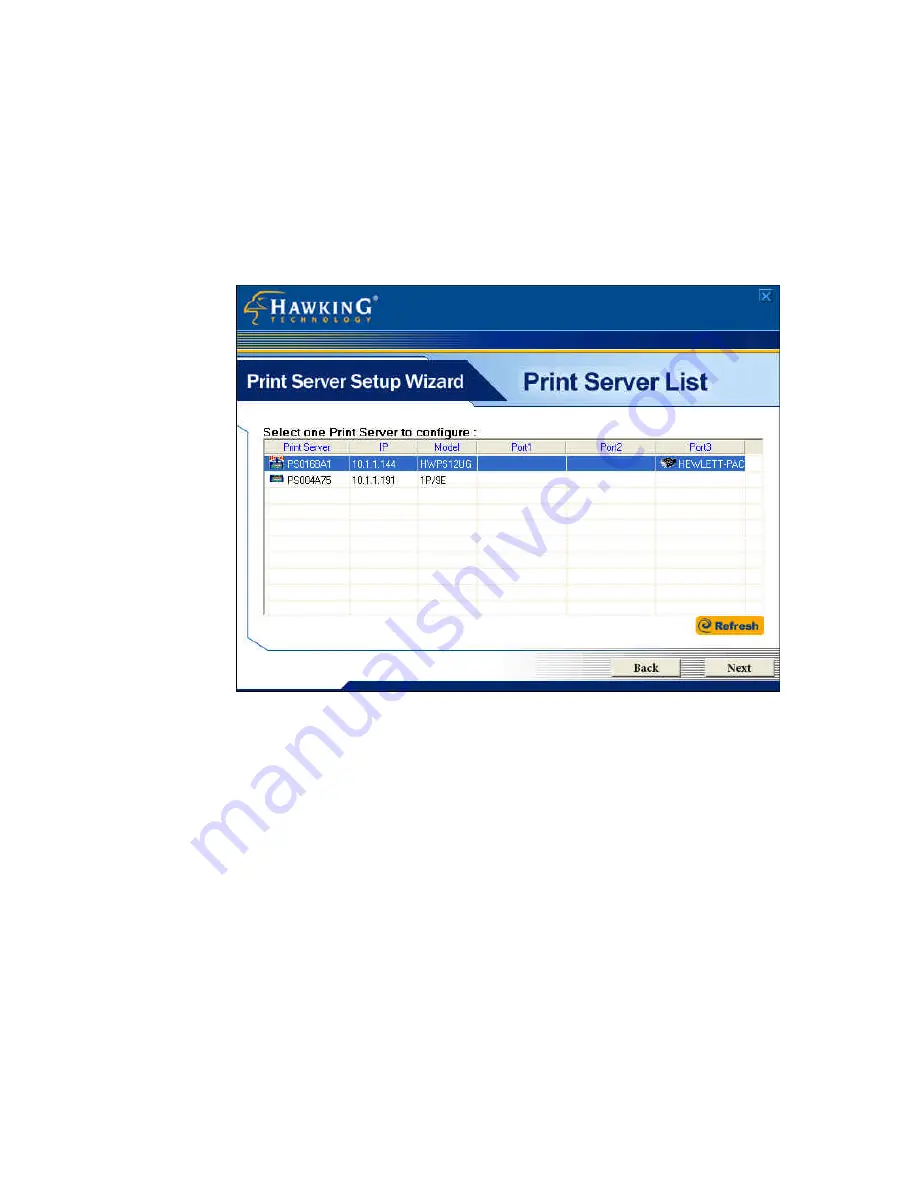
The “Print Server List” screen will list all available 

Hawking Technology print servers that the Wizard finds on 

your Network.  Please choose the print server you wish to 

configure and press “Next.”  You may always hit the 

“Refresh” button to refresh the print server list. 


(Please note that “un-configured” print servers will appear 

in 

Bold

11.


Once a Print Server is selected from the list, the login 

username/password screen will appear. Please type in your 

login and password and then press “

OK

” .  The standard 

default 

Login/Password

 for Hawking print Servers is: 

Login:

 admin 

Password:

 1234 

Содержание HPS1P

Страница 1: ......

Страница 2: ...l connect your printer to your network The HPS1P has a 10 100Mbps auto sensing port allowing you to attach it to a 10Base T or 100Base TX network without the need for a dedicated PC print server The H...

Страница 3: ......

Страница 4: ...LAN READY and STATUS on the front of the Print Server They should start to flash while doing a routine diagnostic test and printer check If not please contact your local dealer for repair or replaceme...

Страница 5: ...Power On Self Test POST This indicates that the print server hardware is properly configured The HPS1P may take up to 1 minute to perform its internal diagnostic tests LAN This light will illuminate...

Страница 6: ...lled please consult your operating system s and or printer s manual s for instructions on how to do so 3 Make sure your Windows firewall is disabled if you are using Windows XP Service Pack 2 Please c...

Страница 7: ...2 The Hawking Installation Windows manager will pop up on your screen as follows 3 Click on Setup Wizard and the Setup program will proceed to install the Print Server Utility program package...

Страница 8: ...4 Click Next to start the installation of the Print Server Utilities software and Easy Installation Wizard 4 Click Next to specify the destination folder where the HPS1P utility files will be installe...

Страница 9: ...xt and select the components you wish to install It is highly recommended to install all provided software utilities and drivers 6 Click Next to specify the program folder where the program icons will...

Страница 10: ...Click Next to start the utility file installation 8 The Print Server Utilities program will finish installing After this installation is complete please click on Finish to bring up the Easy Setup Wiz...

Страница 11: ...have connected the print server to your printer Once the Setup Wizard has verified your settings please click on the Next button to continue If there is a problem with your setup the Print Server Wiza...

Страница 12: ...ess Next You may always hit the Refresh button to refresh the print server list Please note that un configured print servers will appear in Bold 11 Once a Print Server is selected from the list the lo...

Страница 13: ...12 Once you have entered your login and password for the selected print server the General Settings page will appear The General settings windows will allow you to edit the...

Страница 14: ...e click in the SMB Group Name box for more information Printer Port and Printer List Each available printer port and the attached printer to that port will be displayed on this page You may refresh th...

Страница 15: ...omputer s internal network settings and suggest an appropriate static IP address to assign to the print server If you do not wish to use the suggested IP address you may change your IP settings in the...

Страница 16: ...Summary of Settings Changes This page displays a summary of configuration changes that are going to be saved to the print server Please press Save to reboot the print server and save all modified set...

Страница 17: ...nter model if detected If no printers are dis played please make sure your printer is turned on and connected to the print server You may hit the refresh button at any time to search for your connecte...

Страница 18: ...tion options You may install a new printer driver to your system or you may select your printer driver from the existing list of printer drivers currently on your system Please select which option to...

Страница 19: ...properly bound to the print server you will see a RED checkmark by the installed printer indicating a successful installation Once you have bound your printer to the print server you may press the Fin...

Страница 20: ...d press the Print Test button to verify that your print server is properly configured There may be a short delay the first time you print to the print server If there is a problem printing the test pa...

Страница 21: ...onment If you are installing your print server in a Mac only environment and you have not previously configured the print server please make sure you press down the reset button for 10 seconds continu...

Страница 22: ...erver 6 Enter lpt1 as Queue Name if your print server is using the first port For HPS12U and the HWPS12UG lpt1 is p1 lpt2 is u2 lpt3 is u3 7 Select printer from the Printer Model field 8 Select your p...

Страница 23: ...sers over the Internet who know your printer model printer port and the IP address of your HPS1P IPP Setup Print Server Side It is not necessary to modify your IPP settings on the print server side Ma...

Страница 24: ...S1P print server The URL format will be http IP 631 LPT_PORT The IP portion of the URL will be the print server s IP address You will need to write down 631 after the IP address This number 631 is the...

Страница 25: ...will be http 192 168 2 1 631 lpt1 for a print server located on the first printer port lpt1 of the IP address 192 168 2 1 After entering the URL of the print server click Next and complete the remaini...

Отзывы: