KK-K9-C22-K_INST_6-12.docx rev 2-14
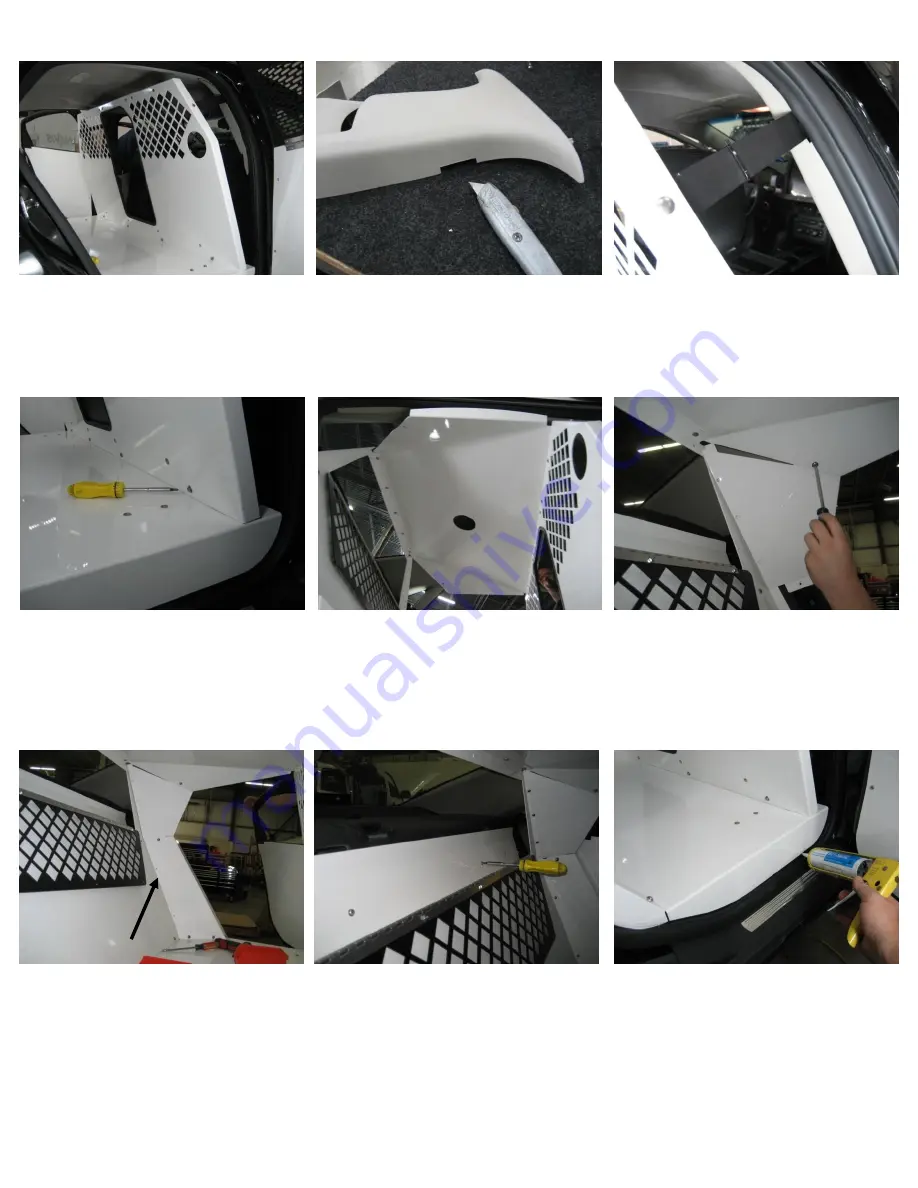
Attach upper and lower trim panels
to rear bulkhead with # 10 x 1/2”
sheet metal screws and flat washers
With all parts now in place,
drill and attach rear upper
support bracket to metal seat
backer with #10 x 3/4 Phillips
pan head sheet metal screws.
Check position of all parts and
tighten all hardware.
Neatly silicone / caulk the lower
seams to shed water out of vehicle.
Note:
The floor pan is designed to
minimize the need for sealant.
Caulk (sealant) is mostly needed
where the floor meets the door sill
and lower filler panels.
View of “B” pillar brackets
completely installed
With location of “B” pillar brackets
now determined. Mark and cutout
notch upper “B” pillar trim for
bracket.
One each side.
Loosely attach upper “B” pillar
brackets to front bulkhead with 1/4
x 3/4” Carriage bolts and serrated
nuts.
Loosely front bulkhead to floor
with 1/4 x 3/4 Round head Phillips
bolts and flat washers.
Use an Awl or other pointed tool to
help align mounting holes.
Loosely attach to front and rear
bulkheads with 1/4 x 3/4” Carriage
bolts and serrated nuts.
Attach dome light with # 10 x 1/2”
sheet metal screws
Attach upper and lower trim panels
to ceiling and floor with 1/4 x 3/4
Round head Phillips bolts and flat
washers.


