16
Removing an Exclusion Zone -
continued:
6.
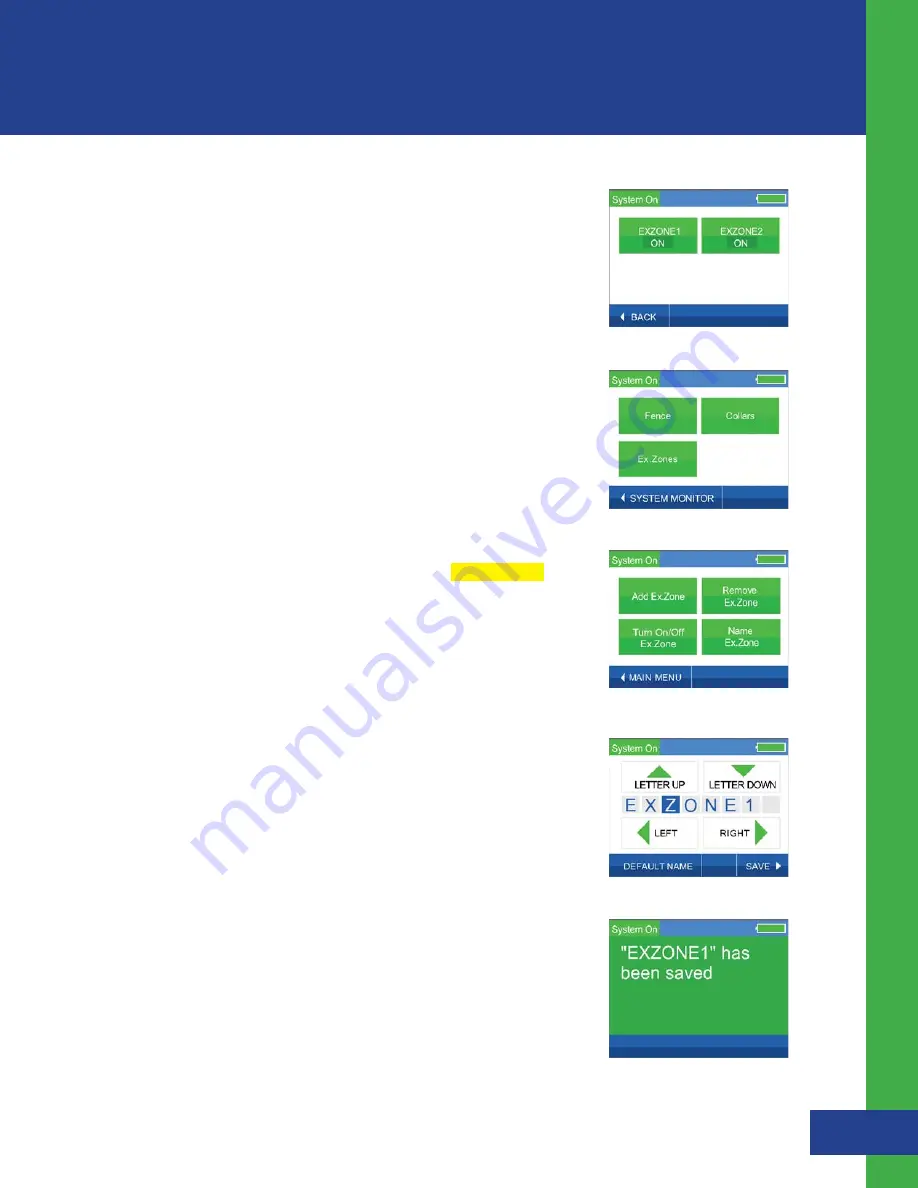
Upon successful removal, you will be returned to the selection screen
and the Exclusion Zone that you chose to remove will no longer
appear. (See Figure 5.0)
7.
Repeat this process to remove other Exclusion Zones.
Naming an Exclusion Zone:
You can name each Exclusion Zone using the Controller.
1.
Select “Ex. Zones” from the main menu. (See Figure 5.1)
2.
Press the “Name Ex. Zone” Button. (See Figure 5.2)
3.
Press the “NEXT” Button to show all of the Exclusion Zones
(See Figure 4.8)
4.
Choose which Exclusion Zone you would like to name. No Dsp Screen
5.
Create the name of the Exclusion Zone. Use the left or right arrows
to highlight the letter you would like to change. Then use the up or
down arrows to choose the character that you want from A-Z and
0-9. The name can be up to 8 characters in length. Repeat this
process until you are satisfied with the name. (See Figure 5.3)
You can also change the name of an Exclusion Zone back to its
default name by pressing the “DEFAULT NAME” Button in the lower
left
corner.
6.
Once you are satisfied with the name of the Exclusion Zone,
press the “SAVE” Button and a confirmation will display briefly and
then take you back to Exclusion Zone Options. (See Figure 5.4)
Figure 5.0
Figure 5.1
Figure 5.4
Figure 5.3
Figure 5.2
Havahart
®
Custom-Shape Wireless Dog Fence
Installing the Custom-Shape Wireless Dog Fence -
Setting Up the Exclusion Zones


