1
2
3
For all versions of Windows:
Turn ON your PC and allows Windows to load fully. Insert the WinTV Installation CD-ROM in
your PC’s CD-ROM drive.
The 'Hauppauge WinTV Installation CD' window
will appear on the screen. Select your preferred
language.
Click the button labeled 'Step 1: Install drivers'.
A blue screen will open and begin installing the
drivers for your WinTV. Once the drivers have in-
stalled, click on the Finish bar to exit.
Windows XP only:
After you install your WinTV device and boot
Windows, a 'Found New Hardware' wizard will
appear, please cancel it and allow Windows to
load fully before proceeding. After Windows
loaded fully insert the installation CD-ROM and
proceed with driver installation as mentioned
above.
N
ote: If the CD does not autorun navi-
gate to the CD and run the 'Setup' file.
ImpactVCB-e
Quick Installation Guide for Windows 7, Vista and Windows XP
(English)
●
ImpactVCB-e video capture PCI-E board
●
Half Height bracket for low profile sys-
tems
●
WinTV v7 installation CD-ROM*
* Make sure to keep the installation CD-
ROM in a safe place, it will be required
for later software updates.
Contents of the package
1.Install the ImpactVCB-e board in your PC and connect AV cables.
2.Install ImpactVCB-e Windows device driver.
3.Install the WinTV7 application.
4.Begin setting up WinTV 7.
5.Using the WinTV7 Application.
1. Install the ImpactVCB-e board in your PC and connect AV cables
To install:
●
Switch off the computer and remove the com-
puter cover. The manufacturer of your PC
supplies instructions on removing the PC
cover.
●
Locate a free PCIe slot (a short white slot).
Unscrew and remove the metal cover plate
which covers the back of the empty slot.
●
Plug the WinTV board into the PCIe slot, and
screw the WinTV metal cover plate to the
PC’s chassis.
●
Connect your A/V source (Composite or S-
Video) to the ImpactVCB-e board.
N
ote: Your PC could be damaged by electrostatic discharge. Avoid this by contac-
ting the earthed chassis of your PC, before you open it or touch the PCIe card.
N
ote: If you are using a low profile computer or chassis, you can replace the full
height bracket on the ImpactVCB-e with the supplied half height bracket to fit into
your low profile systems chassis.
2. Installing ImpactVCB-e Windows device driver
Installation Overview
ImpactVCB-e is a Windows video capture PCI Express card. It can be used for digitizing and
compressing video from video cameras, video tape recorders, Set-top boxes and other de-
vices which create analog video signals.
The included WinTV v7 application is used for displaying live video on your PC screen and to
create video recordings and still images.
When recording live video with the WinTV v7 application, ImpactVCB-e creates a .TS (trans-
port stream) file. Using options in the WinTV v7 application, you can also create .MPEG files.
ImpactVCB-e uses WDM capture drivers, which will be compatible with most video applica-
tions that support this type of drivers.
How the ImpactVCB-e works
Hauppauge Computer Works, Inc.
Corporate Headquarters
91 Cabot Court
Hauppauge, NY 11788
tel: 631.434.1600
fax: 631.434.3198
sales: [email protected]
tech support tel: 631.434.3197
www.hauppauge.com
Hauppauge Digital Asia Pte. Ltd.
1093 Lower Delta Road #04-05
Tiong Bahru Industrial Estate
Singapore 169204
tel: +65 62769163
fax: +65 62769167
email: [email protected]
tech support: [email protected]
www.hauppauge.com.sg
Hauppauge Computer Works UK Ltd.
Crown House, Home Gardens
Dartford, Kent DA1 1DZ
United Kingdom
Tel: +44 (0)203 405 1717
Tech Support: +44 (0)203 405 1717
sales: [email protected]
www.hauppauge.co.uk
Hauppauge Computer Works GmbH
Krefelder Str. 669
41066 Mönchengladbach
Deutschland
Tel.- Support: (+49) 02161 694 88 40
Telefon: (+49) 02161 694 88 0
Fax: (+49) 02161 694 88 15
email: [email protected]
www.hauppauge.de
3. Installing the WinTV7 Application
Click the button labeled 'Step 2: Install WinTV'.
The setup application will then open. Click
'Next' and follow the instructions of the installer
to install the WinTV7 application.
During installation you will be asked to con-
firm/select the video standard you are going to
use (NTSC / PAL / SECAM).
Once complete, click OK, then Exit.
N
ote: The latest software updates are
available at www.hauppauge.com.
4. Begin setting up WinTV7
After the installation is complete, you will need to configure your AV input in WinTV7
as part of the initial setup. Then you can start watching Live video, record videos or
make snapshots.
To run the WinTV application double click on the WinTV v7 icon on your Windows desktop.
When you run WinTV for the first time, the WinTV Device Setup Wizard appears. Select 'Exter-
nal Inputs' and click Next to continue.
You will be presented with the option to add a
Composite and S-Video Input. Please select your
country and click Next.
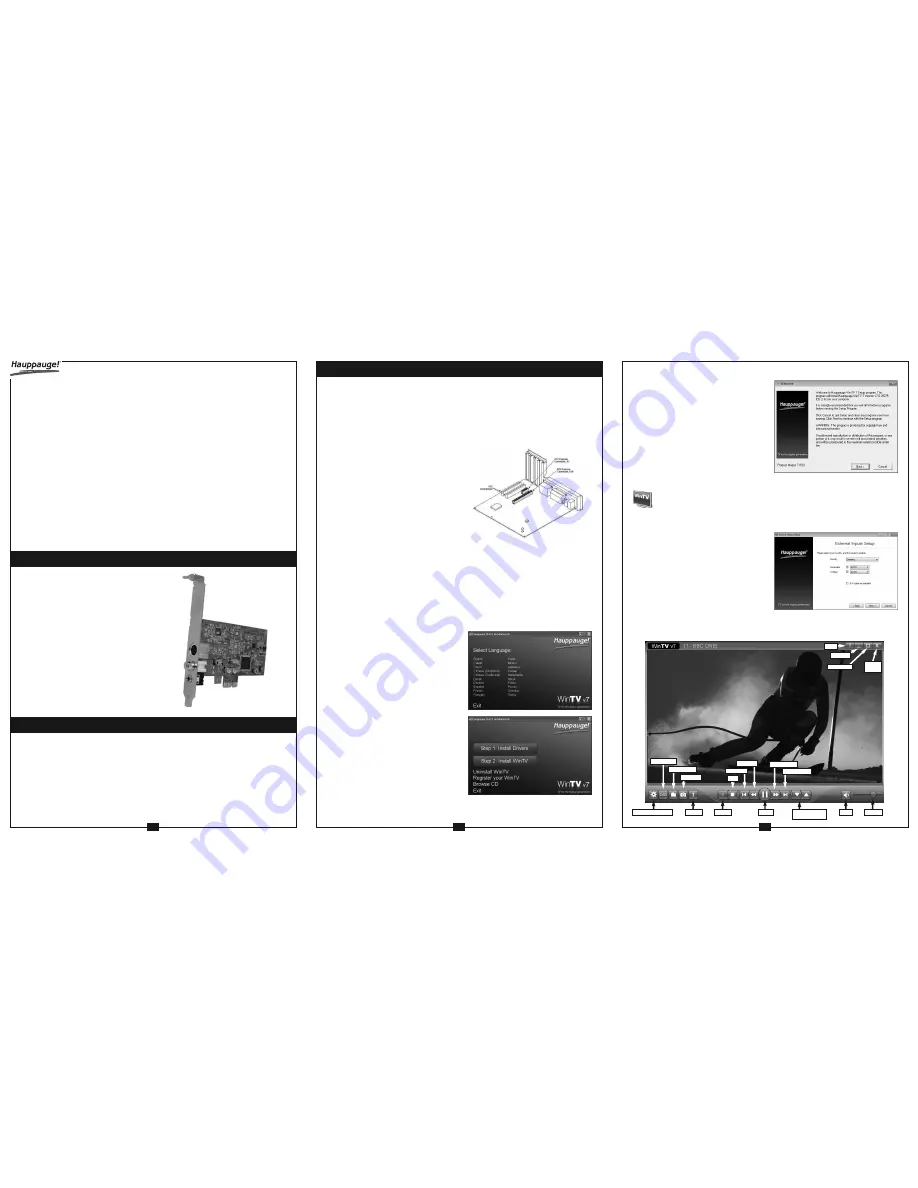
5. Using the WinTV7 application
WinTV v7 has many features, including live TV/Video, recording and pausing of TV/Video,
playback of recordings in a window or full screen, and still image capture.
Minimize
Help
OSD button
Folder button
Snapshot
Teletext
Stop
Pause
Channel up and
Channel down
Record
Volume
Skip back
Fast back
Fast forward
Full Screen
Close
WinTV
Configuration menu
Skip Forward
Mute


