253
4001055180
E 06.21
USA / GB
Chassis
Remove/Re-install wheel reduction gear
MS0152
Chassis
Remove/Re-install wheel reduction gear
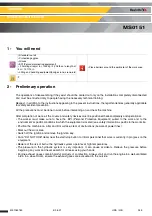
1 - You will need
2 - Preliminary operation
The operations of disassembling if they exist should be carried out only on the installations completely disconnected
and must be entrusted only to people having the necessary technical training.
Respect, in addition to the instructions appearing in the present instructions, the legal tendencies generally applicable
for safety accident prevention.
All the precautions must be done in work before intervening on and near the machine.
After completion of work, all the covers and safety devices must be positioned back completely and operational.
• The worker must make sure to have the EPI (Personal Protective Equipment) suited to the work and to the
environment's specific conditions in which the equipment is located (see safety information specific to the work site.
• Position the machine on a flat and firm surface, clear of obstructions (beware of power lines).
• Mark out the work area.
• Switch off the ignition and remove the ignition key.
• Put a "DO NOT USE" decal near the start/stop button to inform personnel that work is currently in progress on the
equipment.
• Beware of the risk of burns; the hydraulic system operates at high temperatures.
• The pressure in the hydraulic system is very important. It can cause accidents. Relieve the pressure before
beginning any work and never search for oil leaks using your hands.
• Engine exhaust gases contain harmful products of combustion. Always start and run the engine in a well-ventilated
area. In a closed room, ensure the exhaust gases are evacuated to the outside.
• Standard tool kit
• Protective goggles
• Gloves
• EPI (Personal protective equipment)
• ORFS plug kit : 2505001600
• Jack : 20 Tonnes / 44092 lbs
• 1 hoisting strap(s) for 1000 kg / 2,205 lb at a length of 2 m / 6 ft 7 in
• Lifting and handling equipment(bridge crane, crane, etc)
• Wood wedges of approximately 400 mm / 16 in under the chassis
• Oil collection pan
• 1 syringe for oil filling
• Torque wrench : 450 Nm
• Torque wrench : 260 Nm
• Torque wrench : 57 Nm
• 8 the washers NORLOCK should be replaced after each wheel is
removed
• Oil SAE 80W90. Quantity for a reducer : 1,1 L
• Place barriers around the
perimeter of the work area
Major
component
masses
• Wheel : 272 kg / 600 lbs
• Wheel reducer : 60 kg / 132,3 lbs
• Wheel steering pivots : 63 kg / 139 lbs
• Hydraulic motor : 16 kg / 35,2 lbs
1
Exclusively use tools and auxiliary average adapted. Always wear necessary safety clothing.
Содержание HA26 RTJ PRO SW
Страница 8: ...8 Maintenance Book ...
Страница 120: ...120 4001055180 E 06 21 USA GB General data Pins and bearing inspection MS0002 Notes ...
Страница 132: ...132 4001055180 E 06 21 USA GB General data Torque Values MS0005 Notes ...
Страница 148: ...148 4001055180 E 06 21 USA GB Chassis Remove re install the hydraulic motor MS0119 Notes ...
Страница 168: ...168 4001055180 E 06 21 USA GB Turntable Remove re install the main counterweights MS0138 Notes ...
Страница 192: ...192 4001055180 E 06 21 USA GB Upper boom Remove Replace boom assembly MS0140 Notes ...
Страница 200: ...200 4001055180 E 06 21 USA GB Upper boom Removing Replacing the pads MS0141 Notes ...
Страница 214: ...214 4001055180 E 06 21 USA GB Upper boom Remove Re install output compensation cylinder MS0143 Notes ...
Страница 222: ...222 4001055180 E 06 21 USA GB Upper boom Remove Re install input compensation cylinder MS0144 Notes ...
Страница 230: ...230 4001055180 E 06 21 USA GB Lower arm Remove Replace arm cylinder MS0145 Notes ...
Страница 244: ...244 4001055180 E 06 21 USA GB Electric Battery ies MS0149 Notes ...
Страница 262: ...262 4001055180 E 06 21 USA GB Chassis Remove Re install wheel reduction gear MS0152 Notes ...
Страница 268: ...268 4001055180 E 06 21 USA GB Chassis Wheel tightening procedure MP0001 Notes ...
Страница 272: ...272 4001055180 E 06 21 USA GB Chassis Wheel reducer level procedure MP0002 Notes ...
Страница 276: ...276 4001055180 E 06 21 USA GB Turntable Procedure for checking the level of engine oil MP0003 Notes ...
Страница 284: ...284 4001055180 E 06 21 USA GB Turntable Replacing the engine oil filter MP0004 Notes ...
Страница 288: ...288 4001055180 E 06 21 USA GB Turntable Replacing the engine oil filter Kohler engine MP0004 Notes ...
Страница 292: ...292 4001055180 E 06 21 USA GB Turntable Diesel filter replacement MP0005 Notes ...
Страница 296: ...296 4001055180 E 06 21 USA GB Turntable Diesel filter replacement Kohler engine MP0005 Notes ...
Страница 300: ...300 4001055180 E 06 21 USA GB Turntable Hydraulic oil filter replacement MP0006 Notes ...
Страница 304: ...304 4001055180 E 06 21 USA GB Turntable Procedure for checking engine belt tension MP0007 Notes ...
Страница 312: ...312 4001055180 E 06 21 USA GB Chassis Front axle locking function check MP0008 Notes ...
Страница 316: ...316 4001055180 E 06 21 USA GB Turntable Air filter replacement MP0010 Notes ...
Страница 330: ...330 4001055180 E 06 21 USA GB Platform Rotary cylinder tightness check MP0016 Notes ...
Страница 333: ...333 4001055180 E 06 21 USA GB Platform Checking the platform MP0017 Check the platform access rail or gate ...
Страница 334: ...334 4001055180 E 06 21 USA GB Platform Checking the platform MP0017 Notes ...
Страница 342: ...342 4001055180 E 06 21 USA GB Turntable Slew ring clearance check MP0018 Notes ...
Страница 346: ...346 4001055180 E 06 21 USA GB Turntable Torque tightening of the slew ring MP0019 Notes ...
Страница 350: ...350 4001055180 E 06 21 USA GB Turntable Emptying the diesel tank MP0020 Notes ...
Страница 362: ...362 4001055180 E 06 21 USA GB Turntable Starter battery inspection MP0023 Notes ...
Страница 384: ...384 4001055180 E 06 21 USA GB Turntable Drain the engine oil MP0036 Notes ...
Страница 388: ...388 4001055180 E 06 21 USA GB Turntable Drain the engine oil Kohler engine MP0036 Notes ...
Страница 394: ...394 4001055180 E 06 21 USA GB Turntable Draining the wheel reducer MP0043 Notes ...

