MAINTENANCE
Form No. MDWM-0608
7
General
The Hatco Mini Display Warmer is designed for
maximum durability and performance, with minimum
maintenance.
ELECTRIC SHOCK HAZARD:
• Turn the power switch OFF, unplug the power
cord, and allow the unit to cool before
performing any maintenance or cleaning.
• DO NOT submerge or saturate with water.
Unit is not waterproof. Do not operate if unit
has been submerged or saturated with water.
• Do not steam clean or use excessive water on
the unit.
This unit has no “user-serviceable” parts. If
service is required on this unit, contact an
Authorized Hatco Service Agent or contact the
Hatco Service Department at 800-558-0607 or
414-671-6350; fax 800-690-2966; or International
fax 414-671-3976.
Cleaning
Use non-abrasive cleaners only. Abrasive
cleaners could scratch the finish of the unit,
marring its appearance and making it
susceptible to soil accumulation.
To preserve the finish of the Mini Display Warmer
cabinet, it is recommended that the exterior and
interior surfaces be wiped daily with a damp cloth.
Shelves should be removed and washed. Stubborn
stains may be removed with a good stainless steel
cleaner or a non-abrasive cleaner. Hard to reach
areas should be cleaned with a small brush and mild
soap.
Clean the glass sides using a common glass
cleaner. In almost all cases, glass panels should be
cleaned while remaining in the unit. Only for difficult
or hard to clean stains is removal of the fixed glass
panels suggested.
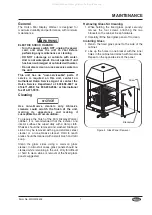
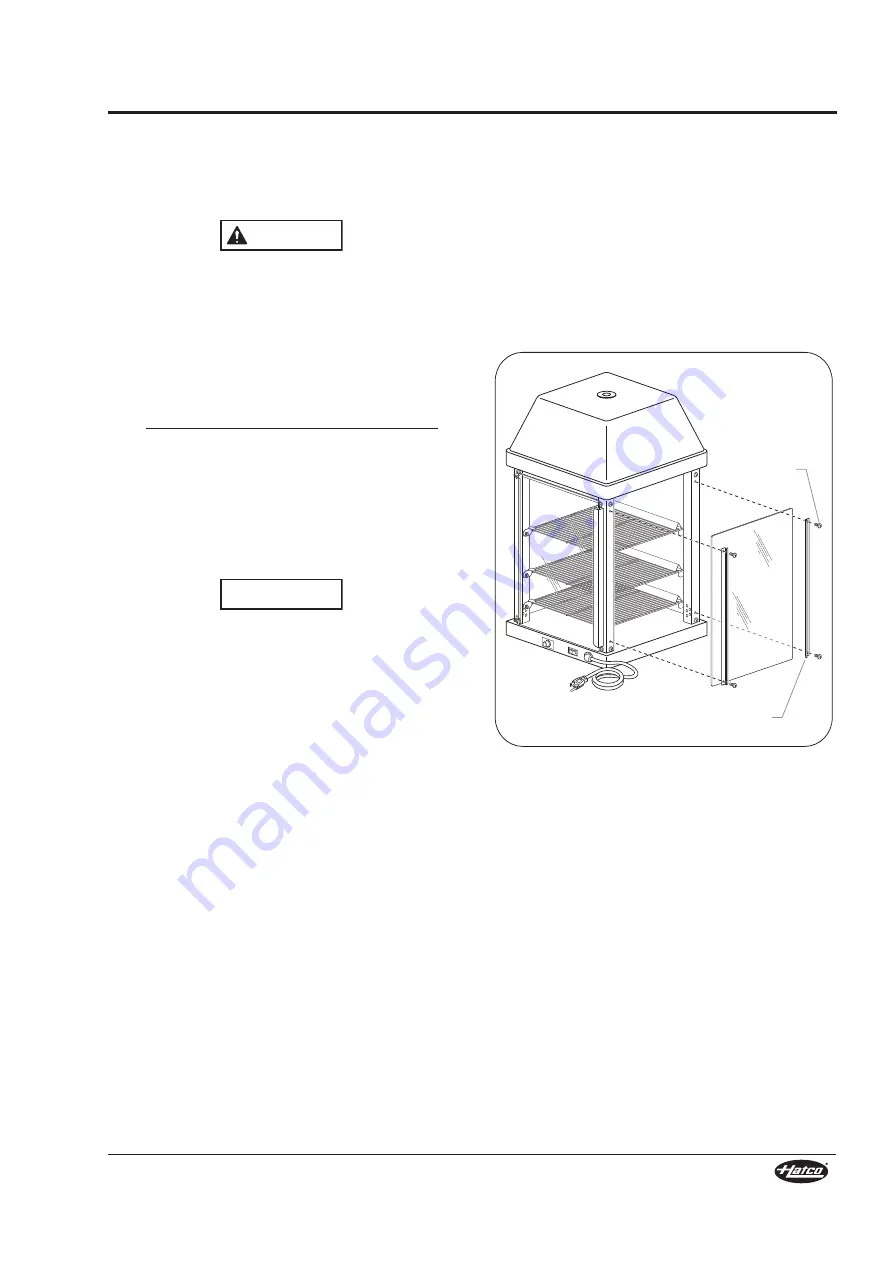
Removing Glass for Cleaning
1. While holding the fixed glass panel securely,
remove the four screws attaching the two
brackets to the cabinet. Keep hardware.
2. Carefully lift the fixed glass panel off to clean.
Installing Glass
1. Return the fixed glass panel to the side of the
cabinet.
2. Line up the holes in one bracket with the inner
holes in the cabinet and attach with two screws.
Repeat on the opposite side of the panel.
Figure 8. Glass Panel Removal
Screw
Bracket
NOTICE
WARNING
All manuals and user guides at all-guides.com

