


Title:
PCM-1 to PCM-2 Upgrade Instructions
Sheet 24 of 25
Rev: A
Dwg:
873-4514-001
STEP 69.
From the UAX Home page navigate to the revisions page by selecting
“Exciter Home”, then “Status”, and then “Revisions”. If the Build Version
matches the revision that was loaded then continue to step 70. For example; if
file APEXM2X_ATSC_REVT. S19 was loaded then the Build Version would be
as it is shown in figure 42.
Figure 42
If “Customer Special”
appears in the Build
Version section the update
must be performed a
second time! If that is the
case, return to step 63 to
perform the software
update a second time.
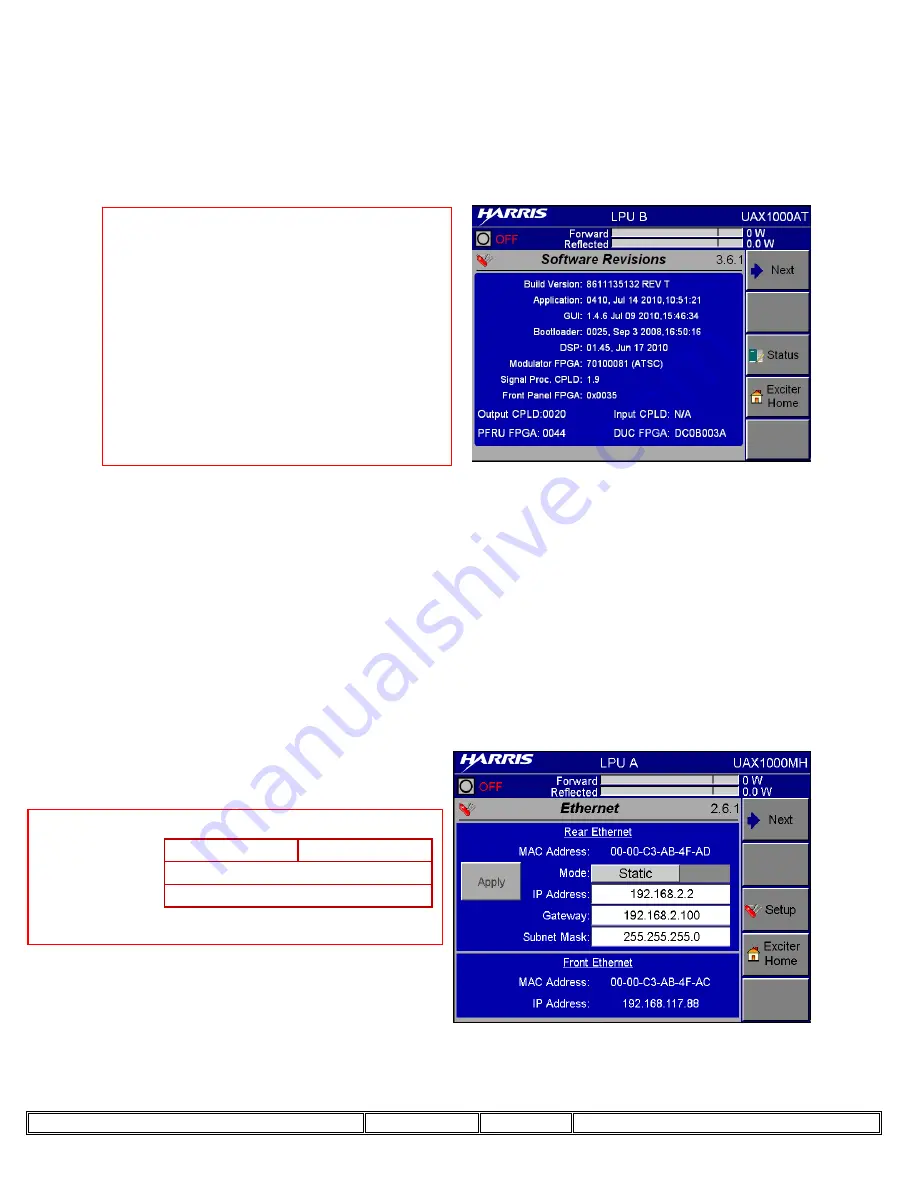
STEP 70.
From the Software Revisions page:
a. Select “Exciter Home”
b. Then “Setup”
c. Then “Remote Comms”
d. Verify that the Rear Ethernet Mode has been set to “Static”.
e. Verify that IP Address, Gateway, and Subnet Mask are properly set in
the LPU you are currently accessing to the parameters shown in the
table below.
f. “Apply” must be selected before leaving the screen to save any updated
settings.
LPU A
LPU B
IP Address:
192.168.2.2
192.168.2.3
Gateway:
Subnet Mask:
192.168.2.100
255.255.255.0
Figure 43


