


Chapter 2 Installation
Inserting the Modules
© 2011 Harmonic Inc.
23
bNSG 9000 & NSG 9000-3G, Rev D
When unpacking a module, keep it in the anti-static wrapping until you are ready to instal
it in the device. Unwrap the module only at an ESD workstation or when grounded.
If for any reason you cannot insert the module, lay it in an anti-static container or
packaging.
Handle the module only at ESD workstation and use anti-static rubber mat and wrist
bands.
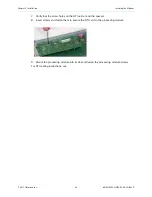
Handle the module with care. Do not touch components and contacts on the board and
hold board by its edges.
2.3.1
Tools for Mounting/Replacing a Module
Mounting the Processing module and the QAM-RF modules requires various tools and
equipment. The following table lists the required action, tools and equipment:
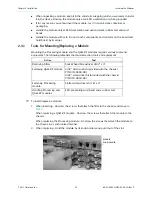
To insert/replace a module:
1.
When inserting - Unscrew the screws that attach the filler to the chassis and move to
Step 4
.
When replacing a QAM-RF module - Unscrew the screws that attach the module to the
chassis.
When replacing the Processing module - Unscrew the screws that attach the module to
the chassis in a synchronized manner.
2.
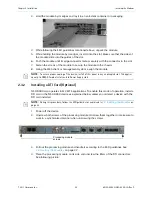
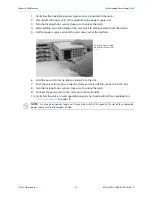
When replacing - Hold the module by its knob-holders and pull it out of the slot.
Action
Tool
Removing Fillers
Socket head Screwdriver 3/32" x 4"
Fastening QAM-RF module
3/32" Allen wrench (provided with the chassis)
P/N 019-0003-001
3/32" screwdriver bit (provided with the chassis)
P/N 019-0004-001
Fastening Processing
module
Slotted screwdrivers 5/16" x 4"
Handling Processing and
QAM-RF modules
ESD-preventing wrist band and a rubber mat
Module
knob-handle


