EON600 Fuse Replacement
Repair Addendum
v 1.0 -03/19
2. Remove the amplifier module from the enclosure recess and disconnect the speakers, LED, and
Bluetooth antenna connections.
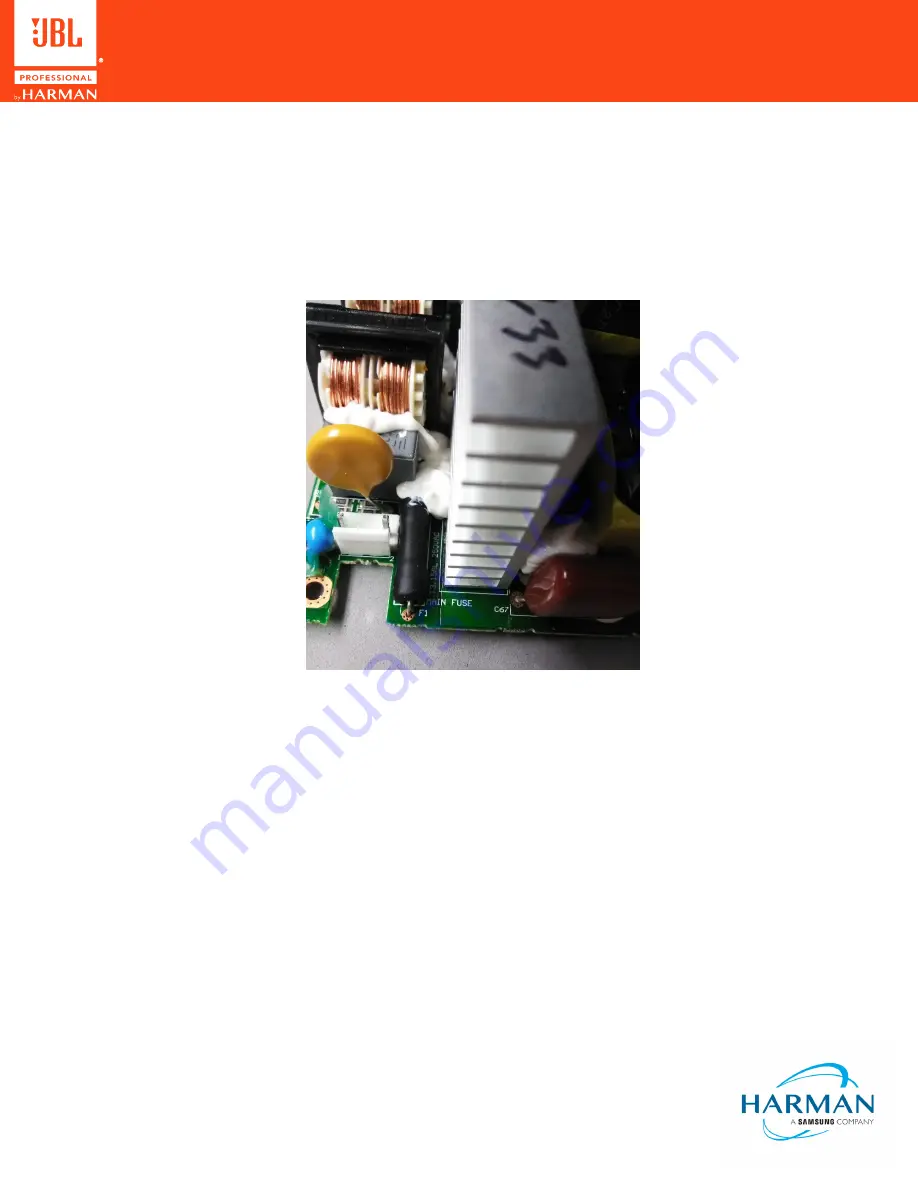
3. Locate the fuse on the PCBA (see Figure 2). The stock fuse should have a shrink-wrap cover.
4. Verify the fuse is blown by using an ohmmeter.
5. If the fuse is open, place the module on a bench and remove all eight of the amplifier PCBA
screws (Figure 3).
6. Pull the amplifier PCBA off the module assembly and dispose of all thermal pads (new
pads will need to be installed).
7. Carefully remove or cut away the white anti-vibration RTV from the fuse and its adjacent parts.
8. Unsolder the fuse from the PCBA.
9. Clean up PCB pads where the fuse was soldered to the PCB.
10. Add shrink wrap to the new fuse and bend leads in a manner similar to original fuse.
Figure 2. PCBA Fuse
2


