background image

22  PLAYBACK BASICS FOR ALL FORMATS

Loading Discs

To load discs in the DVD 101, first turn the DVD 101
on by pressing in the 

Main Power On/Off Switch

and then pressing the 

Power On Button

0

.

Note that the LED indicator surrounding the 

Power On

Button

will turn amber when the power is first

applied by pressing in the 

Main Power On/Off

Switch

. It will turn green when the 

Power On

Button

is pressed. Once the 

Main Power On/Off

Switch

is turned on, it is normally left in that 

position unless you wish to turn the unit completely off
so that the remote control will not be able to turn the
player on.

Next, press the 

Eject Button 

7

/

2

until the disc

tray opens.

Hold the disc by the edge, and gently place it into the
disc drawer, making certain that the disc is properly
seated in the tray's insert. If the disc is not correctly
centered you may damage both the disc and the player
when the drawer closes. When loading discs, please
note the following:

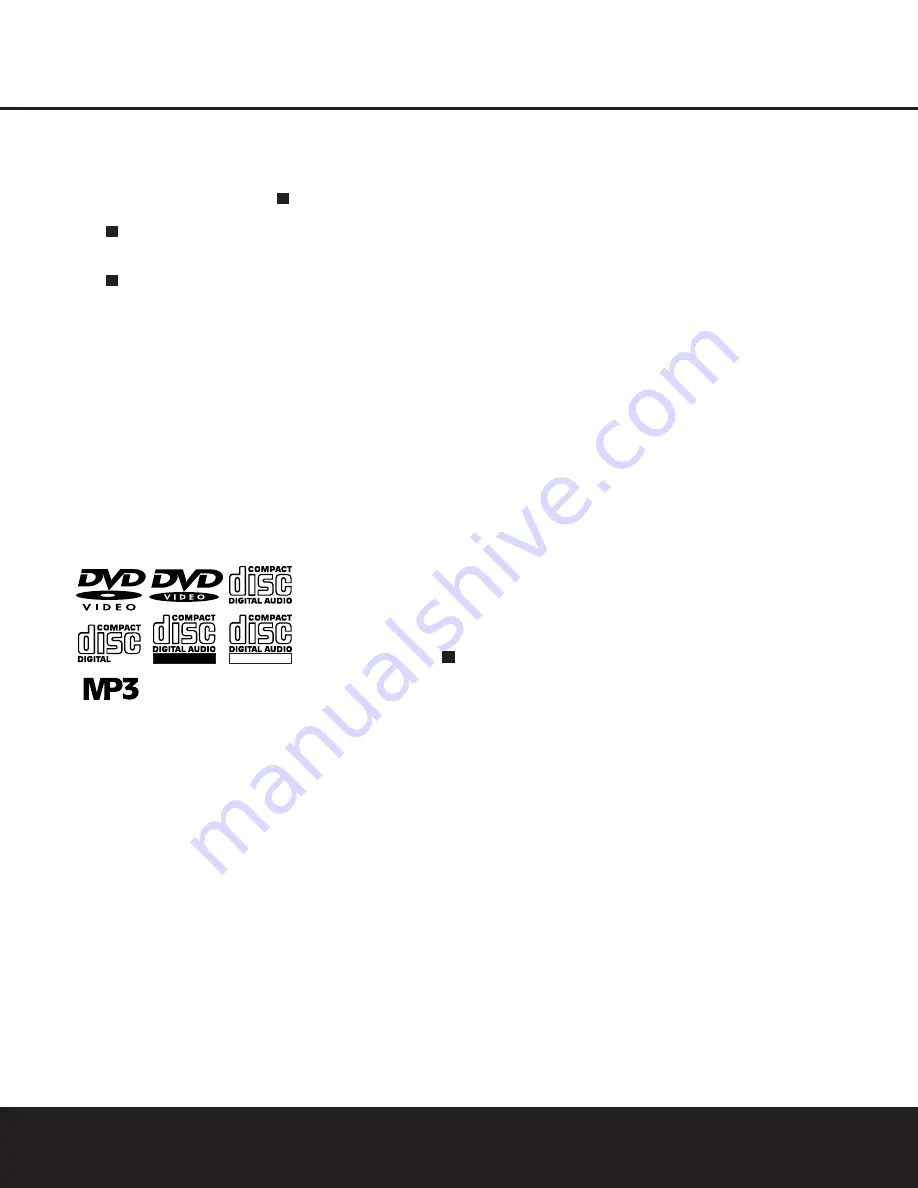
• The DVD 101 will play discs with the following

logos, as well as most DVD-RW or DVD+RW discs.
DO NOT attempt to play another type of disc.

• The DVD 101 will only play discs in the NTSC video

format. It will not play discs for other standards
such as PAL or SECAM.

• Playback capability for CD-RW, DVD-RW or

DVD+RW discs will vary according to the quality of
the disc. On some occasions it is possible that these
discs may not play on the DVD 101. This does not
indicate any problem with the DVD 101.

• The DVD 101 will only play discs that are coded for

Region 1 or discs that are open to being played in
all regions. Discs that contain a Region Code of 2,
3, 4, 5 or 6 (as noted by a number inside a world
map logo on the disc’s cover jacket or case) 
will not play.

• Both 5-inch (12cm) and 3-inch (8cm) discs 

may be used.

• When loading CD audio discs, load the discs 

with the label side up.

• When loading DVD discs with printed labels,

load them label side up.

• Some DVD discs are double-sided. The title infor-

mation for these will be printed on the inner ring of
the disc, very close to the center hole. The title for
the side you wish to play should be facing up.

Once a disc is properly loaded, press the 

Eject Button

7

/

2

to close the disc drawer. After the drawer

closes, you will see a brief indication of 

Reading

in both the Information Display and in the on-screen
display to alert you to the fact that the unit is determin-
ing the type of disc (DVD, CD, VCD or MP3) and is read-
ing the data for track, chapter, title and other information
about the disc.

Once the disc’s data has been read, the type of disc
will be displayed by the 

Disc-Type Indicator

A

and

the disc will automatically begin playing. The disc’s
track timing information and other relevant data will
appear in the information display. For CD discs only, a
Status Bar (On-Screen Banner Display) will automatically
appear in the on-screen display. To view this display
for DVD discs, press the 

Status Button

D

.

Basic playback with the DVD 101 involves functions
similar to those you may be familiar with for conven-
tional CD players or changers:

• Turn the DVD 101 on by first pressing in the 

Main

Power On/Off Switch

and then pressing the

Power On Button

/

0

.

• If a disc is already in the drawer when the unit is

turned on, it will begin playing. If the disc was
stopped using the Resume function, playback will
begin from the point where it was stopped. If the
disc was stopped by pressing the 

Stop Button 

5

/

I

twice, the disc will begin playing from 

its beginning.

• After loading a disc, press the

Eject Button

7

/

2

to close the drawer and begin play.

Playback Features for DVD and CD Discs:

• To momentarily pause playback and freeze the cur-

rent picture frame on a DVD, press the 

Pause

Button 

4

/

C

. To resume playback after pressing

the Pause button, press the 

Play Button 

3

/

G

.

• To move forward or backward through the tracks on

a CD or the chapters on a DVD, press the 

Skip

Forward/Reverse Buttons 

6 7

on the front

panel or the 

Previous/Next Buttons 

E

/

F

on the remote.

• To move forward or backward through the DVD or

CD disc being played at fast speed, press the

Search Forward/Reverse Buttons 

H

/

J

.

Once one of these buttons is pressed, the fast
search will continue until the 

Play Button 

3

/

G

is pressed. Note that the fast-play speeds are 
different for CD discs and DVDs.

For DVD playback, there are four fast-play speeds.
Each press of the 

Search Forward/Reverse Buttons

H

/

J

will cycle to the next speed in the following

order: 2x, 4x, 8x, 16x.

Note that there will be no audio playback during fast-
forward or reverse-play of DVD discs. This is normal
for DVD, as A/V receivers and surround processors
cannot process the digital audio streams during fast-
play modes; audio will be heard during fast-play of 
conventional CDs.

For CD playback, there are two fast-play speeds. Each
press of the 

Search Forward/Reverse Buttons

H

/

J

will cycle to the next speed in the following

order: 5x, 15x.

NOTE:

Fast Search is not available when MP3 discs

are playing.

When playing a DVD disc, you may move forward or
backward through the program being played in one of
four speeds by pressing the 

Slow Play Buttons

L

/

N

on the remote. Each press of the buttons

will move to the next speed in the following order:
1/2x, 1/4x, 1/8x, 1/16x.

Note that there is no audio playback during slow-for-
ward or -reverse play of DVD discs. This is normal for
DVD, as A/V receivers and surround processors cannot
process the digital audio streams during slow modes.
Slow-play is not available for CD discs.

• When a camera icon appears on the screen, and

the 

Angle Indicator

M

flashes, this is your indica-

tion that there is multiple-angle information on the
disc being played. To change the angle, press the

Angle Button 

4

until the desired angle view

appears. An on-screen banner message will appear
to indicate the angle view in use.

To illuminate the buttons on the remote control so that
they may be seen in low-light conditions, press the

Light Button 

.

2

ReWritable

Recordable

VIDEO

2

2

2

PLAYBACK BASICS FOR ALL FORMATS

Содержание DVD 101

Страница 1: ...DVD 101 DVD 101 DIGITAL VERSATILE DISC PLAYER OWNER S MANUAL Power for the Digital Revolution ...

Страница 2: ...g the Audio Track 25 Changing the Subtitle Language 25 Changing the Camera Angle 25 Repeat Play 26 A B Repeat Play 26 Zoom Playback 26 Information Menus 27 Programmed Play With DVD 28 CD Playback 28 Audio CD Playback Features 28 Selecting a Track 28 Using Bookmarks 28 Selecting Time Display 29 Repeat Play 29 Random Play 29 Video Off Feature 30 Programmed Play With CD 31 MP3 Disc Playback 32 VCD Pl...

Страница 3: ...vantage of all the power and flexibility the DVD 101 has to offer we encourage you to review this manual That small investment of your time will pay major dividends in the enjoyment you will get from proper use of the DVD 101 If you have additional questions about this product or its installation or operation that are not answered in this manual please contact your dealer as he or she is your best...

Страница 4: ...ng the carton down to a more two dimensional appearance Other cardboard inserts may be stored in the same manner Packing materials that cannot be collapsed should be saved along with the carton in a plastic bag If you do not wish to save the packaging materials please note that the carton and other sections of the shipping protection are recyclable Please respect the environment and discard those ...

Страница 5: ...cm disc 3 8cm disc 5 12cm disc 5 12cm disc The DVD 101 will also play most discs recorded in the DVD RW or DVD RW formats but we cannot guaran tee complete playback compatibility of DVD recordable discs due to the wide variation in recorders and blank discs CD RW CD R VCD 5 12cm disc 3 8cm disc 5 12cm disc 5 12cm disc 5 12cm disc NOTE Playback of CD R or CD RW discs created on a computer requires ...

Страница 6: ... many chapters within a title as the producers decide to include Most discs include only one title but some may have more than one to give you a Double Feature presentation or to include other special features Press the Title Button 3 to see a listing of the titles on a disc When a disc has only one title pressing the Title Button 3 may show a list of the chapters Multiple Angle DVDs have the capa...

Страница 7: ...to place the disc in the Resume mode which means that playback will stop but as long as the tray is not opened or the disc changed DVD playback will continue from the same point on the disc when the Play Button 3G is pressed again Resume will also work if the unit was turned off To stop a disc and have play start from the beginning press the button twice 6 Skip Previous Press this button to move b...

Страница 8: ...event anyone from changing the rating level without a code E Progressive Scan Indicator Lights when Progressive Scan component video output is selected in the setup menu F Test Indicator This indicator lights when the TV test screen is activated G V OFF Indicator This indicator lights when the unit s video output has been turned off by pressing the Video Off Button Q on the remote control H Repeat...

Страница 9: ...op J Search Forward K Dimmer L Slow Forward M Zoom N Slow Reverse O Random P Step Forward Q Video Off Step Reverse Numeric Keys Program Check Clear Repeat Light A B Repeat ON OFF PREV NEXT STOP POWER EJECT TEST STATUS PAUSE AUDIO SET UP RANDOM ZOOM STEP PROG CHECK CLEAR LIGHT A B REPEAT DIMMER SLOW SUBTITLE 5 2 9 PLAY E V OFF K O 1 2 7 5 6 8 9 0 4 N J F D 8 4 TITLE ANGLE 3 L P MENU B SEARCH ENTER ...

Страница 10: ... When a CD is playing there are two fast play speeds R SEARCH 5x R SEARCH 15x I Stop Stops playing a disc When a disc is playing if you press the Stop Button 5I and the Play Button 3G the disc will resume play i e it will start from the same point on the disc where the unit was stopped If you press the Stop Button 5I twice and the Play Button 3G the disc will start play from the beginning J Search...

Страница 11: ...o input switching Component Video Outputs These outputs carry the component video signals for connection to display monitors with component video inputs For standard analog TVs or projectors with inputs marked Y Pr Pb or Y Cr Cb connect these outputs to the correspon ding inputs If you have a high definition television or projector that is compatible with high scan rate progressive video connect t...

Страница 12: ...ect both outputs video and S Video to your TV or A V receiver use only one of them When the audio signal is to be fed to an analog receiver rather than to the TV connect the audio out jacks to any normal audio input on your amplifier decoder receiver The DVD 101 will downmix Dolby Digital recordings to Pro Logic available on these connectors all analog surround or stereo signals will be fed to the...

Страница 13: ... system this connection must be made then you can turn up the TV s volume as needed The analog audio jacks may also be connected to the standard analog left right DVD or CD inputs on your receiver to processor if you wish to use the DVD 101 as the input for a multiroom system Connecting to a Receiver Amplifier With Dolby Digital or DTS Decoder VIDEO OUT COMPONENT CLASS 1 LASER PRODUCT KLASSE 1 LAS...

Страница 14: ...o Progressive See page 17 VIDEO OUT COMPONENT CLASS 1 LASER PRODUCT KLASSE 1 LASER PRODUKT LUOKAN 1 LASER LAITE KLASS 1 LASER APPARAT 20 Y Y Pb Cb Pr Cr 120V 60Hz 1 DVD 101 TV or Monitor To power outlet AC 120V 60Hz To component connectors To analog audio input connectors on TV or receiver red white optional only see NOTE on page 13 To optical or coaxial digital input of receiver or processor Only...

Страница 15: ...n Do not mix old and new batteries Wipe away any leakage inside the remote control unit and install new batteries If leakage should come into contact with your skin immediately wash it off thoroughly with water Batteries contain chemical substances and we rec ommend that you dispose of them properly and in compliance with any local regulations Remote Control Operation Range Point the remote contro...

Страница 16: ...l benefit of Pro Logic from the same DVD movies that provide full 5 1 channel Dolby Digital soundtracks as well as from titles encoded with Dolby Surround The DVD 101 is designed to digitally output 96kHz PCM audio with a 96kHz sampling rate The 96kHz indicator will light in the display However some 96kHz DVDs may include copy protection codes that do not permit digital output For full 96kHz fidel...

Страница 17: ... is set to Progressive but connected to a display device that cannot process a progressive signal there will be nothing on the TV screen If this happens you can restore the player to Interlaced mode Press the Stop Button I on the remote and hold it down for more than three seconds The player will revert to Interlaced mode and a picture should appear on the screen As a Progressive Scan DVD player t...

Страница 18: ...s it is present on the disc being played Digital Output If your system includes 5 1 digital audio surround decoding Dolby Digital and or DTS select ORIGINAL as the digital output In that case all audio signals will be outputted with their original format If your system only includes stereo and or Dolby Pro Logic select PCM When PCM is selected you will not be able to use DTS soundtracks Select the...

Страница 19: ...made will be lost Enter Password and Setting Level For disabling the playback of rated DVDs a password consisting of four digits must be entered Select PARENTAL CONTROL in the Player Setup menu then press the N Navigation Button 9 or Enter Button 9 to access the Parental Control submenu PASSWORD appears in the right column Enter the password the initial password is 8888 If the password is correct ...

Страница 20: ...ed to select and change subtitles during playback Press the K L Navigation Buttons 9 to select the desired choice for the subtitle In the event the disc provides subtitle language options other than English French German Italian or Spanish select the OTHER option and note that four dashes will appear Consult the chart on page 33 to match the menu language options available to the code number for t...

Страница 21: ...ep dark black bar at the left The optimal contrast setting will depend on your preference and the surrounding light in the TV room 2 If the brightness of the white bar no longer increases when the contrast is turned up or the borders of the white harman kardon letters on top bloom over light into the black areas drastically decreasing the sharpness of the type the contrast has been turned up too m...

Страница 22: ...ress the Status Button D Basic playback with the DVD 101 involves functions similar to those you may be familiar with for conven tional CD players or changers Turn the DVD 101 on by first pressing in the Main Power On Off Switch and then pressing the Power On Button 0 If a disc is already in the drawer when the unit is turned on it will begin playing If the disc was stopped using the Resume functi...

Страница 23: ...isc to decide which of those features and functions are available on any given disc For that reason not all discs will function identi cally and some discs will not have many of the fea tures of the DVD system For example most current DVD discs do not take advantage of the multiple angle feature When you press a button and the player displays the Feature Prohibited icon this is an indication that ...

Страница 24: ...ected title will be played at once after the last title number was entered NOTE Some discs have only one title Selecting a Chapter Because DVDs use digital technology a title can be divided into individual chapters similar to tracks on a CD You can press the Prog Button on the remote to see the numbers of chapters of each individual title on a disc below the Chapter icon after the disc has been re...

Страница 25: ...s you to become the director selecting the view of a scene that you wish However this feature does not appear on many discs and when it does appear it will typically be for only certain scenes and not for the entire disc s program To see whether a disc contains multiple angles check the disc s cover or jacket When the DVD s title or chapter played currently does contain scenes with multiple angles...

Страница 26: ...ocessing circuits include a Zoom feature that allows you to enlarge the image for closer examination of the picture Four steps of enlargement are available To zoom in on the picture press the Zoom Button M while a disc is playing or paused Press again to step through the four magnification steps or to cycle back to normal picutre size Some discs do not allow the use of the Zoom feature In addition...

Страница 27: ...e in the list will replace the deleted one and will be selected automatically The program can be deleted completely by moving the cursor to the top of the play list and pressing the Enter Button 9 for each value programmed or by turning the unit off completely not to Standby only or opening the tray see Cancel Program Play Insert Title Chapter Inserting titles or chapters is possible only if title...

Страница 28: ...of tracks recorded on a CD below the TRACK indicator and the total time on disc Using Bookmarks Bookmarks are a feature of the DVD 101 that allows you to mark up to nine different points on a disc and to quickly return to those points later To Enter a Bookmark Follow These Steps 1 While a disc is playing press the Status Button D on the remote to see the On Screen Banner Display if not already sho...

Страница 29: ... A B Repeat Play The Repeat A B function allows you to select any portion of a CD and have it repeat continually until the unit is manually stopped To initiate a Repeat A B playback sequence follow these steps while a disc is playing 1 While a disc is playing press the A B Button on the remote when you want to choose a passage as the beginning point The Repeat A Display appears and REPEAT A K is i...

Страница 30: ... each value programmed or by turning the unit off completely by the Main Power On Off Button or opening the tray see Cancel Program Play Insert Tracks Inserting tracks is possible only if tracks are already programmed on the Playlist and will change the order of playback 1 Press the Prog Button on the remote to insert a track Program Edit Display appears 2 Move cursor to PLAYLIST and press the K o...

Страница 31: ...ay options are not available with MP3 playback The DVD 101 is only compatible with standard MP3 encoded discs Other compressed audio formats used for Internet audio downloads will not play on the DVD 101 Due to the differences in various versions of the MP3 format and the many differences between the CD R machines used to record MP3 discs on a computer it is possible that some MP3 discs may not pl...

Страница 32: ...en playing VCD discs it is possible to access the disc s features using the On Screen Banner Display as shown for CD playback on page 28 Press the Status Button D on the remote to see the Banner Display Note however that when the PBC is on some features may be not available with that VCD Use of functions when the PBC is on will vary accord ing to the disc type With some VCD discs you may select th...

Страница 33: ...ti 7185 Hausa 7265 Hebrew 7387 Hindi 7273 Hungarian 7285 Icelandic 7383 Indonesian 7378 Interlingua 7365 Interlingue 7369 Iunpiak 7375 Irish 7165 Italian 7384 Japanese 7465 Javanese 7487 Kannada 7578 Kashmiri 7583 Kazakh 7575 Kinyarwanda 8287 Kirghiz 7589 Kirundi 8278 Korean 7579 Kurdish 7585 Laothian 7679 Latin 7665 Latvian Lettish 7686 Lingala 7678 Lithuanian 7684 Macedonian 7775 Malagsy 7771 Ma...

Страница 34: ...DVD disc is in fast or slow mode There is no audio playback on DVD discs during fast or slow modes Surround receiver not compatible Use analog audio outputs with 96kHz PCM audio Picture is distorted or jumps during MPEG 2 decoding It is a normal artifact of DVD playback for pictures to jump fast forward or reverse play or show some distortion during rapid play Some remote buttons do not operate Fu...

Страница 35: ...ption 12 Watts On 20 Watts Max Dimensions W x H x D 17 3 10 x 3 7 16 x 12 440mm x 87mm x 305mm Weight 15 4 lb 7kg Depth measurement includes knobs and connectors Height measurement includes feet and chassis All specifications subject to change without notice Harman Kardon and Power for the Digital Revolution are registered trademarks of Harman International Industries Incorporated Dolby is a regis...

Страница 36: ... 250 Crossways Park Drive Woodbury New York 11797 www harmankardon com 2003 Harman International Industries Incorporated Part No WLD8 810 119 1 ...

Отзывы: