Menu Language
The Menu Language menu allows you to select the
language that will be used to display the menus gen-
erated by the DVD that is being played. Note that
although this menu permits you to select a langauge,
in order for that language to appear it must be present
on the disc. Before making a change to this menu,
consult the DVD jacket for information on the menu
languages available for any particular disc. In addition,
if your menu choice is English, no change to the
default setting is needed, in which case you may press
the
L
Navigation Button
9
to proceed to the
next setting.
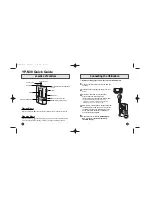
To change the setting, make certain that the MENU
LANGUAGE line is highlighted and press the
N
Navigation Button
9
. The right side of the screen
will then display the available options and the current
Menu Language setting will be highlighted.
Press the
K
/
L
Navigation Buttons
9
to select
the desired choice for the on-screen menus provided
by the DVD. In the event the disc provides language
options other than English, French, German, Italian or
Spanish, select the OTHER option, and note that four
dashes will appear. Consult the chart on page 33 to
match the menu language options available to the
code number for that language. Press the
Numeric
Keys
to enter the language code number and
note that the menu will return to OTHER when the
entry is complete.
When the selection process is complete, press the
M
Navigation Button
9
to continue with the
selection options for other features.
Subtitle Language
The Subtitle Language menu allows you to select the
language that will be used to display the subtitles that
accompany the DVD’s audio track. Note that although
this menu permits you to select a langauge, in order
for that language to appear it must be present on the
disc. Before making a change to this menu, consult
the DVD jacket for information on the subtitle lan-
guages available for any particular disc. If your menu
choice is English, no change to the default setting is
needed, in which case you may press the
L
Navigation Button
9
to proceed to the next setting.
To change the setting, make certain that the SUBTITLE
LANGUAGE line is highlighted and press the
N
Navigation Button
9
. The right side of the
screen will then display the available options and the
current Subtitle Language setting will be highlighted.
With this setting you define your preferred subtitle
language (if the disc contains different subtitles). You
may also change the subtitle language at any time
when a disc is playing by pressing the
Subtitle
Button
2
on the remote during disc playback.
Changes made with the Subtitle Button are temporary
and will only be effective during the playback of a
specific disc, while the changes made in this menu
will become the unit’s default setting.
This setting can turn subtitles on or off. If set to OFF,
subtitles will not be displayed automatically. The
Subtitle Button
2
on the remote control can be
used to select and change subtitles during playback.
Press the
K
/
L
Navigation Buttons
9
to select
the desired choice for the subtitle. In the event the disc
provides subtitle language options other than English,
French, German, Italian or Spanish, select the OTHER
option, and note that four dashes will appear. Consult
the chart on page 33 to match the menu language
options available to the code number for that lan-
guage. Press the
Numeric Keys
to enter the
language code number and note that the menu will
return to OTHER when the entry is complete.
When the selection process is complete, press the
M
Navigation Button
9
to continue with the
selection options for other features.
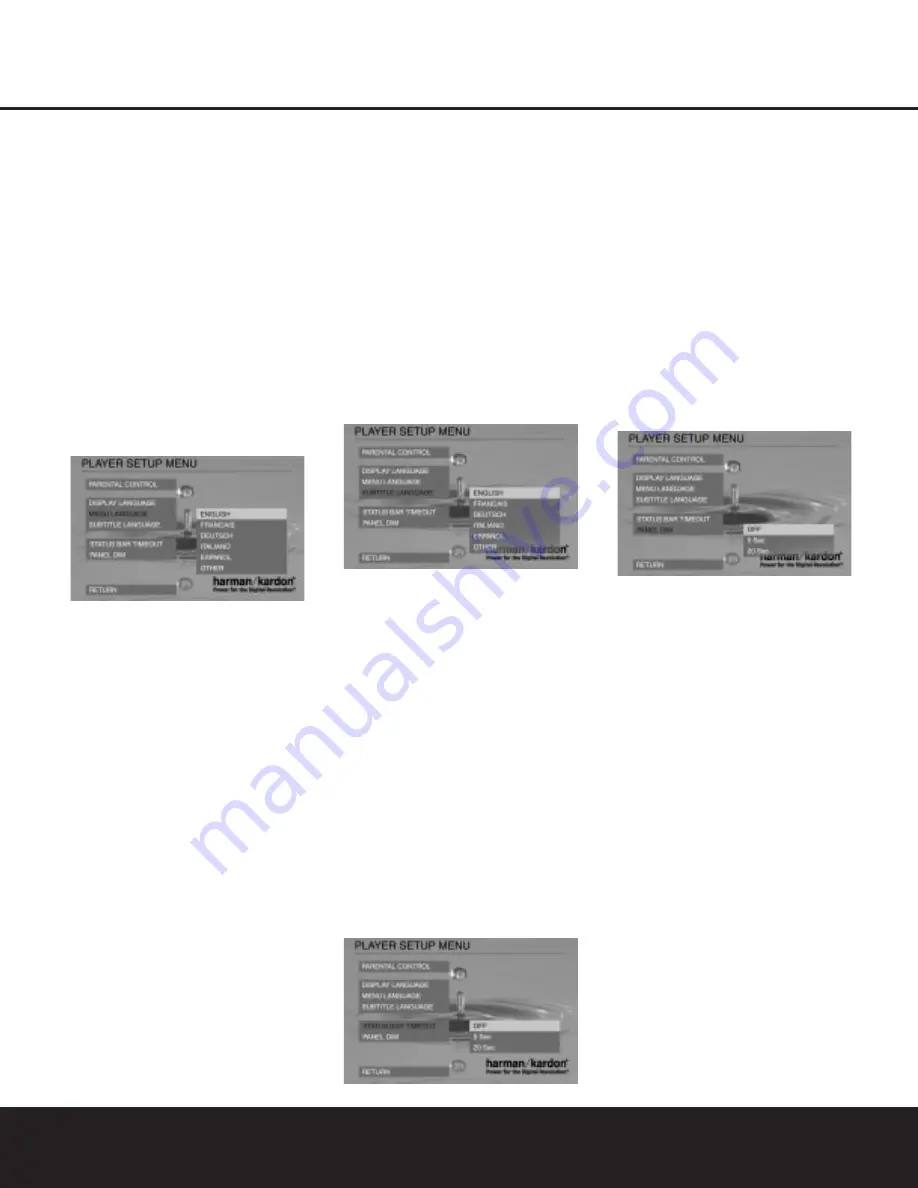
Status Bar Time Out
This setting allows you to select the length of time
the Status Bar (On-Screen Banner Display) remains on
the screen when it is called up during DVD playback.
To make a change to this setting from the Player
Setup Menu, press the
L
Navigation Button
9
until STATUS BAR TIMEOUT is highlighted and press
the
N
Navigation Button
9
.
The current setting and available choices will then
appear on the screen. When set to OFF, the Status
Bar will remain on-screen when selected, until the
Status Button
D
or
Clear Button
is pressed
on the remote control. If set to 5 or 20 seconds, the
Status Bar will disappear after that number of seconds.
However, during CD playback, the Status Bar will
always remain on-screen unless the
Clear Button
or
Status Button
D
is pressed.
Panel Dim
This setting allows you to select the length of time the
front-panel display remains illuminated during disc
playback. To make a change to this setting from the
Player Setup menu, press the
L
Navigation Button
9
until PANEL DIM is highlighted and then press
the
N
Navigation Button
9
. The current setting
and available choices will appear on the screen.
With the PANEL DIM menu on the screen, press the
K
/
L
Navigation Buttons
9
to select one of the
following options. Select OFF to turn off the dimmer
function. This is the default setting, and it turns off the
dimmer so that the front-panel display remains lit at all
times. To have the front-panel display turn off after a
preset period of time, select the 5- or 20-second
options. When one of these two selections is made,
the main display readout will dim after the desired time
period, but the
Disc-Type Indicator
A
and the
Playback Mode Indicator
B
will remain lit to
remind you that the unit is operating.
NOTE:
If the front-panel display is set to turn off using
this menu, the display may be recalled at any time
during playback by pressing any button on the remote.
After the desired setting is made, press the
M
Navigation Button
9
to return to the Player Setup
menu. You may now make any other desired configu-
ration settings, or press the
M
Navigation Button
9
to return to the Main menu.
When all desired setup and configuration entries have
been made, press the
L
Navigation Button
9
with the Main menu on the screen so that EXIT is
highlighted and press the
Enter Button
9
. The unit
will return to normal operation and you are ready to
enjoy the finest in DVD or CD playback!
SYSTEM SETUP
20 SYSTEM SETUP