


consult the System Requirements outlined below to make certain that your machine is capable of
the minimum capabilities needed for the DAL 150 to operate.
This guide contains the information needed for installation and use of the DAL 150. Please read it
carefully before using the DAL 150 device for the first time. The
README
file included on the
supplied disk may contain more recent information that may not be included in this guide. Be sure
to read the
README
file as well.
For the purposes of this guide, DAL 150 will be referred to interchangeably as a USB Device.
Where differences in procedure, specification, or operation occur, they will be noted.
Before beginning the installation of the DAL 150 and its software drivers we recommend that you
print out these instructions and then leave the CD-ROM disc in your computer. Most installation
options will require that the CD-ROM be available so that the needed files it contains may be
copied to your computer during the installation process.
From time to time, we may offer software upgrades to add new features and functionality to the
DAL 150. You may check for upgrades by visiting our web site at
www.harmankardon.com/dal150upgrade.asp
.
b, System Requirements.
In order for HK DAL 150 to function properly the following is required:
•
PC compatible Computer with USB port
•
Microsoft Windows 98™, Millennium (ME)™, XP™ or Windows 2000™ Operating
System
•
Pentium
®
200 or higher processor
•
Minimum 32MB of system memory
•
10MB of free hard disk space
•
CD-ROM or DVD-ROM drive
•
A/V receiver or processor with coaxial digital input and PCM or MP3 decoding capability
•
Windows Media Player Version 7.0 or higher (provided on this CD-ROM)
2,INSTALLATION INSTRUCTIONS
a, Installation for Windows 98
1. Connect one end of a USB cable (as supplied with the
DAL 150) into one end of the DAL 150, and connect the
other end to an available USB port on your computer or an
optional, external USB hub.
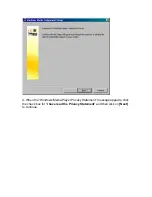
2. When the DAL 150 is connected to the USB port, the
following window will appear. Click on the
[Next >]
button.


