8
www.hardlifeutility.com
FRAME INSTALLATION
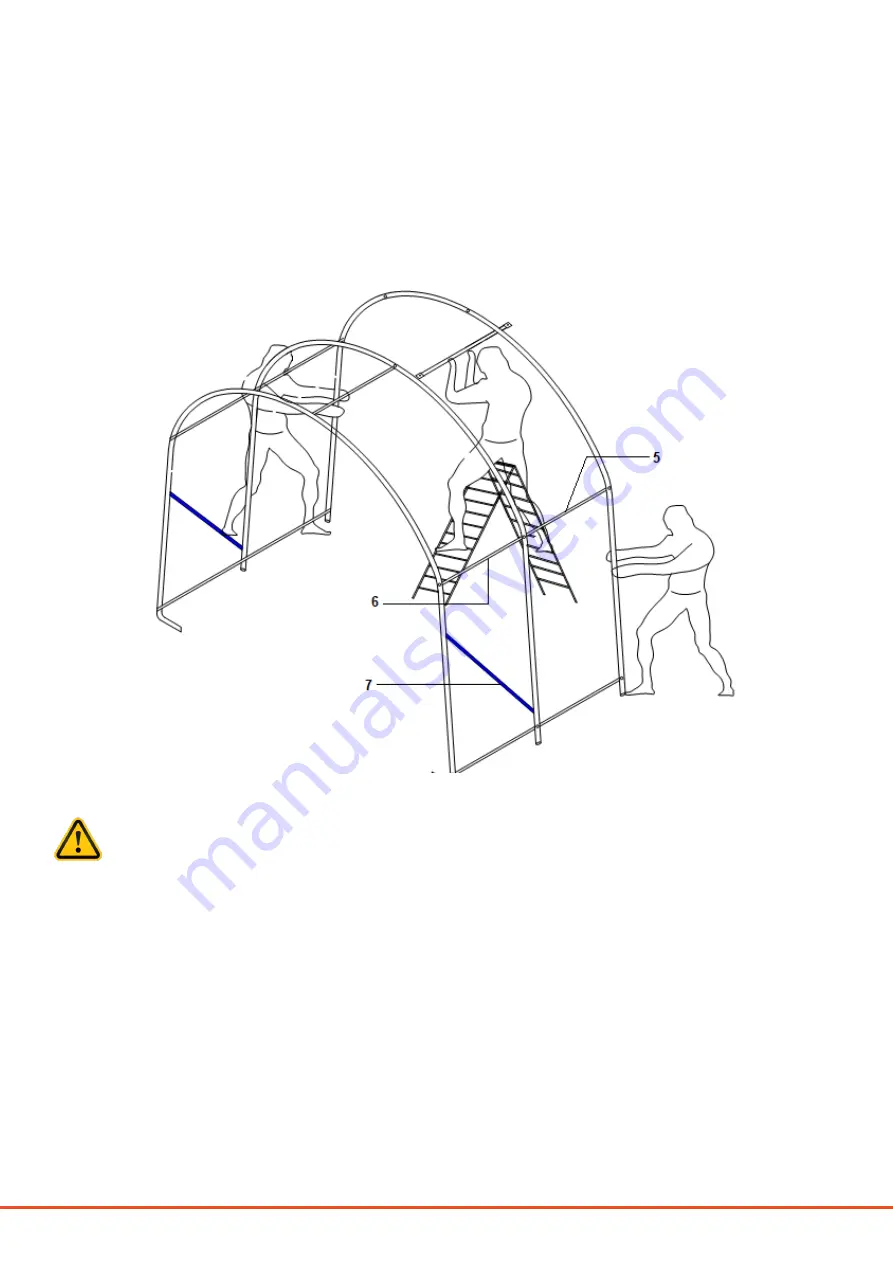
1. Erect the front door arch, as shown in Figure 3.
2. Install the second arch immediately after installing the first arch, and connect the two arches using female
horizontal connecting tubes (component code 6), as shown in Figures 1 and 3. Secure the connecting
tubes using M8 X 80 mm bolts (component code 15).
CAUTION
:
• Ensure that the bolt head is in the right direction to prevent it from tearing the roof cover.
• Do not install the carriage bolt on top of the truss, where the fabric will rest, as it can tear the
fabric.
3. Install the diagonal bracing tube (component code 7) and secure using M8 X 50 mm bolts (component
code 16) to make the front door group arch.
NOTE:
There are 5 pieces of female horizontal connecting tubes between the first and second arches.
4. Then, install the third arch and connect the male horizontal connecting tubes (component code 5) be-
tween the second and third arches, as shown in Figures 1 and 3. Secure the connecting tubes using M8 X
50 mm bolts.
Figure 3


