Page 3
SKU 99623
For technical questions, please call 1-800-444-3353.
Do not use in rain.
2.
Keep children away - All visitors
3.
should be kept at a distance from
work area.
When servicing use only identical
4.
replacement parts.
Use the right equipment - Do not use
5.
appliance for any job except that for
which it is intended.
Do not force this equipment - It will do
6.
the job better and with less likelihood
of injury at the rate for which it was
designed.
Store idle equipment indoors - When
7.
not in use, gardening equipment
should be stored indoors in a clean,
dry location out of reach of children.
Maintain this product with care - Keep
8.
this product clean for best perfor-
mance and to reduce the risk of
injury. Follow instructions for mainte-
nance. If damaged, have this product
repaired by an authorized service
facility. Keep handle dry, clean, and
free from oil and grease.
Check for damaged parts - Before
9.
further use of this product, a guard
or other part that is damaged should
be carefully checked to determine
that it will operate properly and per-
form its intended function. Check for
alignment of moving parts, binding of
moving parts, breakage of parts, and
any other condition that may affect its
operation. A guard or other part that
is damaged should be properly re-
paired or replaced by a qualified tech
-
nician unless indicated elsewhere in
this manual.
Keep guards in place and in working
10.
order.
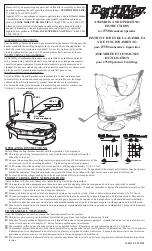
general Safety
Do not exceed the maximum weight
1.
capacity
(50 pounds)
of the Spread-
er.
Use this product only with powdered
2.
and granular fertilizers, seed, sand,
and ice-melt products.
Never leave contents in the Spreader.
3.
Pour leftover material back into its
package and seal the package tightly.
Never allow children or pets near any
materials you apply.
Always follow the fertilizer manufac-
4.
turer’s instructions for proper use of
the fertilizer.
Do not use appliance for other than
5.
intended use.
Maintain labels and nameplates on
6.
the Spreader. These carry important
safety information. If unreadable or
missing, contact Harbor Freight Tools
for a replacement.
The warnings, precautions, and in-
7.
structions discussed in this instruction
manual cannot cover all possible con-
ditions and situations that may occur.
It must be understood by the operator
that common sense and caution are
factors which cannot be built into this
product, but must be supplied by the
operator.
SAVE THESE
INSTRuCTIONS.