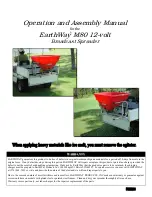
manualshive.com logo in svg
background image

Page 2

SKU 99623

For technical questions, please call 1-800-444-3353.

SAVE THIS MANuAL

Keep this manual for the safety warn-

ings and precautions, assembly, operating, 

inspection, maintenance and cleaning pro-

cedures.  Write the product’s serial number 

in the back of the manual (or month and 

year of purchase if product has no num-

ber).  Keep this manual and the receipt in 

a safe and dry place for future reference.

IMPORTANT SAFETY 

INSTRuCTIONS

In this manual, on the labeling, 

and all other information 

provided with this product:

  This is the safety alert 

symbol.  It is used to alert 

you to potential personal 

injury hazards.  Obey all 

safety messages that 

follow this symbol to avoid 

possible injury or death.


DANgER indicates 

a hazardous 

situation which, if not 

avoided, will result in death or 

serious injury.
 

WARNINg 

indicates a 

hazardous situation which, if 

not avoided, could result in 

death or serious injury.
 

CAuTION, used 

with the safety 

alert symbol, indicates a 

hazardous situation which, if 

not avoided, could result in 

minor or moderate injury.


NOTICE is used to 

address practices 

not related to personal injury.
 

CAuTION, without 

the safety alert 

symbol, is used to address 

practices not related to 

personal injury.
 

When using 

gardening 

equipment, basic safety 

precautions should always be 

followed to reduce the risk of 

personal injury, including the 

following: 

READ ALL INSTRuCTIONS

Personal Safety

Dress properly - Do not wear loose 

1. 

clothing or jewelry. They can be 

caught in moving parts. Use of rub-

ber gloves and substantial footwear is 

recommended when working out-

doors. Wear protective hair covering 

to contain long hair.

2. 

Wear ANSI-approved safety 

goggles, NIOSH-approved 

dust mask/respirator, and 

heavy-duty work gloves.

Do not overreach - Keep proper foot-

3. 

ing and balance at all times.
Stay alert - Watch what you are do-

4. 

ing. Use common sense. Do not op-

erate this product when you are tired.

gardening Appliance use and Care

Avoid a dangerous environment - Do 

1. 

not use this product in damp or wet 

locations.

Содержание 99623

Страница 1: ...ght Tools 3491 Mission Oaks Blvd Camarillo CA 93011 Visit our website at http www harborfreight com Read this material before using this product Failure to do so can result in serious injury Save this manual Copyright 2008 by Harbor Freight Tools All rights reserved No portion of this manual or any artwork contained herein may be reproduced in any shape or form without the express written consent ...

Страница 2: ...ry CAUTION used with the safety alert symbol indicates a hazardous situation which if not avoided could result in minor or moderate injury NOTICE is used to address practices not related to personal injury CAUTION without the safety alert symbol is used to address practices not related to personal injury When using gardening equipment basic safety precautions should always be followed to reduce th...

Страница 3: ...moving parts binding of moving parts breakage of parts and any other condition that may affect its operation A guard or other part that is damaged should be properly re paired or replaced by a qualified tech nician unless indicated elsewhere in this manual Keep guards in place and in working 10 order General Safety Do not exceed the maximum weight 1 capacity 50 pounds of the Spread er Use this pro...

Страница 4: ...EMBLY Instructions Read the entire Important Safety Instructions section at the beginning of this manual including all text under subheadings therein before assembly or use of this product Note For additional information regarding the parts listed in the following pages refer to the Assembly Diagram near the end of this manual Turn the Hopper 16 upside down 1 and install the Frame 30 using four Sc...

Страница 5: ... Do not tighten hardware at this time See Figure D FIGURE D LOCK NUT 24 CROSS BRACE 45 FRAME BRACE 31 BOLT 33 BOLT 11 HOPPER 16 Slide an Axle Bushing 37 over the 5 Axle 39 and into an Axle Bearing 38 on both ends of the Axle Install a Wheel 36 on each end of the Axle and secure the Wheels using two Hex Bolts 47 and two Hex Lock Nuts 44 Then install a Flat Washer 34 and End Cap 35 for each Wheel Se...

Страница 6: ...a Bolt 11 through the Upper Handle 23 through the Handle Spacer through the other Upper Handle and secure with a Flat Washer 48 and Nut 21 Install the Gauge Lever Assembly 4 on the left hand side using two Bolts 11 and two Nuts 21 See Figure G Unscrew and remove 8 one Lock Nut 24 from the Control Rod 25 Insert the threaded portion of the Control Rod into the hole in the Pivot and Bracket Assembly ...

Страница 7: ...e size of the holes you need See Figure J Insert the R Pin 17 into the Pinion 14 Shaft on the Gear Box and Axle As sembly 39 Make sure the Impeller 42 is turning in the correct direction as indicated by the arrow in the illustration See Figure J Operating Instructions Read the entire Important Safety Information section at the beginning of this manual including all text under subheadings therein b...

Страница 8: ...l See Figure K When finished applying the material 7 push the Adjust Handle 6 forward to stop the release of material being applied See Figure K FIGURE K SCREEN 14 UPPER HANDLES 23 WING NUT 10 HOPPER 16 ADJUST HANDLE 6 8 Never leave material in the Spreader Pour leftover material back into its bag container and seal the bag con tainer tightly To prevent accidents wash thor 9 oughly to remove all m...

Страница 9: ... Neither the manufacturer or distributor makes any representation or warranty of any kind to the buyer that he or she is qualified to make any repairs to the product or that he or she is qualified to replace any parts of the product In fact the manufacturer and or distributor expressly states that all repairs and parts replacements should be undertaken by certified and licensed technicians and not...

Страница 10: ...Page 10 SKU 99623 For technical questions please call 1 800 444 3353 PARTS LIST Part Description Qty Gear Box Axle Assembly 2 REV 09b ...

Страница 11: ...44 3353 ASEMBLY DIAGRAM Record Product s Serial Number Here Note If product has no serial number record month and year of purchase instead Note Some parts are listed and shown for illustration purposes only and are not avail able individually as replacement parts ...

Отзывы: