Page 13
SKU 94515
for technical questions, please call 1-800-444-3353.
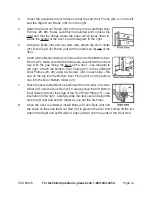
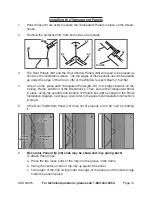
Orient the assembled door frames so that the Left Door Frame (20) is on the left,
3.
and the Right Door Frame (28) is on the right.
Attach the Top Door Frame (24) to the top of the Left/Right Door
4.
Frames (20, 28). Make sure that the rounded portion faces the
front and that the flange where the pane will sit faces down to-
wards the center of the door, see the diagram to the right.
Using two Bolts (43) and two Nuts (52), attach the Door Slider
5.
(31) to the Top Door Frame (24) with the rollers on the top of the
door.
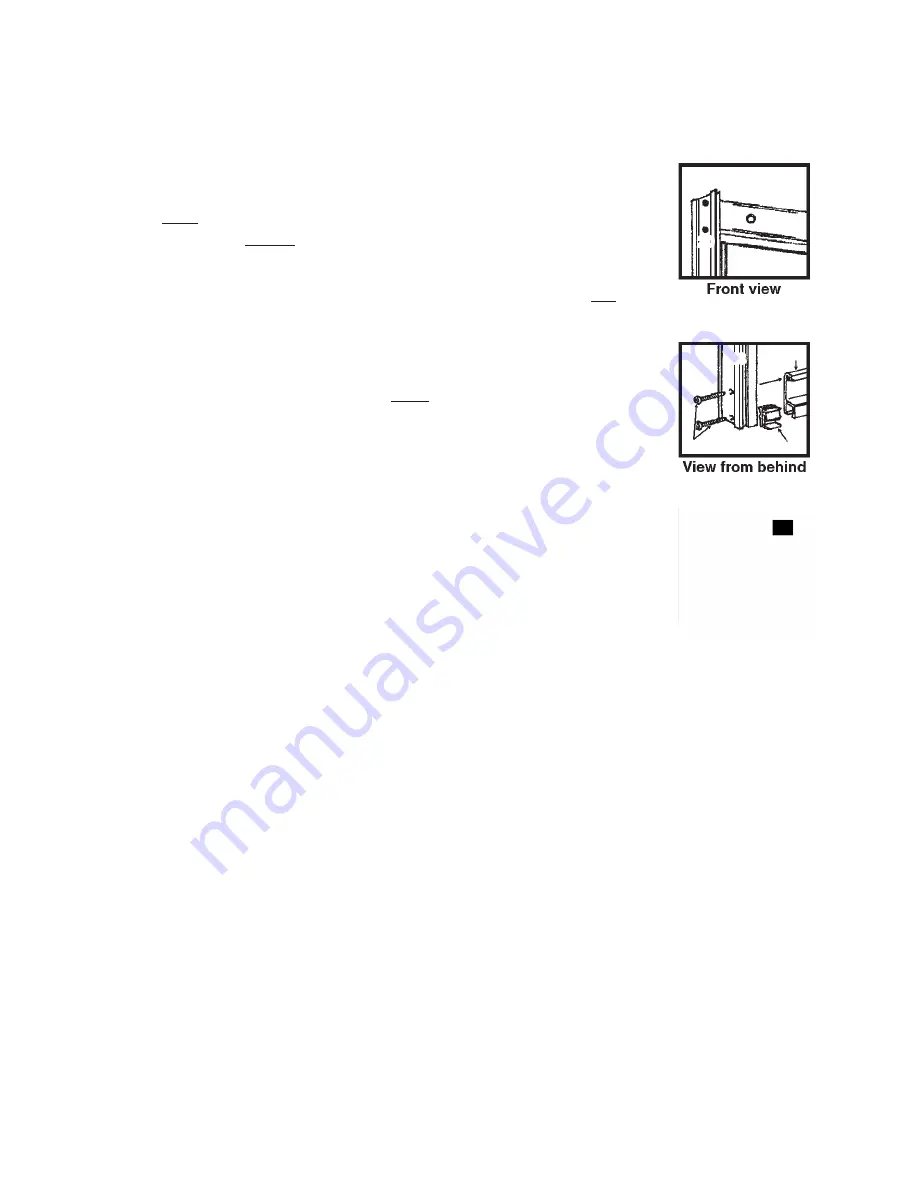
Insert a Door Bottom Slider (40) into each end of the Bottom Door
6.
Frame (27). Make sure that the Sliders are assembled the correct
way, with the gap facing the back of the door – see diagram to
the right. Attach the Bottom Door Frame (27) to the Left/Right
Door Frames (20, 28) using two Screws (44) on each side – the
one on the top into the Bottom Door Frame (27) and the bottom
one into the Door Bottom Slider (40).
Raise the assembled Door up and insert the first roller of its Door
7.
Slider (31) onto the Door Rail (14). Carefully align the first Bottom
Door Slider (40) over the edge of the Front Floor Plate (17) – see
illustration to the right. Carefully slide the door over and align the
other top Roller and bottom Slider as you did the first ones.
Once the door is installed, install Bolts (43) and Nuts (52) into
8.
the holes on the ends the Door Rail (14) to prevent the door from sliding off the rail.
Attach the Right and Left Rail End Caps (49,50) onto the ends of the Door Rail.
20
24
pANE
28
27
40
44


