10
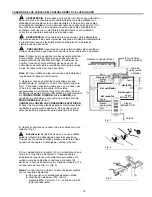
Fig. 2
Fig. 2A
Fig. 2B
2.
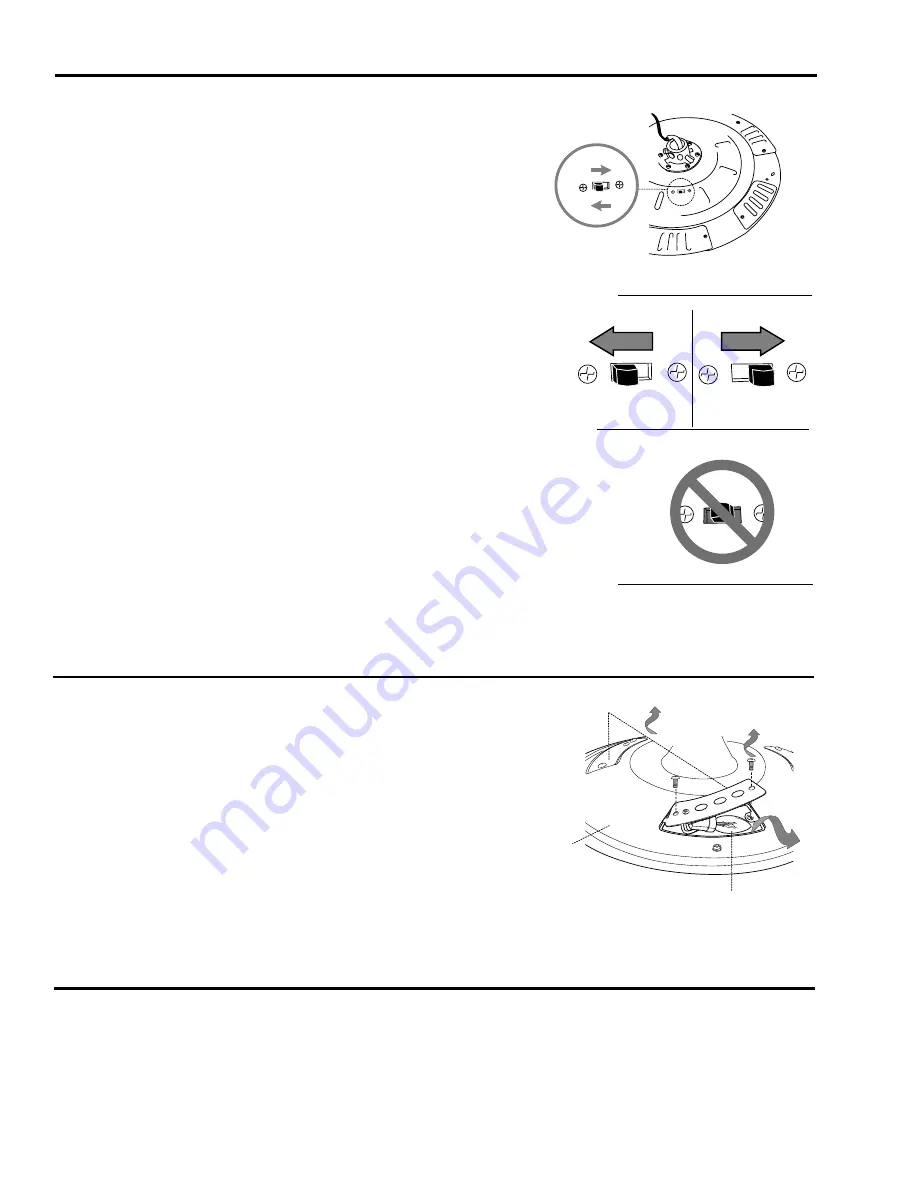
Use the fan reverse switch, located on top of the motor housing
(E), to optimize your fan for seasonal performance. [Fig. 2] A ceiling
fan will allow you to raise your thermostat setting in summer and
lower your thermostat setting in winter without feeling a difference
in your comfort.
Note:
Wait for fan to stop before moving the reverse switch.
2A.
In
warmer
weather, setting the reverse switch to the
LEFT
will result in downward airflow creating a wind chill
effect. [Fig. 2A]
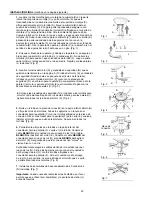
2B.
In
cooler
weather, setting the reverse switch to the
RIGHT
will result in upward airflow that can help move
stagnant, hot air off the ceiling area. [Fig. 2B]
IMPORTANT
: Reverse switch must be set either
completely
to the
RIGHT
or
completely
to the
LEFT
for fan to function. If the reverse
switch is set in the
middle
position [Fig. 2C], fan will not operate.
Fig. 2C
CARE AND MAINTENANCE
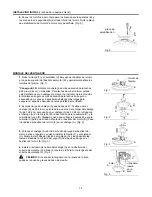
At least twice each year, lower canopy (B) to check downrod (A) assembly, and then tighten all screws on the fan.
Clean motor housing (E) with only a soft brush or lint-free cloth to avoid scratching the finish. Clean blades (J) with
a lint-free cloth. You may occasionally apply a light coat of furniture polish to wood blades for added protection.
Important: Shut off main power supply before beginning any maintenance. Do not use water or a damp cloth to
clean the ceiling fan.
LIGHTED HOUSING BULB REPLACEMENT
Important:
Allow motor housing (E) and bulbs (Y) to cool down
before touching them.
When it becomes time to replace bulbs (Y) in the lighted motor
housing (E), locate six access covers on the
top
of the motor
housing (E). Determine which access cover contains the burnt-out
bulb (Y). Remove the access cover by removing the two screws at
the edges of the access cover--this will allow access to the
burnt-out bulb (Y). Replace burnt-out bulb (Y) with one candelabra
base 15 watt max. bulb. Repeat for each burnt-out bulb (Y). After
replacing bulb(s), re-install screws that were previously removed
Tighten all screws securely.
Access
Covers
Y
E,
(top
view)
E
(top view)
REMOTE CONTROL AND FAN OPERATION
(continued from previous page)
reverse
switch


