Seite DE-13
Geschirrspülmittel, Klarspüler und Regeneriersalz
Geschirrspülmittel, Klarspüler und Regeneriersalz
WARNUNG!
Vergiftungsgefahr!
Multitabs, Geschirrspülmittel, Klarspü-
ler und Rege nerier salz können gesund-
heitsschädlich sein.
■
Diese Mittel für Kinder und Haustiere
unzugänglich aufbewahren.
■
Das Wasser im Innenraum des Geräts
nie als Trinkwasser benutzen.
.
Geschirrspülmittel einfüllen
Verwenden Sie ausschließlich Geschirrspül-
mittel, das speziell für Geschirrspüler be-
stimmt ist.
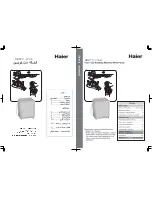
(21) (25)
1. Ziehen Sie den Verschluss (25) der Spül-
mittelkammer (21) nach hinten.
Der Deckel springt auf.
2. Füllen Sie bei
– verschmutztem Geschirr die gesamte
Menge an Geschirrspülmittel in die Kam-
mer (
A
) der Spülmittelkammer (21) ein
– stark verschmutztem Geschirr ca. 4/5
des Geschirrspülmittels in die Kam-
mer (
A
) der Spülmittelkammer (21) ein.
3. Füllen Sie die restlichen 1/5 des Ge-
schirrspülmittel in die Kammer (
B
) der
Spülmittelkammer (21) ein. Diese Menge
verwendet das Gerät während des Vor-
spülprogramms.
(21)
(25)
4. Drücken Sie den Deckel der der Spülmittel-
kammer (21) zu, sodass der Verschluss (25)
wieder einrastet.