


112
Setting the air extractor mode of operation of
the hood
In the extractor mode air is discharged to the out
-
side by a special conduit. In that setting any carbon
filters shall be removed. The hood should be con
-
nected to the opening discharging air to the outside
by means of a rigid or flexible conduit of
120 mm diameter, which should be purchased in a
shop selling installation materials.
A qualified installer should be commissioned to
make the connection.
Setting the odour absorber mode of operation
of the hood
In this option filtered air returns to the room
through openings in the front of the hood.
In this setting it is necessary to install the carbon
filter. It is recommended to install the air guide
(availability depending on model).
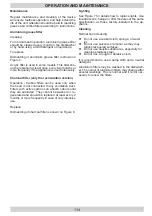
In some universal hoods you need to switch lever
inside the hood (Fig. 8) to switch between the
extraction and air recirculation modes. The cle
-
aned air is returned to the room through the holes
in the top of the unit.
Furniture and telescopic cooker hoods operating
in air recirculation mode require installation of the
exhaust duct. The other end of the duct should be
directed to the room as it will discharge filtered air.
Fan speeds
The lowest and medium speeds should be used
under normal conditions and with low concentration
of fumes. The maximum speed should be used in
case of high concentration of kitchen fumes, e.g.
during frying or grilling.
INSTALLATION
Содержание OMC621IH
Страница 2: ...2 ...
Страница 3: ...3 ...
Страница 4: ...4 min 650mm Gas cookers min 650mm Gas cookers min 450mm Electrical cookers 1a 1b 1c 3a 3c 3b 3d ...
Страница 5: ...5 4 7 5 6 3e 1 2 3 L 0 ...
Страница 11: ...11 УСТАНОВКАУСТРОЙСТВА Монтаж Пошаговый монтаж устройства указан на рисун ках 3 ...
Страница 21: ...21 INSTALAREA DISPOZITIVULUI Montajul Montajul dispozitivului pas cu pas este prezentat pe figurile 3 ...
Страница 31: ...31 ИНСТАЛИРАНЕ НА УРЕДА Монтаж Монтажът на уреда стъпка по стъпка е предста вен върху фигурите 3 ...
Страница 41: ...41 ЖАБДЫҚТЫ ОРНАТУ Құрастыру Құрылғыны сатылап құрастыру 3 суретте көрсетілген ...
Страница 51: ...51 УСТАНОВКА ПРИСТРОЮ Монтаж Покроковий монтаж пристрою зображений на малюнках 3 ...
Страница 61: ...61 PRIETAISO ĮRENGIMAS Montavimas Įrenginio montavimas žingsnis po žingsnio parody tas 3 piešiniuose ...
Страница 71: ...71 IERĪCES INSTALĀCIJA Montāža Ierīces montāža soli pa solim ir parādīta 3 zīmē jumā ...
Страница 81: ...81 SEADME PAIGALDAMINE Paigaldamine Seadme paigaldamist on näidatud samm sammult joonistel 3 ...
Страница 101: ...101 INSTALACIJA UREĐAJA Montaža Koraci montaže uređaja pokazani su na crtežima 3 ...


